Live and Learn Farm

  • Home
    • About Us
    • Contact Us!
  • HomeSchool
    • All Inclusive
    • Apologia
    • Arts
    • Bible
    • Civics
    • Current Events
    • Curriculum
    • Elementary
    • Geography
    • History
    • Language Arts
    • Math
    • Middle School
    • Montessori
    • Other
    • Practical Life Skills
    • Science
    • Writing
  • Link Ups
    • Monday Middle & High School Link Up
  • Montessori
  • Teen Blogs
    • Gage – 13 Years Old
    • Chase – 14 Years Old
    • Blake – 10 Years Old
  • Shop
    • Cart
    • Checkout
    • My Account
  • Free!!!
  • Other Topics
    • Blogging
      • Facebook Series
    • Farmstead
      • Chickens
      • Cows
      • Permaculture Garden
    • Mom
You are here: Home / Archives for HomeSchool

5 Scriptural Facts All Children Should Know About Passover

March 31, 2013 By: Trish Corlew2 Comments

5 scriptural facts all children should know about passover


Our family is Messianic and therefore we observe the Lord’s Feasts described in the Bible. Understanding the Jewishness of our Messiah Jesus (His Hebrew name is: Yeshua ) helps us understand our faith and the depth and richness of Scripture more fully. Remember the First Century Believers did not have the New Testament to read, they used the “Old Testament” to test what Yeshua was teaching and to determine if He was their prophesied Messiah.

Passover / Pesach is so much more than just a celebration, it is a remembrance of redemption that is taught and retaught every year during the Passover Seder. A Seder is a meal that marks the beginning of Passover. This Seder teaching is calling people to their identity as the People of God. By using all of our senses, the Passover Seder not only tells the story of God’s grace that is demonstrated throughout history, but also calls us to experience and share in the story, our story, our history. Passover is so much more than a sermon, it is commanded for us to remember. So, let’s teach our children about our Messiah, Jesus, and Passover and fulfill this command. The five scriptural facts all children should know about Passover:

1.  Jesus kept the Passover, from the time of His youth. Luke records:

His parents went to Jerusalem every year at the Feast of the Passover. And when He was twelve years old, they went up to Jerusalem according to the custom of the feast (Luke 2:41-42)


2.  Jesus continued to keep Passover His entire life., once a year as commanded in Exodus 13:10. It was observed on the fourteenth day of the month of the first month (called Abib in Deuteronomy 16:1 or Nisan in Esther 3:7):

On the fourteenth day of the first month at twilight is the LORD’s Passover (Leviticus 23:5).

And Jesus had his disciples also keep it:

7 Then came the Day of Unleavened Bread, when the Passover must be killed. 8 And He sent Peter and John, saying, “Go and prepare the Passover for us, that we may eat.” 9 So they said to Him, “Where do You want us to prepare?” 10 And He said to them, “Behold, when you have entered the city, a man will meet you carrying a pitcher of water; follow him into the house which he enters. 11 Then you shall say to the master of the house, ‘The Teacher says to you, “Where is the guest room where I may eat the Passover with My disciples?”‘ 12 Then he will show you a large, furnished upper room; there make ready.” 13 So they went and found it just as He had said to them, and they prepared the Passover. (Luke 22:7-13).


3.  Passover commemorates God’s redemption of the Hebrews from slavery in Egypt (and spiritually redemption of the Believers from the world) and the creation of the Israelite people. Passover is actually three feasts Passover (Pesach), The Feast of Unleavened Bread and the Feast of Firstfruits. Every single event in Jesus’ end days matches up with these three feasts of Passover. He was crucified as our Passover lamb, He was buried on Unleavened Bread and He rose on the Feast of Firstfruits.


4.  At a Passover Seder there are four cups of wine. The First cup is the “Cup of Sanctification” (I will bring you out of Egypt). The second cup is the “Cup of Deliverance” (I will deliver you from Egyptian Slavery). The third cup is the “cup of Redemption” (I will redeem you with My power). The fourth cup is the “Cup of Restoration” (I will take you as My People). Since Yeshua was keeping a Passover Seder (Luke 22:15-16) with His Apostles, he drank of these cups. But the last cup, the Cup of Restoration, He did not drink. He promised to do so with them in the coming Kingdom! Matthew 26:29. The fact that He took the bread and the cup after supper identifies the bread as the afikoman and the cup to be the cup of redemption (based on the order of the Seder.)

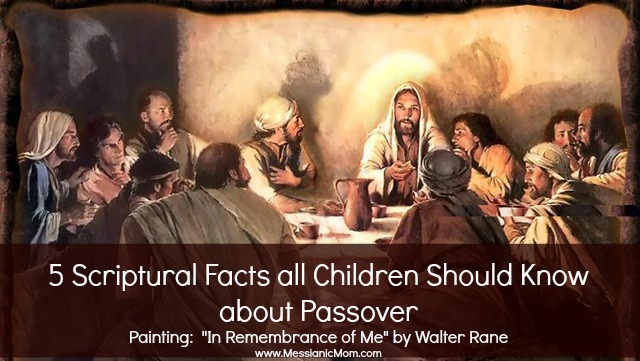
5.  The bread pictured at the last supper is usually of this beautiful full loaf of bread, but that is not what really would have been on the table. The bread of the Last Supper is unleavened bread (Matzah).  Here is another beautiful aspect of the Seder that we completely miss when we separate our Messiah from His Jewishness… there are three pieces of Matzah placed in a bag. The middle matzah is pulled out and broken in two with half of it wrapped in white linen and hidden. The children search for the middle matzah (known as the Afikomen) and the one that finds it brings it back to the father of the house to be redeemed for a price. The other half of the bread is passed around and eaten.

So you see, there is so richness that can be learned by studying our Messiah, Jesus, from a Jewish perspective. I hope you will continue to study and learn about Passover. Remember, we are called to be Bereans, to test everything we hear and read against His Word, the Bible!

To learn more about Passover, read: Exodus 12; Numbers 9: 1-14; Numbers 28:16-25; Deuteronomy 16: 1-6; Joshua 5:10; 2 Kings 23:21-23; 2 Chronicles 30:1-5, 35:1-19; Ezra 6:19-22; Ezekiel 45:21-24.

Passover in the New Testament: Matthew 26, Mark 14, Luke 2 and 22, John 2, 6, 11, 12, 13, 18 and 19. Acts 12:4; 1 Corinthians 5:7.

Credits: Artwork is by Walter Rane. A print of his painting can be purchased from here.
If you like this post, please share it!

  • Share on Facebook (Opens in new window) Facebook
  • Share on Pinterest (Opens in new window) Pinterest
  • Share on X (Opens in new window) X
  • Print (Opens in new window) Print
  • More
  • Email a link to a friend (Opens in new window) Email
  • Share on Reddit (Opens in new window) Reddit
  • Share on LinkedIn (Opens in new window) LinkedIn
  • Share on Tumblr (Opens in new window) Tumblr

Like this:

Like Loading…

Are you an Art Vacuum Too?

March 28, 2013 By: Trish Corlew5 Comments

So, as I was saying, Pinterest has become my new muse!  Up until now, I have never had time to investigate my creative side and to determine what my talent might be.  And it has been a gap in my life, my whole life… I was an “art vacuum”, if you will.  Completely devoid of any identified artistic gift.  I am the fifth of five children.  All of my siblings have talent, and they have not only identified their talent(s) but they apply their talents to help them escape the “busyness” of their chaotic lifestyles. Or, these gifts have become their careers.  Over the years I have jokingly explained that all the talent was distributed in the family gene pool by the time I came along… masking the blatant artistic gap with humor.  So, needless to say, as a mom, I have been determined that my children will not suffer this same artistic void!  Ironically, in my quest to offer them creative outlets, I am starting to find my own gifts.  And… through this process, I’m starting to realize the goal is not to find the one artistic talent I have, but in exploring all the possibilities.   

With that being said, I must admit, I’m not terribly creative yet!  In our homeschool we study artists.  We study not just their art, but their life.  We search for what inspired them, what experiences in life shaped them, and other topics such as, did they have a muse (a person, place or thing that inspired them). To assist in our research of the various artists, I created a research guide that you can download here: Artist Research Worksheet.  (Note this is for upper elementary or higher level research).  For a research form for younger students, HomeschoolWithIndexCards.com has created a great free artist biography form.  


Art Vacuum


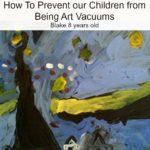
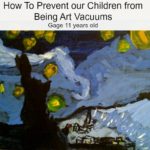
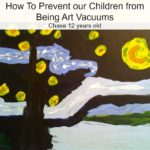
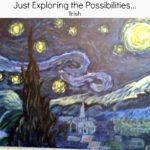
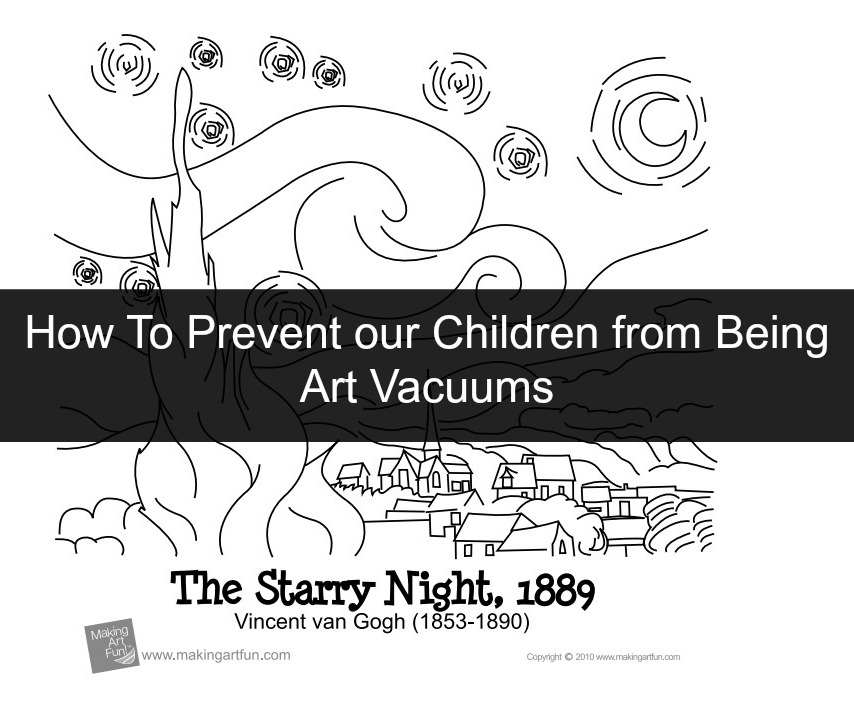
One of the ways we get to know an artist is by exploring the artist’s chosen medium(s) and attempt to recreate one of their art works.  For this post, I’ll show our Starry Night and Van Gogh project.  It all started with this coloring page from MakingArtFun.com.  I found it on Pinterest and pinned it, not knowing exactly how we would use it in our homeschool.   (Have I mentioned that Pinterest is my new muse? LOL)  Months later, we were discussing Van Gogh and pulled out this coloring sheet.  Even though it was a stretch, we decided to paint Starry Nights!  And for an artistically challenged person such as myself, that was a stretch indeed!  I loved being able to use this coloring page to help me see the transitional points in the painting.  It really helped me paint this artwork!  So, if you haven’t tried this yet with your children, I highly recommend it!!  

We then needed to see the painting, in color, preferably large enough to study it.  One of the many sites I found was the VanGoghGallery.  It gave a beautiful vivid picture of Starry Nights, but it also gave some details about the painting, what was happening in Van Gogh’s life when he painted it, etc.  Another great site is ArtCyclopedia.

Once we felt comfortable, we spread out our materials on the kitchen table and started painting.  Here are the results of our study: 


And, my painting…  


I hope we have inspired you to just start exploring the possibilities in order to avoid being Art Vacuums!  

This post is linked at Think Pink Sunday at Flamingo.

Until Next Time…

If you like this post, please share it!

  • Share on Facebook (Opens in new window) Facebook
  • Share on Pinterest (Opens in new window) Pinterest
  • Share on X (Opens in new window) X
  • Print (Opens in new window) Print
  • More
  • Email a link to a friend (Opens in new window) Email
  • Share on Reddit (Opens in new window) Reddit
  • Share on LinkedIn (Opens in new window) LinkedIn
  • Share on Tumblr (Opens in new window) Tumblr

Like this:

Like Loading…

Scrap Paper Wall Art on Canvas

March 28, 2013 By: Trish Corlew3 Comments

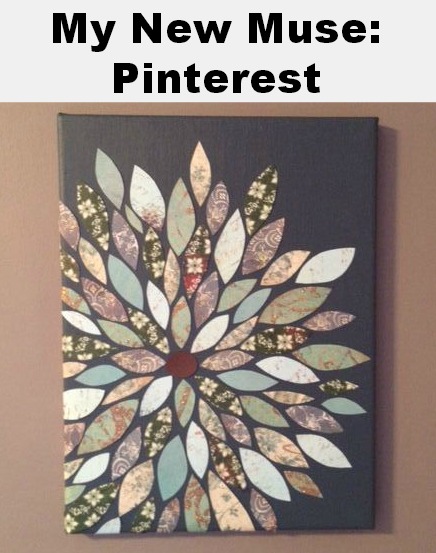
scrap paper wall art on canvas


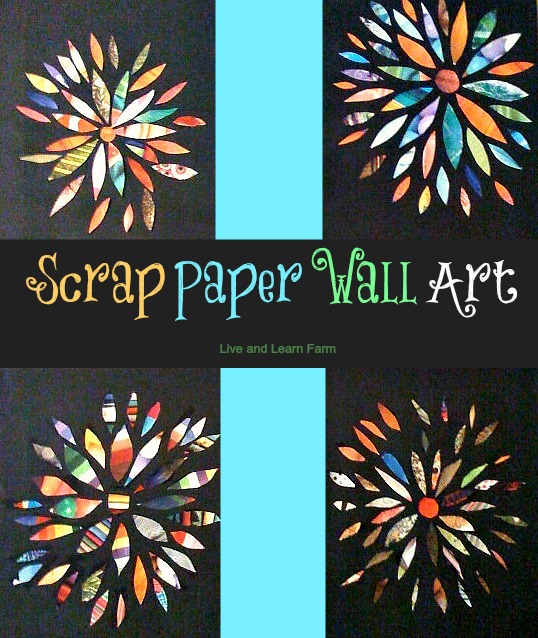
I don’t know about you, but a lot of my inspiration for art projects seems to be coming from Pinterest these days.  Pinterest has become my new muse! When I saw this scrap paper wall art on canvas pin last year, I asked the boys about us creating something similar in our homeschool.  They loved the idea!  And I love the idea of using old catalogues and magazines for something so beautiful!  

One thing I want to get better at is just being with my children.  Sometimes, I think homeschooling moms forget to just hang out and have fun with our children.  We always seem to be focused on the academics, but we need to step back regularly and just be. Remember we are their mom and they need plain ole mommy too!  This was one of those projects where we were just together.  We got the giggles after we realized that everyone had accidentally painted  our pointer fingers black.  There was no time table, no schedule, no right or wrong pieces of art.  It was laid-back fun and totally fulfilling!  We need to do this more often!  

The materials list is short and the directions even shorter for this art project, but I’ll list them out anyway.  

Materials:  

  • Art Canvas.  We used 11 x 14, but any size will do.
  • Black Matte Spray Paint (or any color of choice for your background)
  • Scrap paper (we used old catalogs)
  • Scissors
  • Glue (we used Aleene’s All Purpose Tacky Glue)

Directions:

1  Spray paint the canvas and let dry completely.  We painted very light layers and let each layer dry before adding another coat.  This process took less than 45 minutes.  

2.  Cut out scrap paper from any source.  I imagine even scraps cut from book print would look great if you used a more colorful backdrop.  We used lots and lots of catalogs.  I knew being on all those mailing lists would eventually pay off!  For my Montessori friends, if you look really close at the art piece in the upper right hand corner, you are going to see beads!  Sort of like the “Finding Waldo” prints!  I’ll never tell which catalog I cut up!  (hint, hint… the supplier was way too expensive for us to afford on our budget).  Finally, cut a circle for the center in a contrasting but complimentary color.  

3.  Organize the pieces on the canvas and glue in place once you like the shape and location.  That’s it!  

It was one of the most rewarding art projects we have completed in a long time.  Not because of the product created, but the process we used to get there!  I hung our pieces together to create a collage in our entrance foyer.  They serve as a reminder to take time to just be.  What do you think?  

Scrap Paper Art


Until Next Time…

If you like this post, please share it!

  • Share on Facebook (Opens in new window) Facebook
  • Share on Pinterest (Opens in new window) Pinterest
  • Share on X (Opens in new window) X
  • Print (Opens in new window) Print
  • More
  • Email a link to a friend (Opens in new window) Email
  • Share on Reddit (Opens in new window) Reddit
  • Share on LinkedIn (Opens in new window) LinkedIn
  • Share on Tumblr (Opens in new window) Tumblr

Like this:

Like Loading…

Homeschooling on the Beach Part 1

March 27, 2013 By: Live & Learn Farm6 Comments

Homeschooling on the Beach Part 1

Disclosure

Are you in the process of planning your beach vacation?  If you are, be sure to not leave your homeschool at home.  Studying with the ocean as your backdrop can bring in almost any subject you can imagine.  And, if you don’t live in an area where saltwater creatures are geographically close, you don’t want to miss this opportunity to teach it while you are on location!  Since we homeschool, we are not limited to vacations when our children are “out of school”.  We get to be creative about the “out of school” and vacation timing which allows us to make the most of the discounts available for the off seasons.  So you might consider a longer stay to get even more homeschooling in!  We spent a month on the coast of North Carolina in August and we learned so much about zoology and saltwater life that we could only learn there at the beach!  We did get run off the beach due to two hurricanes, but the absolute best homeschooling occurred right after the storms.  The storms brought in fabulous sealife, amazing shells and treasures from the depths!  So don’t be afraid to go in the late summer months!  Because there are just so many great opportunities and activities to teach at the beach, I have decided to break this topic into several posts .  So, part one will be about some lessons you might want to teach leading up to your beach vacation.  

If you have been following our blog, you already know that we take traditional curriculum and make them more hands-on and tactile learning materials.  With Apologia Swimming Creatures it is already a hands-on learning text, but we have added even more experiments and activities to help make your beach vacation a great experience homeschooling on the beach!  (Note we are a participant in the Amazon Services LLC Associates Program, an affiliate advertising program.  Any money received via this relationship is used for our homeschool!  PS. I’ve made a grand total of $0.00 from affiliate marketing… but the FTC says I have to tell you that IF you buy it, I will make 4% of the sale as commission.)

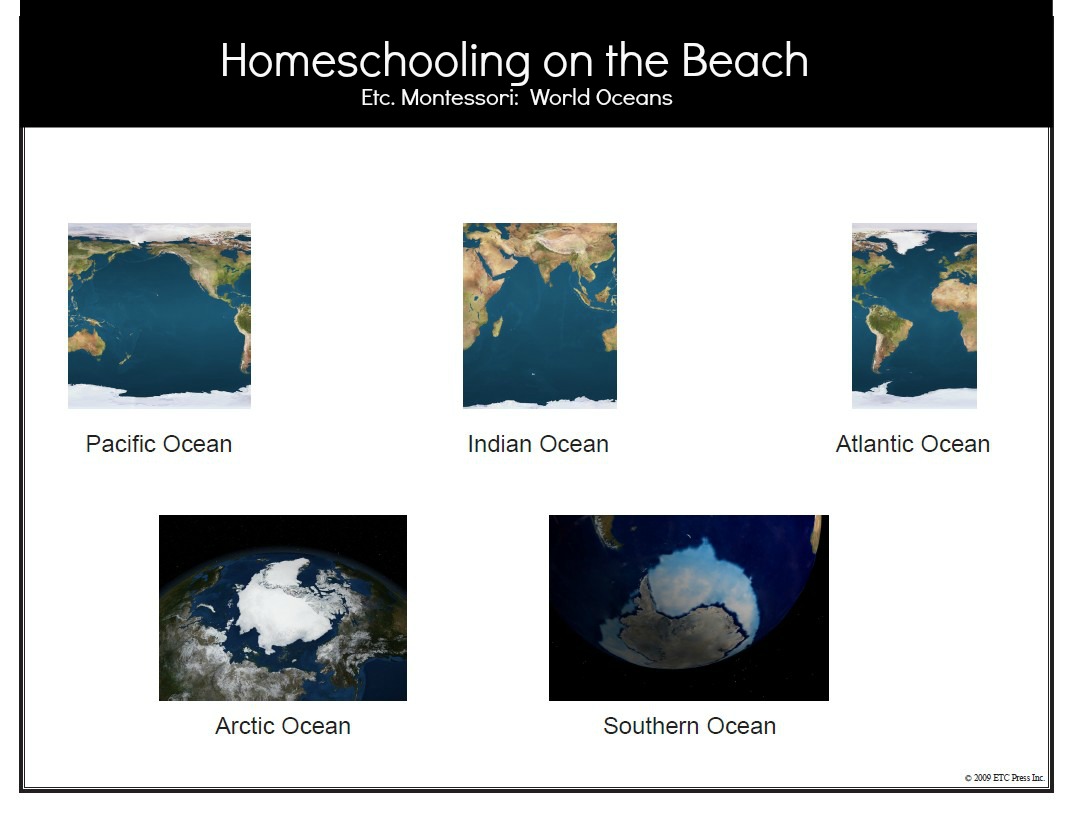
Geography is one of those subjects that I like to teach before we leave.  I will assume you are heading to an ocean, if you are reading this article, so the first thing we want to cover is the oceans of the world!  


World Oceans Etc. Montessori


Etc. Montessori has a beautiful free set of hands-on materials to cover World Oceans.  Click here to download them from their site.  


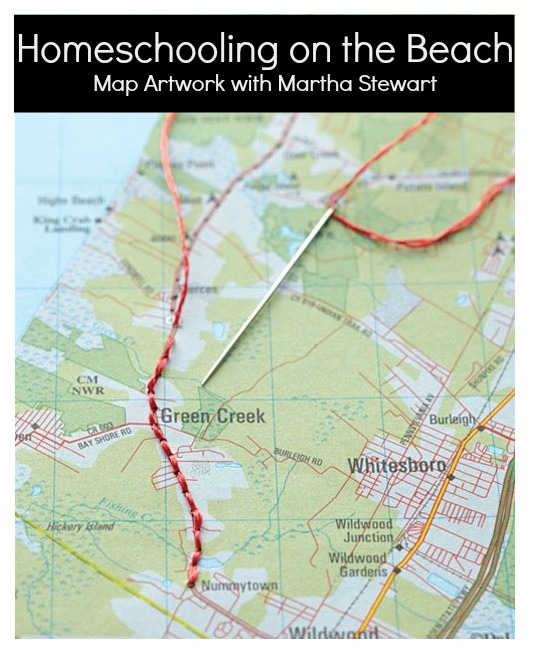
Mapping Vacation with Martha Stewart


Another great way to teach geography is to map out the trip.  This is another project you can do before you leave.  I love building up the anticipation of going on vacation.  Believe it or not, Martha Stewart really adds a bit of an artistic flair to this one.  I LOVE this idea and will be doing this myself!  


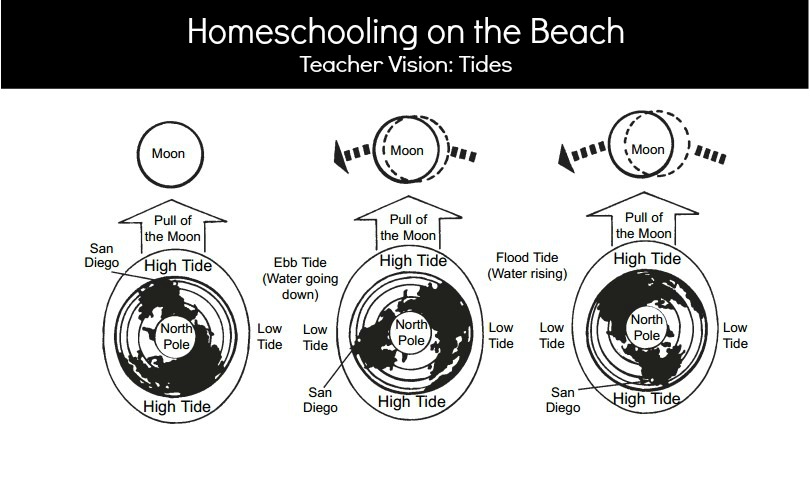
Tides Teacher Vision

Another subject to teach before you go to the beach is about tides.  What causes the tides?  Here is a great print out from TeacherVision (if you are not using the Apologia Swimming Creatures textbook).  There is a great experiment on ehow to demonstrate how the gravitational pull creates the tides by using a magnet and metal shavings.  However, I can’t find a single picture of the experiment online.  So, I guess we’ll do it and post the pictures 🙂  When I do, I’ll add the link here.  


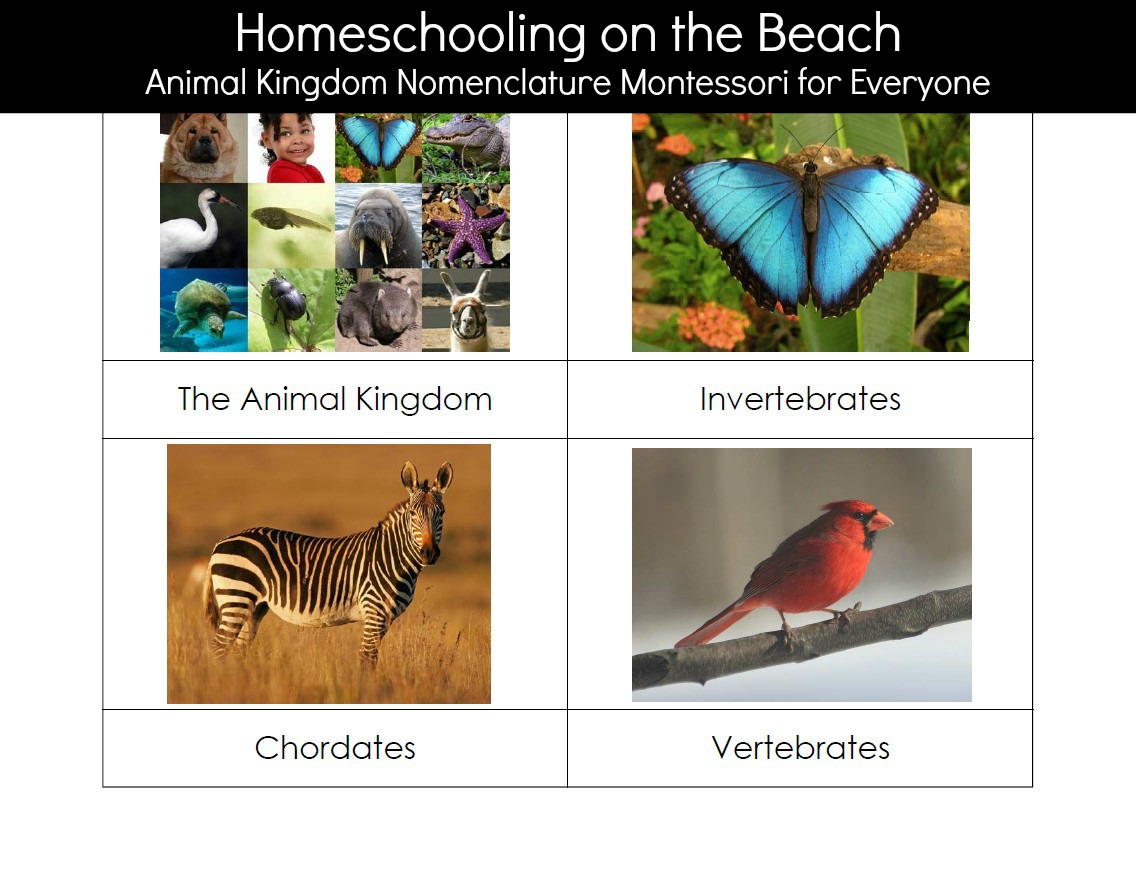
Animal Kingdom Nomenclature Montessori for Everyone

If you have not started studying Zoology yet, this would be a great time to introduce  animal classification, since so many ocean creatures are invertebrates (do not have backbones).  Montessori Materials has some free classification works here.  Matri Learning has a chart here.  The Helpful Garden has over 20 free sets of Zoology Materials to download including classification and sorting cards.  The Homeschool Den created some invertebrate cards and lots of other ocean activities! If you are in a position to purchase a beautiful set, Montessori for Everyone has wonderful nomenclature cards that are quite affordable.  


Here is a short “homeschooling on the beach” packing list.  If I have left anything off, please leave me a comment so I can add it! 

  • Nature Notebook to sketch / draw and journal in
  • Sketch Pencils
  • Magnifying Lens  
  • Binoculars
  • Camera (like we would go on vacation without one … )
  • Plastic Bags, Totes, Buckets, Bottles to take home some beach samples (sand, saltwater, shells, etc.)
  • Ocean Field Guide (can be borrowed from the library) 
  • Plain paper or a notebook and pencil
  • Ruler

Part two will be the various studies to do once you are at the beach!  I will add a link here once it is posted.    


Until next time… 


If you like this post, please share it!

  • Share on Facebook (Opens in new window) Facebook
  • Share on Pinterest (Opens in new window) Pinterest
  • Share on X (Opens in new window) X
  • Print (Opens in new window) Print
  • More
  • Email a link to a friend (Opens in new window) Email
  • Share on Reddit (Opens in new window) Reddit
  • Share on LinkedIn (Opens in new window) LinkedIn
  • Share on Tumblr (Opens in new window) Tumblr

Like this:

Like Loading…

Apologia Homeschool Blogs

March 24, 2013 By: Live & Learn Farm5 Comments

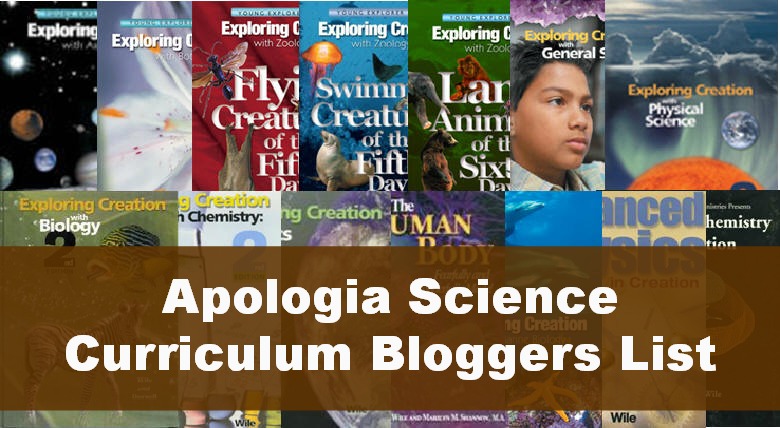
Apologia Science Bloggers List

Apologia Science Bloggers List


I love to learn from other homeschoolers and get inspiration from  their blog posts about experiments, projects, research, etc.  We use Apologia Science for all of our boys (13, 12 and 9).  We have taught every Apologia Elementary curriculum available to us (and are anxiously awaiting Jeannie’s newest book, Physics!).  Our blog will document many of our experiments  over the last 4 years, with a heavy focus on tactile hands-on learning.  I also wanted to keep a running Apologia homeschool blogs list of other homeschooling families using the Apologia Science curriculum.  If you are using any Apologia curriculum and blogging about it, please leave a comment below so I can add you to the list!  There are many families out there that are using Apologia… but most are not blogging about it.  So, I’m trying to keep this list focused on those families that are not just using Apologia, but those writing posts about it too!  Not taking anything away from the others… but just where I chose to focus this list 🙂   Thank you!!!  


Elementary Blogs:

http://chickensbunniesandhomeschool.blogspot.com/search?q=apologia

http://thehomeschoolscientist.com/?s=apologia

http://traciebauguess.blogspot.com/

http://garnergoingson.wordpress.com/

http://ourjourneywestward.com/

http://homeschoolingjustnextdoor.blogspot.com/search/label/Science

http://mudpiesandmakeup.blogspot.com/

http://adventuresinmommydom.org/

http://fieldschoolathome.blogspot.com/search?q=apologia

http://www.journalofmommak.blogspot.com/

http://angelicscalliwags.wordpress.com/

http://proverbs2pursuit.blogspot.com/

http://www.mamaofmanyblessings.com/

http://weshallobtaindeliveringgrace.blogspot.com/

http://homemakingwithheart.com/


Middle School / High School Apologia Blogs:

http://mindfulramblings.com/apologia-biology/

http://homeschoolersresources.blogspot.com/

http://traciebauguess.blogspot.com/

http://www.thedaisyhead.com/

http://bankwhitt.wordpress.com/biology/

http://homeschoolblogger.com/amnbooks/apologia-biology/

http://appliejuice.wordpress.com/apologia-biology/

http://appliejuice.wordpress.com/physical-science/

http://martysahm.blogspot.com/p/apologia-biology.html


Blend of both (elementary and middle / high school):  

www.LiveAndLearnFarm.com

http://oursideofthemtn.blogspot.com/

http://homeschooljournal-bergblog.blogspot.com/p/science.html

http://our4kiddos.blogspot.com/

http://lilliputstation.blogspot.com/

http://charlottemasonway.blogspot.com/

http://anniekateshomeschoolreviews.com/?s=apologia


Until next time…. 

If you like this post, please share it!

  • Share on Facebook (Opens in new window) Facebook
  • Share on Pinterest (Opens in new window) Pinterest
  • Share on X (Opens in new window) X
  • Print (Opens in new window) Print
  • More
  • Email a link to a friend (Opens in new window) Email
  • Share on Reddit (Opens in new window) Reddit
  • Share on LinkedIn (Opens in new window) LinkedIn
  • Share on Tumblr (Opens in new window) Tumblr

Like this:

Like Loading…

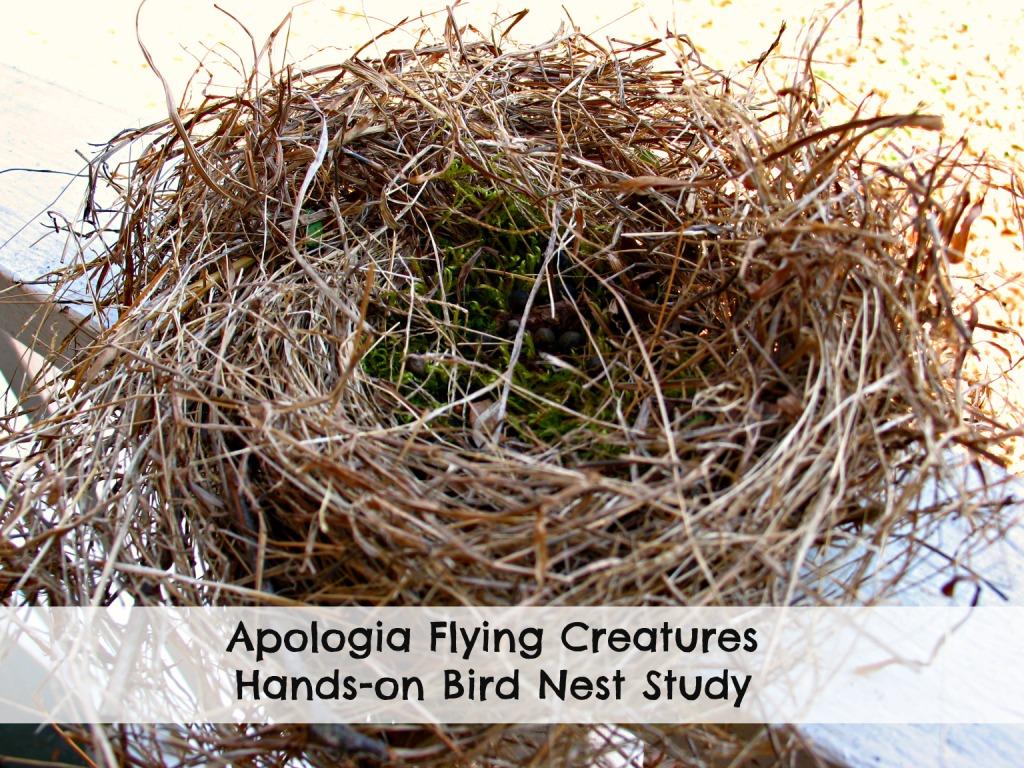
Apologia Flying Creatures Bird Nest Study

March 22, 2013 By: Trish Corlew2 Comments

Bird Nest Study

Apologia Flying Creatures – Bird Nest Study

This is another example of taking a traditional homeschool curriculum and supplementing with hands-on tactile materials to make it feel more Montessori. In Lesson 5 of Apologia’s Flying Creatures we studied Bird Nests.  Did you know birds only sleep in nests when they are incubating eggs and when their babies are young.  So, their nests are not their homes.  For most birds in North America, the nesting season starts in March and ends by the end of August.  Birds instinctively know, when the days are getting warmer and longer, that it is time to construct nests.   (Note we are a participant in the Amazon Services LLC Associates Program, an affiliate advertising program.  Any money received via this relationship is used for our homeschool!  PS. I’ve made a grand total of $0.00 from affiliate marketing… but the FTC says I have to tell you that IF you buy it, I will make 4% of the sale as commission.)

Nests are made with a variety of materials from the typical straw, hay, and leaves to yarn, string, and dryer lint.  Most birds like to fill the nest where the eggs and babies will be with soft materials.  Hummingbirds will even pull lichen off trees to soften their nests.  Nests are built by the female bird typically, with some assistance from the male.  

For our homeschool, I made Zoology Lesson 5 Nesting 3 part nomenclature cards that include all the different types of nests covered:

  • Bower Nests
  • Weaver Nests
  • No Nests
  • Ground Nests
  • Mound Nests
  • Earth-Hole Nests
  • Cavity Nests
  • Platform Nests
  • Cup Nests
  • Adherent Nests

The “Try This” for Lesson 5 is making nests.  I can tell you from experience, they are MUCH harder to make than you might think and certainly can make a huge mess!  

Materials You Might Use to Try to Build Various Nests:

  • Grass
  • Twigs
  • Leaves
  • Straw
  • Mud
  • String
  • Cotton
  • Dryer Lint
  • Fishing Line

Directions:  

Now take the materials and try to build the various nests in the nomenclature cards.  Some are easier than others.  Here are some of our finished nests:


A Bower Nest:

Bower Nest edited


A Cup Nest (and a platform in the background):  


Cup and Platform Nests edited


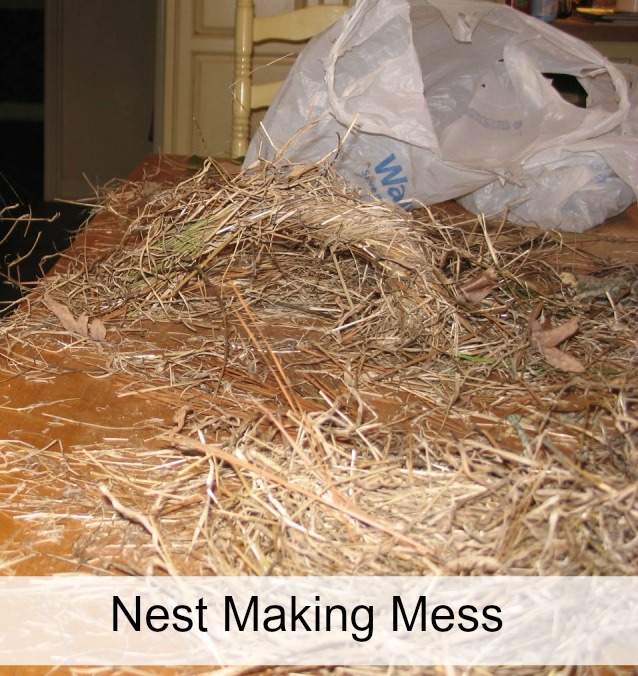
And the mess we made 🙂


Nesting Pictures


Let me know if you do make any nests and use the nomenclature cards. Leave a comment below with a link to your blog so we can see!  

Until Next Time…..

If you like this post, please share it!

  • Share on Facebook (Opens in new window) Facebook
  • Share on Pinterest (Opens in new window) Pinterest
  • Share on X (Opens in new window) X
  • Print (Opens in new window) Print
  • More
  • Email a link to a friend (Opens in new window) Email
  • Share on Reddit (Opens in new window) Reddit
  • Share on LinkedIn (Opens in new window) LinkedIn
  • Share on Tumblr (Opens in new window) Tumblr

Like this:

Like Loading…

Spring Weather Hands-on Study

March 21, 2013 By: Trish Corlew2 Comments


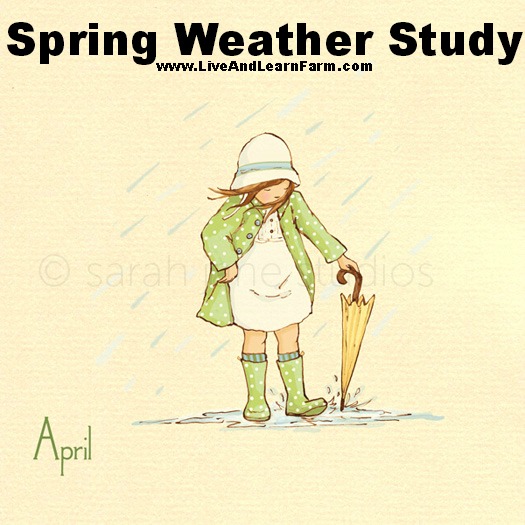
@Sarah Jane Studios:  April Showers.  Used with Permission.

@Sarah Jane Studios: April Showers. Used with Permission.

We’ve all heard the phrase “April Showers Bring May Flowers” right about this time of year.  Out of curiosity  I did a bit of research on the quote (’cause that is what homeschool moms do… we research and then teach what we learn to our children, right?).  Anyway, I discovered this often quoted proverb usually leaves out the first part, which is the month of March.  Here is the full quote (per wikipedia):

March winds and April showers bring forth May flowers

It was first recorded in 1886, and is a common expression in English- speaking countries.

Wind in March is an understatement these days!  I don’t know about your area, but Spring usually brings with it some crazy weather here in West TN!  And this week has been a perfect example of the unpredictable weather!  Sunday, March 17th, we worked in our garden and I uncovered all of our strawberry plants after discovering our first strawberry blossoms peaking out.  Well, last night, March 21st, The National Weather Service issued a Winter Weather Advisory for SLEET for my area tonight!  THIS is typical spring weather for us!  

So, for the Montessori Mom’s Spring Montessori Blog Hop topic I decided to focus on the weather of Spring.  

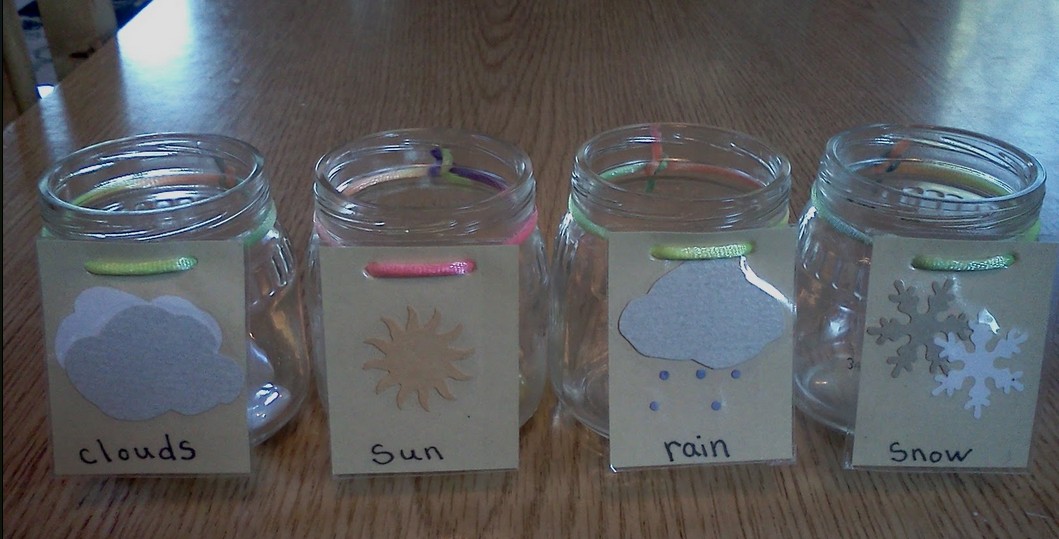
To introduce this characteristic of unpredictable spring weather to younger students it is really just a matter of actually paying attention to the weather.  This Weather Tracking work is perfect for Early Childhood / Primary students.  It is so easy to make!  You need four jars that are the same size, a “weather” card tied to each jar with the weather word and an image that exemplifies that weather event, and some “thing” to put in the appropriate jar for each day that has that weather.  You could track the weather for any length of time, but for younger students, a week is a great “long project” for them.  At the end of the week, you could show them how to create a simple bar graph with the “things” from the jars lined up above the picture labels.

Montessori Design Weather Tracking Work

Weather Tracking Montessori Design


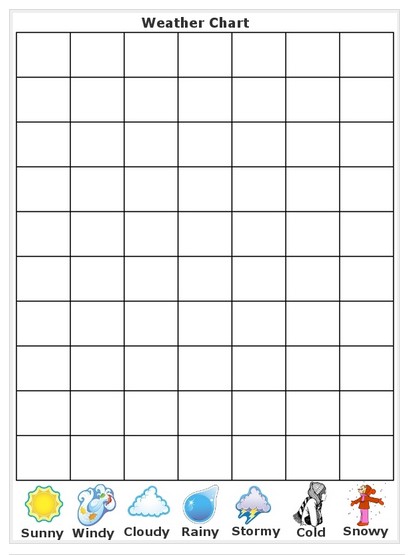
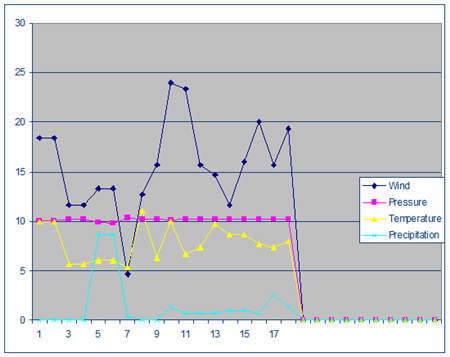
Another option to show just how unpredictable Spring weather really is pull historical weather data.  You could pull data for one specific day, say March 15th, for a series of years or a specific week for a series of years.  You might track the high temperature for that day, low temperature for that day, the amount of precipitation, wind speed, etc.  Just remember, the more variables, the more complex to graph the data.  The access historical date, I found that Wunderground has an historical data link where you can search by date all the way back to 1948!  Depending on the age of your child, graphing this data would be a great visual to understand the data and, in the process, teach them about different ways to display data.  Just remember the more variables to track and dates you track it for, the more complex the chart!  (Wouldn’t this be a fun activity for your child to do for their birthdays throughout their life?)  For younger students, you can use a graph with pictures like this one I found at Funaslearning:

FunAsLearning Weather Chart

FunAsLearning Weather Graph


or for older students, you can use an advanced graph like this one found on Gringod.com:

Weather Graph - Advanced

Advanced Weather Graph


or go somewhere in between like this one from North Conway Weather.  Also, you can bring in some math here by discussing ratios. How many days out of the total days researched had rain? had sunshine? etc. 

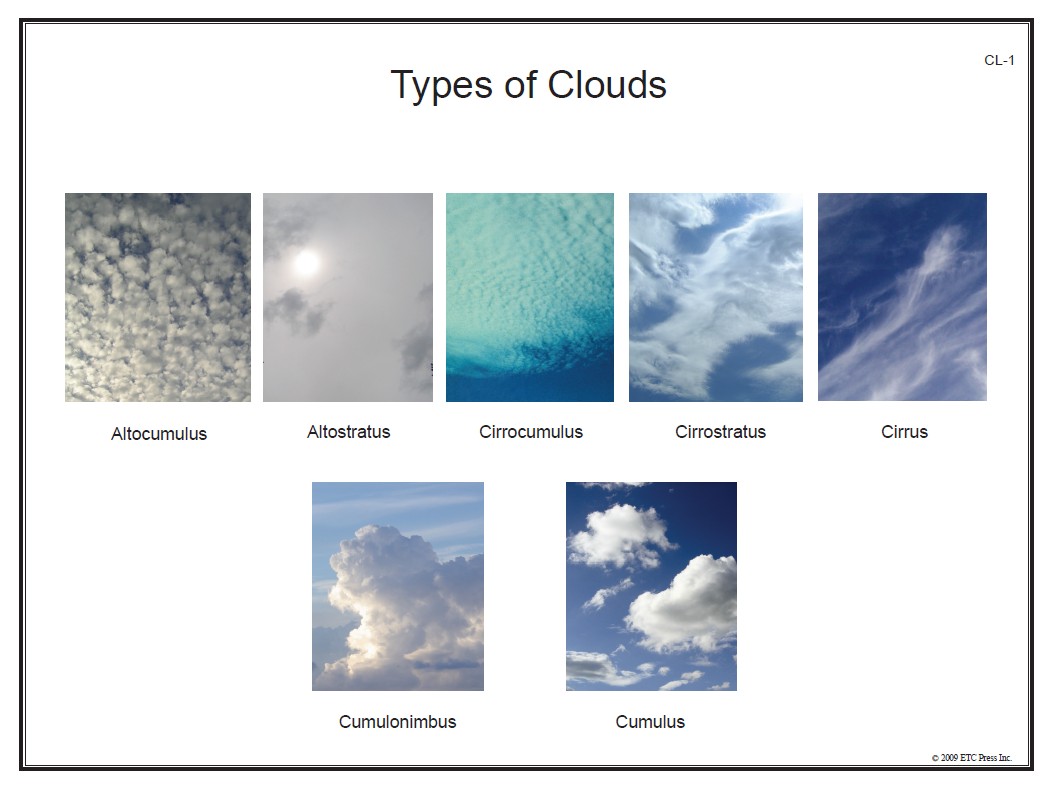
Spring is also a great time to do a cloud study.  Montessori Etc. Has some of the most beautiful and FREE Types of Cloud nomenclature card sets for the study of clouds:

Types of Clouds Etc Montessori

Etc Montessori Types of Clouds


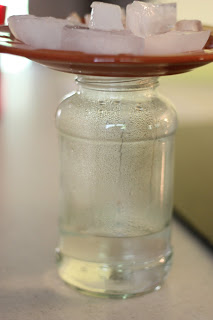
I don’t think any science study is complete without an experiment!  So I have to add at least one 🙂  This one would be fun for any age student …Making your own rain.  I first saw this experiment on Pinterest.  Weather Wiz Kid originally published it, but here it is with pictures of the different phases of the experiment on IcanTeachmychild.com:

Making it Rain from ICanTeachMyChild.com

Making it Rain from ICanTeachMyChild.com


To bring another dimension to your study of Spring weather, Handbook of Nature Study Blogspot does a fabulous job of bringing art and journaling in with their Seasonal Weather Study project.  Students are conducting some research, spending time outside and drawing what they see.  You can find her post here and her Seasonal Weather Study project here.  All of this website’s experiments and studies are based off the Handbook of Nature Study by Anna Botsford Comstock If you don’t have this book, it is one of the absolute best books on nature study and experiments.  I highly recommend it!  

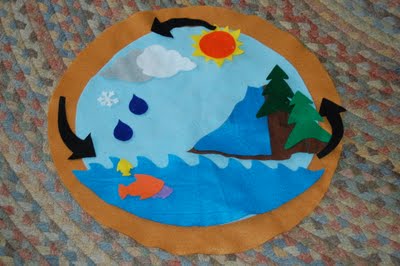
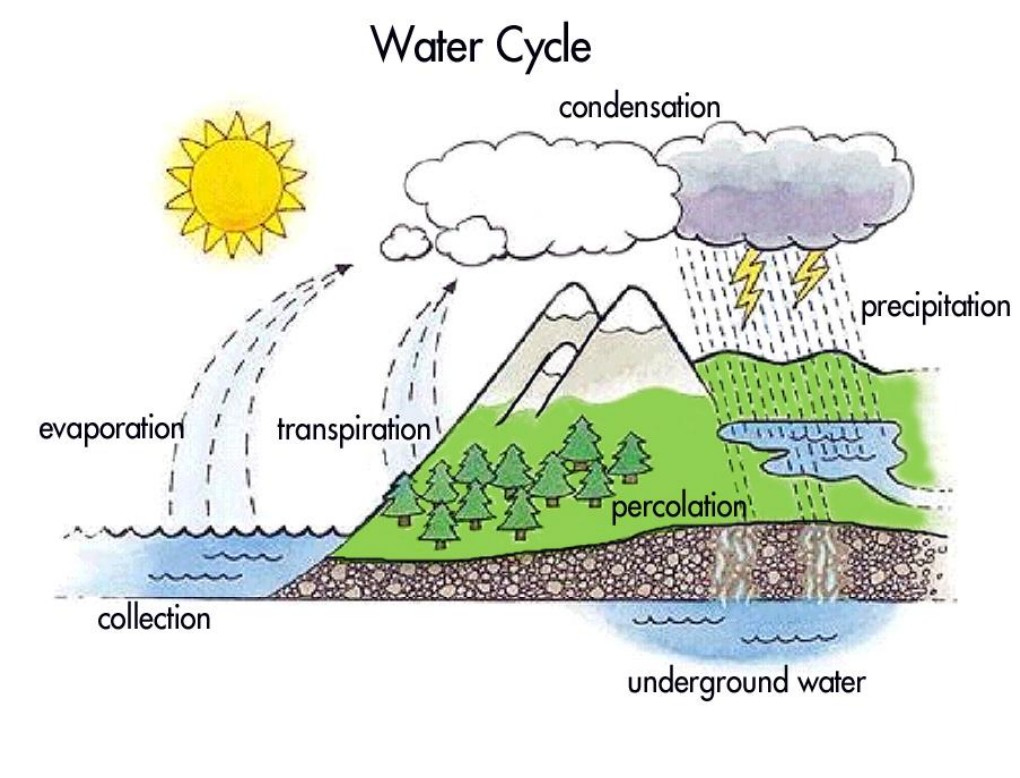
Finally, no weather study would be complete with a discussion of the water cycle. This felt water cycle looks easy enough to make and would be a great project for the students to make and give a presentation on!  I love how felt “sticks” to each other, but to save money, it could certainly be made from construction paper!  

Felt Water Cycle

Felt Water Cycle


To help students remember details about the water cycle, here is a catchy little Water Cycle song.  This version is being performed by a precious 4 year old at a Montessori School:


Here are the words and hand movements that go with the water cycle song:  

(Sing it to the tune of She’ll Be Coming Around the Mountain)

Water travels in a cycle, yes it does 
(use pointer finger to make a big circle)

Water travels in a cycle, yes it does
(repeat finger circle)

It goes up as evaporation
(moves hands up to the sky)

Forms clouds as condensation
(make a cloud overhead with arms)

Then comes down as precipitation, yes it does!
(sprinkle with fingers while bringing arms down in front of you)

And last but not least, here is a Free Water Cycle Study by Montessori Materials:  

Water Cycle Montessori Materials

Water Cycle Montessori Materials


For older students, I encourage my children to research and dig deeper with this Exploring Weather with Blooms unit. 

(By the way, isn’t the introduction picture for this post just adorable?!  I contacted Sarah Jane to get permission to use this image for this blog hop, it just goes with a post about spring weather!  She has the most adorable artwork at http://shop.sarahjanestudios.com/pages/shop.  Isn’t she amazingly talented!?!  I guess when you lack in the creative arts department, you appreciate talent even more!!   (And no, she is not a sponsor nor am I financially benefiting from saying this  🙂  )

Montessori in the Springtime Blog Hop
Please join us for the Montessori Spring Blog Hop! You can link up your Montessori-inspired spring posts anytime during the next 30 days. 


Hosted by:
Confessions of a Montessori Mom

Creative Care
The Education of Ours

JDaniel4’s Mom
Live And Learn Farm
Living Montessori Now
Making Montessori Ours
Montessori Messy
Montessori Nature’s Smile
Montessori on a Budget
Montessori Tidbits
Natural Beach Living
Our Montessori Home

Smiling Like Sunshine

If you like this post, please share it!

  • Share on Facebook (Opens in new window) Facebook
  • Share on Pinterest (Opens in new window) Pinterest
  • Share on X (Opens in new window) X
  • Print (Opens in new window) Print
  • More
  • Email a link to a friend (Opens in new window) Email
  • Share on Reddit (Opens in new window) Reddit
  • Share on LinkedIn (Opens in new window) LinkedIn
  • Share on Tumblr (Opens in new window) Tumblr

Like this:

Like Loading…

Apologia Exploring Creation with Botany Supplemental Resources

March 17, 2013 By: Trish Corlew1 Comment

Apologia Botany edited 2

Apologia Exploring Creation with Botany Supplemental Resources.  We modify traditional homeschool curriculum to make it more Montessori, more hands-on.  Apologia Botany was one of the easiest curriculums to accomplish this with.  This curriculum seemed to dovetail perfectly with the Montessori Botany works.  If you have students that like to do workbooks, they have one.  Although we did not use it.  I’ll detail how we did this below. First let me reiterate here, Apologia is such a well-rounded and full curriculum, you would not have to add one thing to their curriculum for it to be a full science curriculum. These additions are not because this curriculum lacked a thing… it is because we chose to teach our children with a Montessori pedagogy… which is a LITTLE (not a lot) more hands-on. At the link below, not only will you find the Table of Contents, but you will also find a sample chapter for botany. Go check it out, you will understand what I mean about not needing to add much to this curriculum.

Before starting, I highly recommend you first read Michael Olaf’s description  of Montessori Botany from 0 – 12 years old.  It really helps us have a goal in mind when teaching Botany.  Maria Montessori said it so beautifully:

How often is the soul of man, especially that of the child, deprived because one does not put him in contact with nature.

There is no description, no image in any book, that is capable of replacing the sight of real trees, and all the life to be found around them, in a real forest. Something emanates from those trees which speaks to the soul, something no book, no museum is capable of giving. The wood reveals that it is not only the trees that exist, but a whole, interrelated collection of lives. And this earth, this climate, this cosmic power are necessary for the development of all these lives.

The myriad lives around the trees, the majesty, the variety are things one must hunt for, and which no one can bring into the school. — Maria Montessori

Now that you understand what we are trying to accomplish and I have pointed you to the foundation of a botany curriculum, lets dive into Apologia Exploring Creation Botany curriculum.  Here is a link to the Apologia Table of Contents

I have copied the details from the Table of Contents onto this post to make it easy to reference the supplemental works (if any) that we used for each section. One of the first things we (my best friend and I) made were the nomenclature (3 part cards) for each chapter. I will create a link for these at each of the chapter headings below.

Botany Lesson 1 (note, I have to upload them as pdfs, the word files are too large). A large part of Lesson 1 is introducing language and concepts, so there will not be much in addition to the nomenclature cards for this lesson). I will do my best to provide free resources, but some of the works we used were not free, I will link to the products that we used if you choose to purchase them.

  • Latin (In nomenclature cards)
  • Botanists: (Botany Degree Employment)
  • Taxonomy: There are 1000 different things you can categorize to help your children grasp taxonomy. Here is a link to a blog where they actually classified Legos (and they were using the Apologia Botany curriculum as well).  I created several Taxonomy charts.  One that is in Taxonomy chart(because the children can use the shades to determine what comes next in the list) and also Taxonomy chart 2  I made a control for these to be a self correcting works.
  • What Do You Remember?
  •  Notebook Activities
  • Experiment: Shoe Taxonomy. We created two different charts for the children to document their shoe taxonomy. Shoe Taxonomy.  Shoe Taxonomy Chart and Shoe Taxonomy Chart When I find the pictures of us doing this experiment, I’ll post them here as well! It was fun!  Shoe Nomenclature Cards.  
  •  Phyla Phyla of the Plant Kingdom
  • Vascular Plants.  We used lots of charts from different places.  Encylopedia Brittanica,Wikipedia, and Ag Arizona; Vascular Interactives
  • Try This.  This Try this is a study of the midrib of a leaf.  We used Parts of a Leaf Nomenclature, Parts of a Leaf Puzzle, Parts of a leaf NAMC Manual,  Parts of a Leaf from Montessori Etc, leafpuzzleandcards, We always loved making these leaf crafts.  Be sure to check out my Pinterest Boards for more Botany Art projects
  • What Do You Remember?
  • Nonvascular Plants  Plant Kingdom Nomenclature Lesson Wikissori;  Plant kingdom Graphic Organizer; Vascular vs NonVascular experiment
  • Paper Towel Activity
  • Moss:  Moss Lifecycle; Moss Experiment; Two different experiments for moss 
  • Seed Homes Seeds: types of seed plants; types of angiosperms (Very affordable);  Free Types of seeds nomenclature cards;  Parts of a Seed Free
  • Angiosperms  Flowering Plants Nomenclature Cards Free;  Parts of a Flower Free Nomenclature Cards; More free parts of a Flower Cards
  • What Do You Remember?
  • Gymnosperms
  • Seedless Vascular Plants
  • Nonvascular Plants
  • What Do You Remember?
  • Notebook Activity


 Project Note:  Some Items above are linked to my Amazon affiliate account.  The very small amount of money that we make from our affiliation with Amazon is used to augment our curriculum needs.  Some photos shared are courtesy of Amazon.

If you like this post, please share it!

  • Share on Facebook (Opens in new window) Facebook
  • Share on Pinterest (Opens in new window) Pinterest
  • Share on X (Opens in new window) X
  • Print (Opens in new window) Print
  • More
  • Email a link to a friend (Opens in new window) Email
  • Share on Reddit (Opens in new window) Reddit
  • Share on LinkedIn (Opens in new window) LinkedIn
  • Share on Tumblr (Opens in new window) Tumblr

Like this:

Like Loading…

Paths of Exploration Supplemental Resources

March 17, 2013 By: Trish Corlewcomment

POE Supplemental Resources

We will be starting Paths of Exploration by Trail Guide to Learning in April of 2013.   We homeschool with a very hands-on (Montessori) approach to education, so I am creating a Paths of Exploration Supplemental Resources pages for those that want to take this curriculum in a bit of a different, more hands-on direction with your children.  Most of these resources are free resources with a few exceptions.  I hope this resource will be a blessing to you and your family.  If you have any questions, please feel free to contact me.  


Supplemental Hands-On Resources

Supplemental Hands-On Resources

Please note, I will be adding resources to each Unit before and during our study, so be sure to subscribe to the site to continue to receive the updates.  We are really looking forward to this curriculum!  

Volume One  – Columbus Unit 1:

Required Reading Resources:

  • Meet Christopher Columbus (Landmark Book)
  • Christopher Columbus by Bennie Rhodes
  • Carry on Mr. Bowditch by Jean Lee Latham (Middle School)

Optional Supplemental Reading Resources (We added these books in our homeschool library):


Lesson 1 Supplemental Resources can be found here:

Lesson 2

  • Lesson 2, Part 3:  Spices Free 3 part cards; Make your own Montessori Smelling Bottles;
  • Make Saltwater Crystals and you could even add another variable such as yarn thickness by sure to do a Scientific Speculation Sheet with their hypothesis
  • World Oceans Free 3 part cards from Montessori Etc (BEAUTIFUL)!!
  • Continent and Hemisphere Study Free also from Montessori Etc.
  • Sailing Ship Vocabulary Nomenclature Cards 
  • Types of Clouds Nomenclature Cards, again from Montessori Etc. and Free
  • Types of Weather Nomenclature Cards from Montessori for Everyone
  • Geometric Solids 3 part cards from Montessori Etc and Free.
  • Planets 3 part cards Free from Montessori Mom and Online Planet study and another
  • Label Dolphin Anatomy 
  • Parts of the Sun Nomenclature from Montessori For Everyone and make a Model of the sun out of playdoh
  • Constellations Study:  Montessori inspired solar system / constellation studies for younger children


Lesson 3

Lesson 4

Lesson 5

Lesson 6

Jamestown Unit

Lesson 1

Lesson 2

Lesson 3

Lesson 4

Lesson 5

Lesson 6

Pilgrim Unit

Lesson 1

Lesson 2

Lesson 3

Lesson 4

Lesson 5

Lesson 6

Volume 1 

Required Resource List

  • Meet Christopher Columbus by James T. de Kay
  • Christopher Columbus by Bennie Rhodes
  • Stories of the Pilgrims by Margaret Pumphrey (2nd Edition, Christian Liberty Press)
  • Stories of the Pilgrims Answer Key
  • Squanto, Friend to the Pilgrims by Clyde Robert Bulla
  • A Lion to Guard Us by Clyde Robert Bulla
  • Surviving Jamestown: The Adventures of Young Sam Collier by Gail Karwoski
  • Profiles from History by Ashley Strayer Wiggers
  • Handbook of Nature Study by Anna Comstock
  • North American Wildlife Guide published by Reader’s Digest
  • Eat Your Way Around the World by Jamie Aramini
  • Intermediate World Atlas published by Rand Mc Nally
  • RealEarth®GlobeMap™
  • Large-Scale U.S. and World Outline Maps
  • Student Notebook pages (printed from CD-ROM included or available separately)

Volume 2 Required Resource List

  • Daniel Boone, Frontiersman by Janet and Geoff Benge
  • Daniel Boone, Young Hunter & Tracker by Augusta Stevenson
  • Munford Meets Lewis and Clark by Jamie Aramini
  • Seaman: The Dog Who Explored the West with Lewis and Clark by Gail Karwoski
  • Trouble for Lucy by Carla Stevens
  • Johnny Appleseed by David Collins
  • 1911 Boy Scout Handbook
  • United States History Atlas
  • Lewis & Clark Hands On by Sharon Jeffus (©2009, Geography Matters)
  • Going West!: Journey on a Wagon Train to Settle a FrontierTown, a Kaleidoscope Kids book
  • Student Notebook pages (printed from CD-ROM included or available separately)


Note:  A  few items above are linked to my Amazon affiliate account.  The very small amount of money that I make on Amazon is used to augment our curriculum needs.  Photos are shared from  Amazon.

If you like this post, please share it!

  • Share on Facebook (Opens in new window) Facebook
  • Share on Pinterest (Opens in new window) Pinterest
  • Share on X (Opens in new window) X
  • Print (Opens in new window) Print
  • More
  • Email a link to a friend (Opens in new window) Email
  • Share on Reddit (Opens in new window) Reddit
  • Share on LinkedIn (Opens in new window) LinkedIn
  • Share on Tumblr (Opens in new window) Tumblr

Like this:

Like Loading…

Introduction to a Montessori Middle School

March 17, 2013 By: Trish Corlew2 Comments


Grand Rapids Montessori Logo


This is an introduction to a Montessori Middle School, or Erdkinder as Maria Montessori called it.  It is the essence of what we are trying to accomplish with our farm homeschool (we call it farmschooling).  You will see why we have the boys creating their own businesses, growing our own food, and managing the marketing of their businesses.  Each of our children will be blogging about their specific businesses.  I hope you will join us for these adventures!  Please remember all of our boys are 13 or younger, so grace and courtesy is appreciated.  Just as an FYI, I will be moderating all comments, emails, and communication.  

Montessori’s Vision of the Erdkinder (Farm School)

Maria Montessori first proposed her ideas for the reform of secondary education in a series of lectures given at the University of Amsterdam in January 1920. They were later published during the 1930s as part of her work From Childhood to Adolescence.  Dr. Montessori’s model of secondary education is based on her understanding of the developmental needs and learning tendencies of early adolescents. In addition to conceiving many of the reforms incorporated into today’s most innovative programs for early adolescents, Montessori added a unique idea: she recommended a residential school located in a country setting.  Montessori believed that by living independently of their families for a few years in a small rural community, young people could be trained in both the history of technology and civilization, while learning the practical habits, values, and skills needed to assume the role of an adult in today’s society. 

Envisioning a school where children would grow their own food and live close to nature, she called her program the Erdkinder, which translates from the Dutch as “the children of the Earth” or “children of the land.” Dr. Maria Montessori proposed living and working on a residential farm school as the best possible educational setting for young adolescents (twelve- to fifteen-year-olds) as they transitioned physically, cognitively, socially, emotionally, and morally to adulthood.  Montessori believed the demands of puberty warranted a holiday from traditional lecture-based instruction. Instead of confining students to classrooms, she proposed a program that would help them accomplish two key developmental tasks: becoming psychologically and economically independent. Only then, she argued, would young adolescents escape from the pettiness of traditional schooling and engage seriously in the realities of life in society.

Montessori envisioned the Erdkinder as a small community of teenagers and adults located in a rural setting. Here teachers and students would live and work together throughout the year, growing much of their own food and manufacturing many of the things they would need for life in the country, thereby developing a deep sense of their connection to the land and the nature and value of work.  She envisioned students, under adult upervision, managing a hostel or hotel for visiting parents. The students would sell farm goods and other products in their own store. These farm management and store economics would form the basis of meaningful academic studies.  The Erdkinder curriculum would encourage self-expression through music, art, public speaking, and theater. Students would also study languages, mathematics, science, history of civilizations, cultures, and technological innovations. The Erdkinder would possess a “museum of machinery,” where students could assemble, use, and repair their own farm equipment.

For many years the idea of a residential farm school was explored, but considered impractical. Montessori Secondary schools are now found in urban and suburban settings in the United States, with enrollments ranging from fewer than ten students to public school programs with more than 250 students.  The cost of organizing a residential Erdkinder program has been considered far too high for any one school to attempt; instead, Montessori Middle School programs attempt to incorporate as many Erdkinder components as possible. The Montessori community looked on with considerable interest in 2001 when David Kahn, Director of the North American Montessori Teacher’s Association (NAMTA), opened the Montessori Farm School in Huntsburg, Ohio in conjunction with the Hershey Montessori School. Serving students from ages twelve to fifteen, the Montessori Farm School is a lovely facility and an exciting project that has attracted widespread attention, including a substantial article in the London Times.

Many leaders in Secondary Montessori education believe that the future will lie primarily with nonresidential programs. The opening of the Farm School, and others like it that may follow, provides an opportunity to test one of Dr. Montessori’s hypotheses. She proposed that the residential community, with its artificially created social laboratory, will prove to be of most value in the completion of the development of mature, well adjusted young adults.  A piece prepared by David Kahn describing the Montessori Farm School in greater depth follows… the entire article can be found here.  

This article is from the Montessori Foundation 


If you like this post, please share it!

  • Share on Facebook (Opens in new window) Facebook
  • Share on Pinterest (Opens in new window) Pinterest
  • Share on X (Opens in new window) X
  • Print (Opens in new window) Print
  • More
  • Email a link to a friend (Opens in new window) Email
  • Share on Reddit (Opens in new window) Reddit
  • Share on LinkedIn (Opens in new window) LinkedIn
  • Share on Tumblr (Opens in new window) Tumblr

Like this:

Like Loading…
« Previous Page
Next Page »
  • Pinterest
  • Facebook
  • Twitter
  • Google+
  • Sulia

Subscribe to our blog

Email

HHMTeamMember3-01

Winner-Top-Ten-BlogDesign10

Top Posts

  • But I Don't Want to be the Policeman!
    But I Don't Want to be the Policeman!
  • Hands-on Activity for Studying Globes and Maps
    Hands-on Activity for Studying Globes and Maps
  • Start a Home Economics Class in Your Homeschool
    Start a Home Economics Class in Your Homeschool
  • Brimwood Press Worldview Curriculum Review
    Brimwood Press Worldview Curriculum Review
  • nature journal post 2
    nature journal post 2

Affiliates / Sponsors

Give lynda.com

Shop Montessori Services

Newsletter Affiliate

We create and distribute our newsletter via MadMimi! It is SOOO easy to use! I highly recommend it!
Mad Mimi Email Marketing

Grab A Button

LiveAndLearnFarm.com Just select and copy the code below.
<a href="http://www.LiveAndLearnFarm.com" target="_blank"><img src="http://www.LiveAndLearnFarm.com/blog/wp-content/LiveLearnFarmButton.jpg" alt="LiveAndLearnFarm.com" width="125" height="125" /></a>

Copyright © 2026 · Modern Blogger Pro Theme By, Pretty Darn Cute Design

Loading Comments...

    %d