
Live and Learn Farm

  • Home
    • About Us
    • Contact Us!
  • HomeSchool
    • All Inclusive
    • Apologia
    • Arts
    • Bible
    • Civics
    • Current Events
    • Curriculum
    • Elementary
    • Geography
    • History
    • Language Arts
    • Math
    • Middle School
    • Montessori
    • Other
    • Practical Life Skills
    • Science
    • Writing
  • Link Ups
    • Monday Middle & High School Link Up
  • Montessori
  • Teen Blogs
    • Gage – 13 Years Old
    • Chase – 14 Years Old
    • Blake – 10 Years Old
  • Shop
    • Cart
    • Checkout
    • My Account
  • Free!!!
  • Other Topics
    • Blogging
      • Facebook Series
    • Farmstead
      • Chickens
      • Cows
      • Permaculture Garden
    • Mom
You are here: Home / Archives for Trish Corlew

Amazon Prime 30-Day Free Trial

July 4, 2013 By: Trish Corlewcomment

Amazon Prime 30 day Free Trial

Disclosure

Most of my readers know that I am a complete book-a-holic. As a matter of fact, my used book store on Amazon is named “TN Book-A-Holic”! So it’s official!! I am addicted to books (and especially curriculum)!  My FAVORITE book store is Amazon by far!  I have been a prime member for 5+ years because not only am I a book-a-holic, I am also impatient to get what I just bought 🙂  With Amazon Prime, I get my books (or toys, groceries, music, houseware items, etc.) in two days!  Recently they have added so many new benefits to the membership that I am just starting to really take advantage of them myself.  Amazon lists the benefits as follows:

  • FREE Two-Day Shipping on eligible items. Note: If the item you’re ordering is out of stock or unavailable to ship, we’ll get it to you two days after it’s back in stock. Remember to check the cut-off time shown on the detail page. Items are delivered every day but Sunday, and orders over $1300 may require a signature.
  • FREE Standard Shipping on eligible items.
  • FREE No Rush Shipping (typical delivery one week after placing an order).  Note: You may receive promotional credit for selecting No-Rush Shipping. Credit will be automatically applied to your Amazon.com account once the first package from a No-Rush Shipping-eligible order ships. You’ll receive an e-mail as soon as the credit is available. You may select No-Rush Shipping as many times as it’s offered to you, but you won’t be eligible for the credit if you cancel your No-Rush Shipping order or return items from it.
  • Shipping Upgrades to expedite delivery.
  • Free Prime Instant Video access for paid or free trial members in the U.S. and Puerto Rico. Note: Instant Video isn’t available to customers receiving free Amazon Prime shipping benefits through Amazon Student, Amazon Mom, or as guests of another membership.
  • Kindle Owners’ Lending Library access to members in the U.S. For more information, go to Kindle Owners’ Lending Library.
    Note: Customers in a paid membership, free trial or receiving a free month of Prime benefits with a Kindle Fire activation are eligible. The Kindle device must be associated with the Prime account that’s eligible for the benefit.

The two benefits I personally am most excited about are the Kindle Lending Library and the Instant Video Access. We bought the boys used Kindles this year and we are already using them in our homeschool classroom all the time.  If you are a regular reader, you probably saw the POE post where I purchased Meet Christopher Columbus as a Kindle version for our read alouds!   Kindles themselves are already saving us a bunch of money on books!  But now with the lending library… we should see even bigger savings! The Instant Video Access is great to view videos in our homeschool (and family time). We canceled our cable earlier this year and bought Roku. So with the Roku and this Instant Video access… we have cable replaced very inexpensively!  

 

Amazon Prime Free Trial


Interested in checking it out for yourself?  Amazon is having a promotion where you can get an Amazon Prime 30-Day free trial to see if you think it is worth the $79 a year.  For us, we know it has saved us money… but you get to evaluate it for yourself.   Join Amazon Prime – Watch Over 40,000 Movies!  If you are like us, every dime we can save is important right now!  

Until next time…
If you like this post, please share it!

  • Share on Facebook (Opens in new window) Facebook
  • Share on Pinterest (Opens in new window) Pinterest
  • Share on X (Opens in new window) X
  • Print (Opens in new window) Print
  • More
  • Email a link to a friend (Opens in new window) Email
  • Share on Reddit (Opens in new window) Reddit
  • Share on LinkedIn (Opens in new window) LinkedIn
  • Share on Tumblr (Opens in new window) Tumblr

Like this:

Like Loading…

Sandpaper Land and Water Study

June 30, 2013 By: Trish Corlew7 Comments

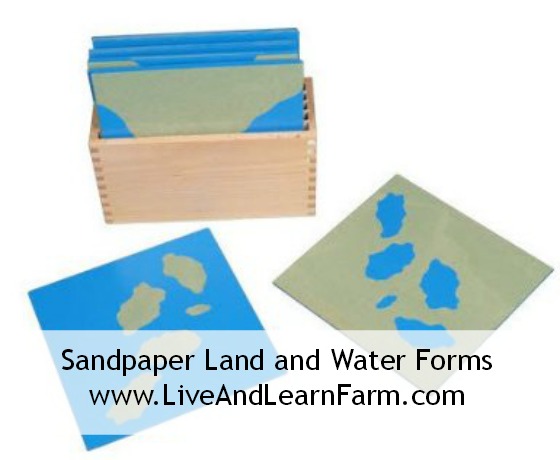
Sandpaper Land and Water Forms

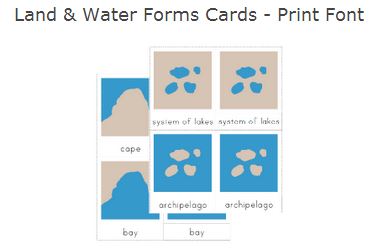
As part of our Paths of Exploration Columbus Unit, we circled back around and reviewed our land and water lessons.  Educational research indicates that children tend to retain information better when it is presented different ways and using multiple senses.  This is an example of how a Montessori education does just that.  This is a traditional Montessori Activity Sandpaper Land and Water forms.  This sandpaper activity is considered a sensorial activity.  InfoMontessori.com explains sensorial works well and will be beneficial for the basis of our sandpaper land and water study:

The purpose and aim of Sensorial work is for the child to acquire clear, conscious, information and to be able to then make classifications in his environment. Montessori believed that sensorial experiences began at birth. Through his senses, the child studies his environment. Through this study, the child then begins to understand his environment. The child, to Montessori, is a “sensorial explorer”.

Through work with the sensorial materials, the child is given the keys to classifying the things around him, which leads to the child making his own experiences in his environment. Through the classification, the child is also offered the first steps in organizing his intelligence, which then leads to his adapting to his environment.

It is not very difficult to make your own sandpaper land and water forms using sandpaper you purchase from a hardware store and foam board from a craft store… I’m not so sure they would be less expensive, but I’m sure your children would have fun making them with you! 

Land and Water 3 Part Cards

These are three part cards that are an extension of the sanpaper land and water forms. I found these free downloads at The Helpful Garden Montessori and they are perfect for this work. I am always amazed and thankful when I realize how many of us are making these materials and willing to give them away!  What an absolute blessing!

Not only are there free 3 part cards online, there are also lessons on how to present the material.  I found the explanation below at Montessori Teachers Collective.

LAND AND WATER FORM CARDS (Lesson Presentation)

Material: One set of cards of ten major geographical land and water forms. Ten land and water models.

Presentation: Invite a small group of children to join you. Have one child layout a mat, then have the children bring over all the land and water forms. The teacher shows the children where the Land and Water Form cards are kept and then brings them to the mat. Review the names and give a brief definition of each model. The teacher holds the cards. Show the children one card and ask a child which form it matches. Child places the card beside the form. Repeat for the other forms. Ask the children to name all the geographical forms they remember by pointing to the cards. Give a three period lesson for all the cards they do not know. Present three at a time, isolated at the bottom of the mat. Continue according to the children’s interest. Replace materials when finished.

Exercise 1 As in presentation, continue until children know all the forms using the cards only. Review cards previously learned.

Exercise 2: Children can draw their own land and water forms. They may label their drawing if appropriate and/or include the flora and fauna.

Purpose: To associate the three dimensional form with the pure concept presented on the card.

Age: 4+ years

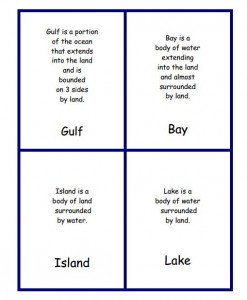
Land and Water Definition CardsAnother extension of this work is teaching your children not only the name of the land or water form, but also the proper definition of them.   Again, I found the cards free!  This time from Montessori Materials.  

LAND AND WATER FORM DEFINITIONS (Lesson Presentation) 

Material: Outline maps large enough to show major land and water forms. Use one map for each set of forms. Two colored pencils brown or green for land, blue for water.

Presentation: Invite a child to join you. show the child where the outline maps are located. Start with the map of the world. Use one map for each land or water form. Decide which land or water form you are going to look for, i.e. island, and select the appropriate pencil crayon. Say that you are looking for all the major/large examples of islands. Child locates first example. Show how to color it in carefully. Child locates next example and colors it in. Have him point out the other examples which he will color in. Child proceeds for as long as he wishes. When finished, label the map according to its geographical form, i.e. Islands.

Exercise 1: As in presentation, repeat the process for all geographical forms.

Exercise 2: Child may use maps of continents or his own country, as long as he knows the appropriate language.

Purpose: Identifying major land and water forms world-wide.

Age: 4.5-5 years

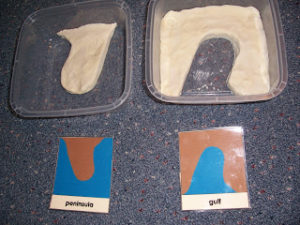
DIY Land and Water TraysMany families make their own land and water form trays. These are usually plastic and some form of clay. Here is one set from Shannon’s Sharings and they are great!  These are  adding another dimension (water) to this already very tactile work. 

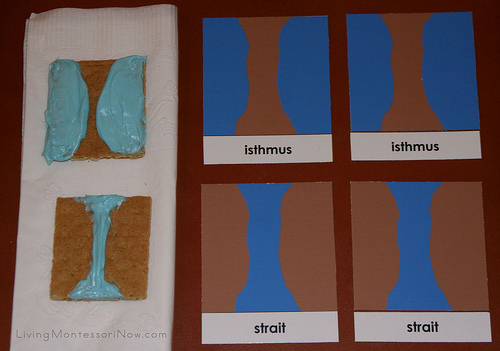
And, believe it or not, there are still more extensions to this one activity! One that I particularly love (and will be doing with the boys) is graham cracker land and water form snacks that Deb Chitwood presented on her website.  Just use food coloring with white icing to make the water and the brown of the graham crackers makes the land. So fun and yummy!  

Edible Land and Water Forms


Well, I hope have enjoyed seeing just one of the many reasons why we chose Montessori as the foundation  for our children’s education.  As they reach middle school and are abstract thinkers, their educational materials tend to be more traditional.  Although, as you see on my homeschool blog, we still lean heavily towards hands-on learning!  

Until next time… 


If you like this post, please share it!

  • Share on Facebook (Opens in new window) Facebook
  • Share on Pinterest (Opens in new window) Pinterest
  • Share on X (Opens in new window) X
  • Print (Opens in new window) Print
  • More
  • Email a link to a friend (Opens in new window) Email
  • Share on Reddit (Opens in new window) Reddit
  • Share on LinkedIn (Opens in new window) LinkedIn
  • Share on Tumblr (Opens in new window) Tumblr

Like this:

Like Loading…

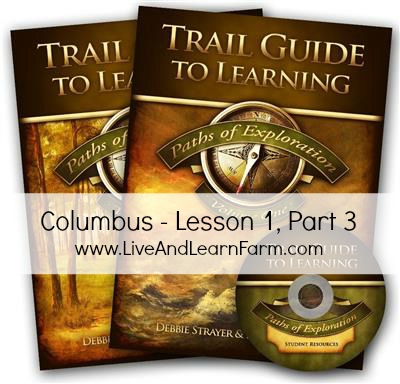
Paths of Exploration Columbus Lesson 1 Part 3

June 30, 2013 By: Trish Corlew5 Comments

POE Columbus Lesson 1 Part 3


Disclosure

As you know we started Paths of Exploration by Trail Guide to Learning for our summer all-inclusive curriculum experiment.  This post relates to Paths of Exploration Columbus Lesson 1 Part 3.  If you missed lesson 1, part 1, you can find it here. and Lesson 1, Part 2 you can find here.  Lesson 3 focuses heavily on map and globe work.  We loved Part 3.  So, lets jump into the lesson.

Section A. Copywork/Dictation.  Focuses on “Language Skills.  As in Part 1 and 2, it is from the original poem, A Journey of Adventure, written by the late Debbie Strayer.  Today we had two areas the boys wanted to explore on the globe:  Cathay and Venice.  We never did find what Cathay, but they did find Venice!  Both words ended up on their spelling list.  

Section B: Reader. Focuses on  “Language Skills”.  There was more reading from our required books. Section B and Section C still seem very cumbersome and clumsy.  These sections seem redundant to me.  But, we will continue to do both through Columbus and re-evaluate before we hit Jamestown.  

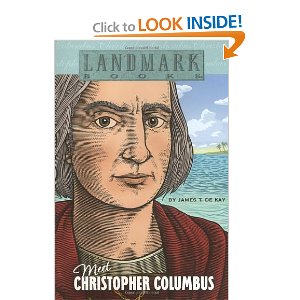
Meet Christopher Columbus

Meet Christopher Columbus


Section C: Read-Aloud and Discussion. Focuses on “Language Skills”.  Today the boys discussed a section from our read aloud regarding what happened during a storm.  This

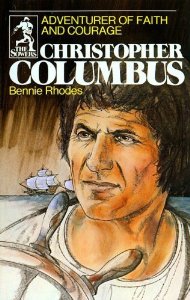
Christopher Columbus

Christopher Columbus

section asked for them to describe the storm.  Our Institute for Excellence in Writing really prepared them well for this section.  They are very familiar with “dressing up” a writing with descriptive adjectives. Again, There are two required reading books about Christopher Columbus. One is Meet Christopher Columbus and the other is Christopher Columbus.  

Section D: Word Study. Focuses on “Spelling, Phonics and Vocabulary”.  In this section, syllables were discussed.  They discussed some of the tried and true ways of identifying each syllable in a word, like clapping them out.  This is also how All About Spelling teaches syllable identification as well.  For those that love using hands-on learning to teach a concept, here are some free cards to print from Montessori For Learning to divide up words by their number of syllables. Have your students clap out the word.  I have to tell you, Paths of Exploration introduces a new way of teaching syllables to young students.  I haven’t seen it recommended by any other organization so I won’t share this technique in this post (you need to buy the curriculum because I would consider this proprietary information 🙂 ), but let me assure you it is really smart and so simple!

In this section the boys also reviewed what “re” means.  We discussed a section from our read aloud that used a “re” word and what the word meant.    

re equals again 

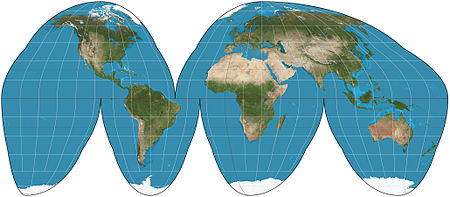
Section E:  Geography.  Focusing on “History and Thinking Skills”. Today we discussed Marco Polo and traced his land route to China.  We looked at the water routes to determine if the water routes were quicker or not to China.  This was a great way to help them actually use the globe to think.  We used it as an opportunity to discuss various ways of looking at routes and the various types of maps and globes.  We will be making a Goode’s Interrupted Projection Map using an orange next week.  Stayed tuned for that project, I will make a new post for it!  


Goode map


Section F:  Writing with a focus on “Language Skills and Writing”.  We discussed Journals and what journals are used for in relation to an explorer.  As part of their study, they had to write a journal entry for today.  I am actually thinking of adding this as a rest of the summer project.  They used to journal when they were little (I would write what they dictated to me about their day).  They still love going back and reading them.  I think I have talked myself into it!  

Section G: Independent Reading.  As we discussed in parts 1 and 2, we modified this a bit so the boys will focus their reading on anything about Christopher Columbus for 30 minutes on Mondays, Wednesdays and Sundays. I wrote a post to share what our library resources are, you can find it here. I am adding our favorite map and globe books below. These books will be a part of what they will read during their independent reading times.  

Maps and Mapping                      Maps and Mapmaking

Mapping skills           How to draw maps and charts

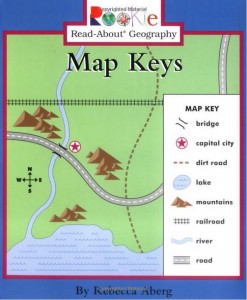
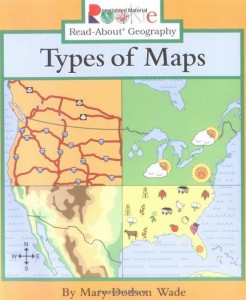
Map Keys Rookie Read about Geography          Types of Maps Rookie Read About Geography


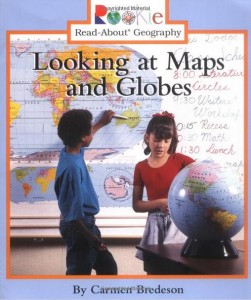
Looking at Maps and Globes Rookie Read about Geography


In this particular lesson POE did NOT teach some points that would have been very beneficial and go right along with this study, especially for young students. I’m going to list some items below that would be great to go with Part 3 since it is so Geography oriented with a focus on land and water. Pick and choose the works that work best for you and your homeschool.  These are the activities that we added to Part three, although most of these are review.  I’ll be creating a new post to show you how we used some of these:  

  • World Oceans Free 3 part cards from Montessori Etc (BEAUTIFUL)!!
  • Continent and Hemisphere Study Free, also from Montessori Etc. 
  • Sailing Ship Vocabulary 3 part Cards  Montessori Print Shop (Not free but very inexpensive)
  • Types of Clouds 3 part Cards, again, from Montessori Etc. and Free
  • Geometric Solids 3 part cards from Montessori Etc and Free.
  • Land and Water Forms 3 Part Cards from the Helpful Garden and are Free.  Here is the post about how we use this activity.  
  • Latitude and Longitude 3 part Cards from Montessori For Everyone and free.

I hope pulling these books and the hands-on lessons together for each part of the Paths of Exploration lessons are a blessing for you and your children! If so, please leave a comment of encouragement. Sometimes, us bloggers feel like we are writing and nobody is reading it! So, it is really so nice to get comments that let us know you are reading what we post. If you have other suggestions on activities that you are using for this lesson, please let me know that too!

Until next time…
 

If you like this post, please share it!

  • Share on Facebook (Opens in new window) Facebook
  • Share on Pinterest (Opens in new window) Pinterest
  • Share on X (Opens in new window) X
  • Print (Opens in new window) Print
  • More
  • Email a link to a friend (Opens in new window) Email
  • Share on Reddit (Opens in new window) Reddit
  • Share on LinkedIn (Opens in new window) LinkedIn
  • Share on Tumblr (Opens in new window) Tumblr

Like this:

Like Loading…

Eat Your Way Around the World – Egypt

June 21, 2013 By: Trish Corlew4 Comments

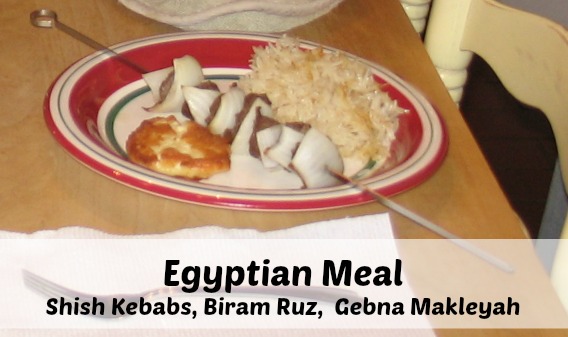
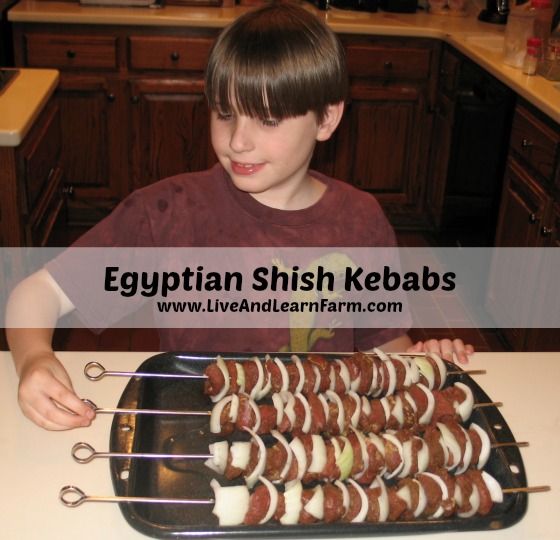
Gebna Makleyah, Biram Ruz, Shish Kebabs

Disclosure

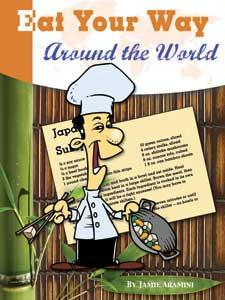
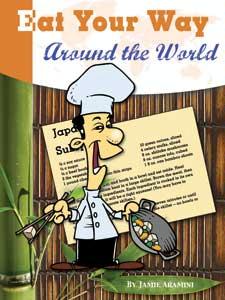
This is such a fun way to study a culture … explore their traditional foods!   We are continuing with our Summer intensive studyat Your Way around the World of Paths of Exploration.  We are in the Columbus unit and just studied the various countries Columbus visited on the Mediterranean Sea and we are starting to study about his sailing experience outside the Med.  One of the required reading books that is part of the Paths of Exploration curriculum is Eat Your Way Around the World, by Jamie Aramini.  


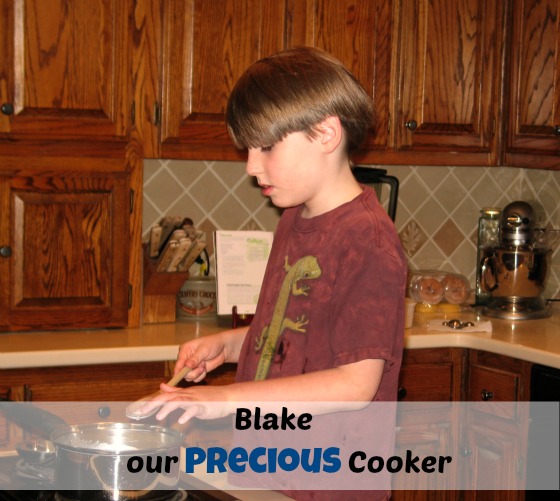
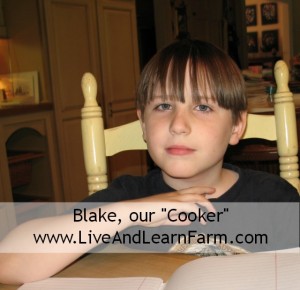
Blake our "Precious" CookerThere are three Egyptian recipes in the cookbook.  Gebna Makleyah, Biram Ruz, and Shish Kebabs. We made all three recipes for our Egyptian Study meal.  Since Blake is the self-proclaimed, cooker, he was in the kitchen with me.  I call him my “precious cooker” (instead of pressure cooker)!  When he was little, I would ask him what he wanted to be when he grew up… he would always tell me “a cooker”!!  Needless to say, he gets as much experience in the kitchen as he wants! 

The Shish Kebabs were spicy!  We love cumin, cinnamon, cloves, ginger, onion, garlic, etc… and we eat these spices regularly!  But even for us, this was a bit of a stout flavor.  We will cook this recipe again, but we will absolutely tone it down!  It could have used more garlic and less cumin (in my opinion).  The flavor was great just too much of it.  Gage noticed how filling this meal was.  I wonder if the level of spiciness has any relationship at all to how quickly you feel full?  Something to explore!

Egyptian Shish Kebabs

We LOVED the Biram Ruz!  It is a long grain rice dish with whole milk and heavy cream… no wonder we like it, huh!?!  Seriously didn’t expect to like this one.  But we all loved it.  It was pretty bland considering the spiciness of the shish kebabs… maybe this is intentional to counter that extreme spiciness?  Either way, it was quite tasty!  

Finally, we made the Gebna Maleyah.  These surprised me.  Number one, they were surprisingly hard to make, and number two theyEgyptian Making Gebna Makleyah tasted great.  I’m not a huge Feta Cheese fan, but these may have changed my mind.  These were supposed to be cheese “balls”, as you see in the plate picture at the top of the article, they look more like pancakes.  The boys didn’t like this flavor at all (no surprise there)!  

So to wrap up our thoughts, the Egyptian meal was good, but not great.  We will try modified versions of these again… except maybe the Gebna Makleyah (the Feta Cheese dish).  They boys really did not like it, I guess that is a mature taste. Thinking about this stout flavored meal, I bet it would be FABULOUS with a nice Cabernet!  I’m pretty sure this will be a Shabbat meal soon! 

Until next time…


If you like this post, please share it!

  • Share on Facebook (Opens in new window) Facebook
  • Share on Pinterest (Opens in new window) Pinterest
  • Share on X (Opens in new window) X
  • Print (Opens in new window) Print
  • More
  • Email a link to a friend (Opens in new window) Email
  • Share on Reddit (Opens in new window) Reddit
  • Share on LinkedIn (Opens in new window) LinkedIn
  • Share on Tumblr (Opens in new window) Tumblr

Like this:

Like Loading…

Hula Hoop Woven Rugs

June 19, 2013 By: Trish Corlew7 Comments

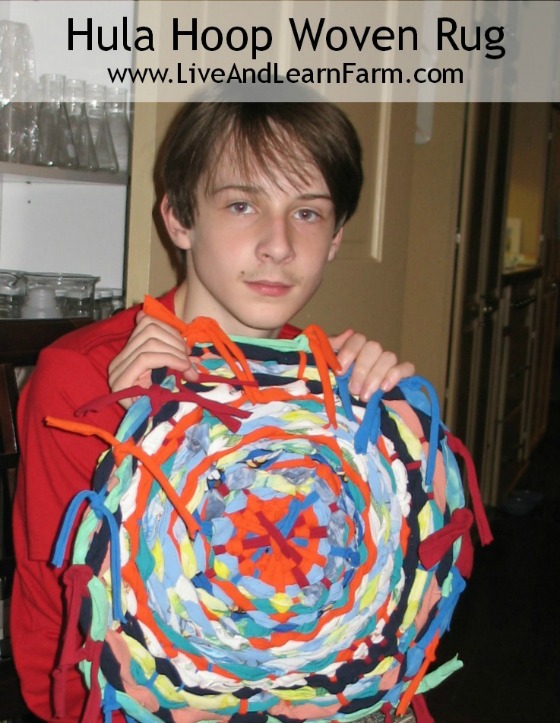
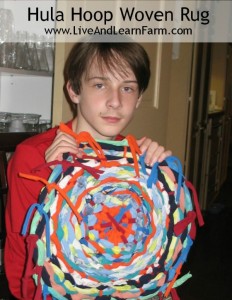
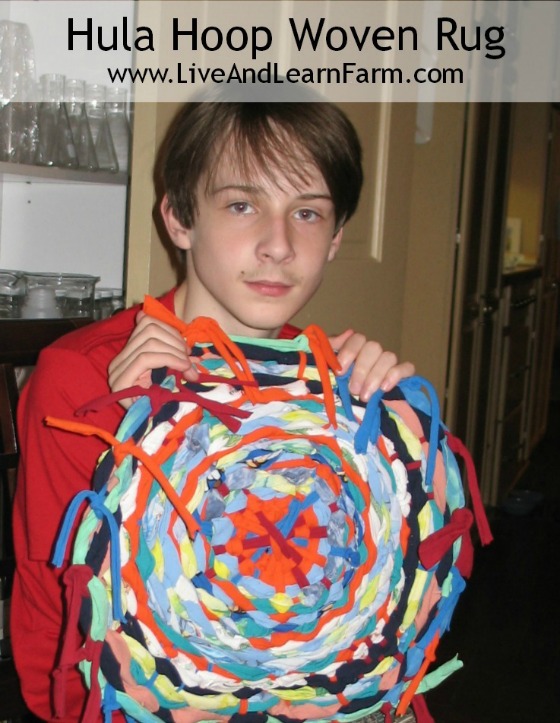
Hula Hoop Woven Rug by Chase

Disclosure

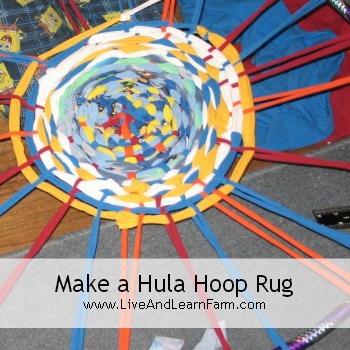
As we discussed in our Paths of Exploration Columbus Unit Lesson 1, Part 2 post, we are discussing Bazaars and the items that you can find for sale in these open-air markets.  We have already mentioned spices being one of the items the explorers liked to bring back.  Another item the POE curriculum discusses is woven goods. They suggest the students design rugs on graph paper, which is fun and the boys are doing … but you know how we like to homeschool…. hands-on as much as possible! Therefore, we decided to create some of our own woven products!  For this project, we got our inspiration from Disney Family Fun, where they created Hula Hoop Woven Rugs.  

My boys have always enjoyed weaving and knitting (I guess from their Montessori school days), so we decided to try this one!   I hope you enjoy reading about our project, but I hope you try it too!  Put a link to your post in our comments if you do one!! I went back and looked at the Disney link after finishing our rugs. I just realized they only showed pictures of the rug being woven and before it was cut off the hula hoop.  None of the finished product?  I think I know why!  I’ll explain later.  

I guess it is a good thing that I had not gotten around to selling or donating the pile of old T-shirts and pajama tops, because that is exactly what we used to create these fabulous woven pieces of art!  We actually even had the hula hoops too, so this project didn’t cost much to do!

The oversized (hula hoop) looms and loops of T-shirt material make these rugs very easy to do for beginning weavers. It is a great way for them to learn the basic hoop weaving technique by creating a colorful rug to either hang or use as a rug. There are a few terms you need to know for this project: the warp is the material you string on the hula hoops, the weft is the material you weave.

The Materials List:  

  • Sharp Scissors
  • A Ruler
  • About a dozen colorful T-shirts (we used mens xl large for the warp material and old t-shirts the boys had outgrown for the weft material)
  • 30-inch hula hoop


The Directions:

Hula Hoop Rug cutting

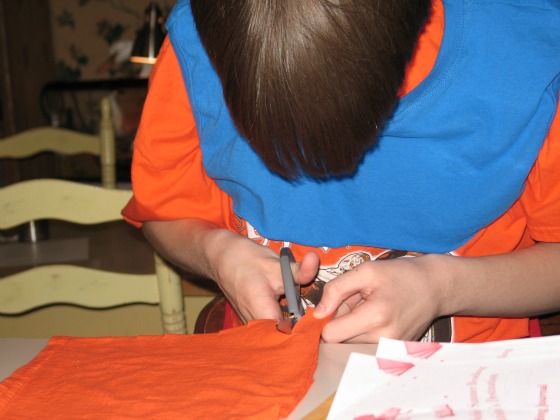
1.  For the warp, cut 1-inch-wide loops from the bodies of several tees (we found a men’s xl worked best on our 30-inch hoop), we did not use the hem and stopped right under the arms.  You’ll need 11 loops per hula hoop rug.  For the weft, cut at least 50 loops from the remaining shirts (we used more on some rugs and less on others).  

2.  Stretch one warp loop over the hula hoop.  You don’t want it loose, nor do you want it tight.  It should fit snugly but not be too taunt.  

3.  Add a second loop, perpendicular to the first (Think of a + sign)

4.  Repeat, filling in the spaces in between, until all 11 loops are in place. (And if you are like me, you want to know if it needs to be 11, Yes it needs to be 11 loops, or another odd number)

5.  Push together two warp loops at the top of the hula hoop (just the two at one end, not both ends). This creates an odd number of warp spokes in your wheel, which allows the over/under pattern of the weft to alternate with each new row.  

6.  Secure the first weft loop to the center of one of the warp spokes (we used the doubled spoke from step 5) by wrapping it around the warp and then looping it back through itself.

How to Make a Hula Hoop Rug

7.  Begin weaving the weft over and under the warp spokes, forming a tight spiral. Not too tight though.You are treating both parts of each warp spoke as a single unit, weaving over or under the two together. As you work, push the weft material toward the center of the hoop and keep it just snug. If you pull the weft too tight, the rug will develop lumps or bends. When you reach the end of the piece of weft, add a new loop by threading it through the end of the first and back through itself.

8.  When your rug is about 8 inches across, begin treating each warp spoke as two individual strips instead of a single unit, weaving over or under each strand instead of going over or under the doubled spoke. This increases the number of warp spokes, improving the structure of the project. When you get to the two warp spokes that you pushed together at the top of the loom, separate them. Treat one of the spokes as two individual strips, but continue to treat the other as a single spoke. This maintains the odd number of warp spokes.  We did this step, but I think we will try another rug without this step and just see how it turns out.  

9.  When the rug is the size you want, but no closer than 5 inches from the edge of the hula hoop, snip open your weft loop.
Tie the ends around a warp spoke, and tuck the ends into the rug.    

10.  Cut the warp spokes off the hoop one at a time.  

11.  Tie the ends in pairs, then trim them to make a fringe or tuck them back into the rug.


Hula Hoop Rug Blake


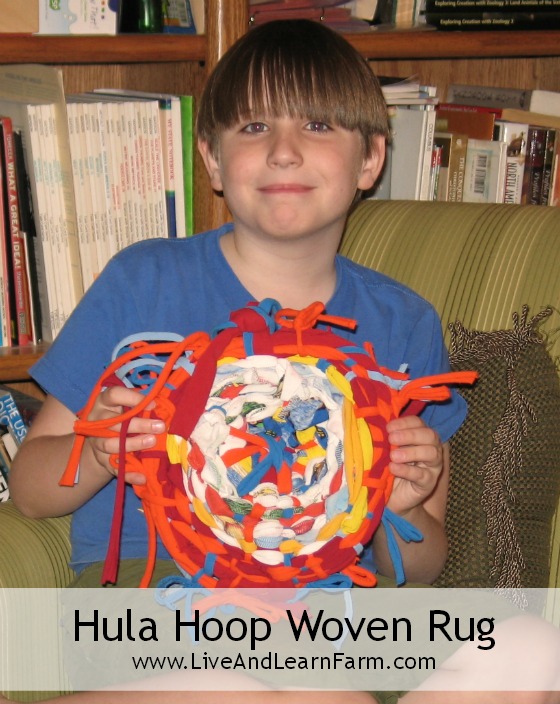
Blake lost interest in making his rug about half-way through, so his rug is the smallest. But he did a great job and he enjoyed it! We had a smaller hula hoop that we should have used for him. Next time! He is hanging his on his wall.  


Hula Hoop Rug by Chase


Chase ended up with the biggest rug. He was the one that was sure the whole way through weaving that he was doing something (or everything) wrong. He loves his and his turned out just great! He wants to make another one now that we half-way know what we are doing! I agree!  


Hula Hoop Hat Gage

That’s my Gage. He can have a good time no matter what is happening around him. His rug was very tight in the center (maybe too tight), but once we started dividing the warps and weaving the two pieces individually, it seemed to change the way the rug would lay.  So, this is why we will skip step 8 next time to just see what happens. Gage is so creative, while weaving his, he would make the hula hoop go back and forth and said the rug was a speaker vibrating. He decided his was a better rag hat than a rug… But Gage loved his too, had a great time weaving and always has such a great attitude!  He wants to weave another one too!

Like I said earlier in the post, when I looked at all the other posts online where people were doing these rugs, I could not find one that showed the rug after it was cut off the hula hoop. I think that is ridiculous. Even if it didn’t turn out like you hoped, still show the end result! Why do so many people want us to believe their lives are perfect and everything they touch turns out exactly as planned? I think way too many people focus on perfection and completely miss the sheer enjoyment of the process and just doing it!  Mistakes are windows to discovery!  Journeys are where we find life!  When we leave for vacation, it starts when we leave our driveway, NOT when we arrive at the beach (or wherever we are going for vacation)…  We purposefully choose to live our lives enjoying the journey… and it is a choice!    

So there you have it!  We had fun and will make another rug soon (maybe even this weekend)!  If you make one, please share a link to your post in the comment section.  

This post is linked at Think Pink Sunday at Flamingo. 

Until next time…. 


If you like this post, please share it!

  • Share on Facebook (Opens in new window) Facebook
  • Share on Pinterest (Opens in new window) Pinterest
  • Share on X (Opens in new window) X
  • Print (Opens in new window) Print
  • More
  • Email a link to a friend (Opens in new window) Email
  • Share on Reddit (Opens in new window) Reddit
  • Share on LinkedIn (Opens in new window) LinkedIn
  • Share on Tumblr (Opens in new window) Tumblr

Like this:

Like Loading…

Paths of Exploration Columbus Lesson 1 Part 2

June 18, 2013 By: Trish Corlew2 Comments

Columbus Lesson 1 Part 2


Disclosure

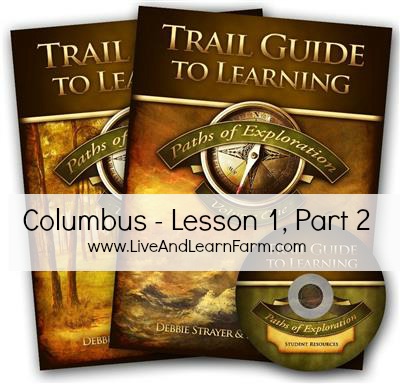
As you know we started Paths of Exploration by Trail Guide to Learning for our summer all-inclusive curriculum experiment.  As we have discussed many times, we homeschool with a very hands-on (Montessori-ish) approach to education, so we are using lots of  supplemental resources to augment this course.  Our plan is to do the entire Paths of Exploration as an intensive study over the summer and early fall!  This post is about Paths of Exploration Columbus Lesson 1 Part 2.  If you missed lesson 1, part 1, you can find it here. 

Section A:  Copywork/Dictation.  Focuses on “Language Skills and Thinking Skills”.  As in the Lesson 1, it is from the original poem, A Journey of Adventure, written by the late Debbie Strayer.  We are enjoying this work and we are finding more vocabulary words to add to our list.  We work on these vocabulary words between classes.  

Section B: Reader. Focuses on  “Language Skills” skills.  More reading from our required books. 

Section C: Read-Aloud and Narration. Focuses on “Language Skills and Thinking Skills”.  Today the boys had to retell specific passages of portions I read in their own words.  Again, There are two required reading books about Christopher Columbus. One is Meet Christopher Columbus and the other is Christopher Columbus.  

Meet Christopher Columbus
Christopher Columbus

Section D: Word Study. Focuses on “Spelling and Phonics”.  The words in Part 2 are the same vocabulary words in Part 1 and are too easy for even my nine year old. The boys “tested” (I asked them to spell each of these words individually and they all could) out of these and moved into more challenging words.  We did the new part of the section which provided the definition and you had to pick the word that best fit.  But, really it is still too easy.  Here are the words I added, if you would like to put some challenge in.  Unfortunately, they do not come from the reading… but we have used each of these words in our homeschool this past year.    

  1. frighten
  2. airtight
  3. birthright
  4. blight
  5. brighten
  6. delight
  7. enlighten
  8. insight
  9. knight
  10. nightfall
  11. plights
  12. weeknight

Another new part of Section D Word Study was to study the past tense of words. We were given words that we had to find the past tense from the read-aloud books from Section C.  This is still terribly basic, for middle schoolers especially.  Here is a hands-on work that could be used for a more advanced study of the tenses of verbs for the older students and a more well-rounded, hands-on lower elementary work can be found here.  We also did a study of the word “strange” and how it was used in the reading. The boys provided synonyms for the word according to how it was used in the different texts.  They all got it and used the word “strange” and its synonyms appropriately.  This section may end up being skipped altogether.  

Also in this section we discussed various cities and if they are situated on the Mediterranean Sea.  Again, I have no idea why this is in Section D when Section E is Geography.  But the boys absolutely love the geography aspect, so I’m not complaining!  

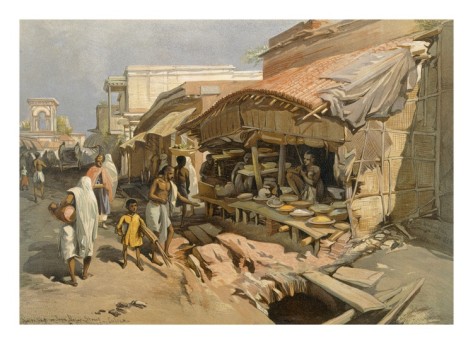
Section E:  Geography.  Focusing on “Thinking Skills”.  We studied what a bazaar is.  There are some discussion questions, but again, they are not terribly thought provoking.  We decided to take this section deeper.  We discussed what we might encounter at a middle eastern bazaar, the things you might see, hear, and smell.  We talked about the fact that they are usually open-air markets and what weather elements they might encounter and wondered aloud how they would protect the items they were selling… such as spices.  Speaking of spices, we wanted to experience what it might be like to walk into the spice tent at a bazaar.  Research shows the more senses you engage when learning new material, the more likely it will be remembered.  We made it a game, “Name that Spice Game“.  Be sure to check out that post.  It was fun (but there is a warning in that)!  

Native shop in a Calcutta Bazaar, 1867, William Simpson

Native shop in a Calcutta Bazaar, 1867, William Simpson

Section F:  Art. In this section we discussed how many of the items at a bazaar are handmade.  The text showed some rugs and discussed their patterns and where you might find them.  Then the boys were to draw their own.  This was fun.  We looked at many google images of African rugs!  They are so beautiful and vibrant!  

NA Rug 5
NA Rug 4
NA Rug 3
NA Rug 2
North African Rugs


Hula Hoop Rug by ChaseBut, again, we like to take it deeper so we creating some of our woven products. We made a Hula Hoop Woven Rug!  You can find that post here.  We will be making an art hanging.  Be sure to check those posts out as well, I will come back and link them to this post as well.  

If you are looking for something a little less bulky, here is another weaving using a paper plate and yarn.  The blogger’s three year old daughter was able to do this one!  It is so precious!  


Eat Your Way around the WorldOne final piece of the Geography study that will always go over extremely well in my house is the cooking piece.  Remember Eat Your Way Around the World by Jamie Aramini is one of the required books.  We are to experiment with making dishes from Egypt and Morocco this week.  I will do another post or two about them!  

Section G:  Independent Reading.  As we discussed in Part 1, we modified this a bit so the boys will focus their reading on anything about Christopher Columbus for 30 minutes on Mondays, Wednesdays and Sundays. I wrote a post to share what our library resources are, you can find it here.  

Thoughts thus far… there seems to be a lot of inconsistency.  I expected the sections to stay the same throughout the Unit… they don’t. I’m not sure this is a big deal, but it is not what I would have expected.  Also, I don’t understand why there is a section called geography, but some geography work is listed in other sections. Again, it just makes it inconsistent and a bit confusing… but NOTHING that you can’t work around or overcome. Thus far I can say I’m pleased with this product.  We will continue to augment the lessons with a more hands-on approach, but I am pleased and am really liking the idea of an all-inclusive curriculum.  I’ll give you more detailed feedback as we get further into the curriculum… but I’ll sum it with “so far, so good”.  

I hope the additional hands-on lessons are a blessing to you and your children!  Please leave me a comment and let me know what you are thinking of this series… and if you decide to purchase it and use it… let me know!  I’ll be creating a blog roll for all of us with posts about Paths of Exploration sometime this summer!  

Until next time…
 

If you like this post, please share it!

  • Share on Facebook (Opens in new window) Facebook
  • Share on Pinterest (Opens in new window) Pinterest
  • Share on X (Opens in new window) X
  • Print (Opens in new window) Print
  • More
  • Email a link to a friend (Opens in new window) Email
  • Share on Reddit (Opens in new window) Reddit
  • Share on LinkedIn (Opens in new window) LinkedIn
  • Share on Tumblr (Opens in new window) Tumblr

Like this:

Like Loading…

Orienteering Scavenger Hunts Using a Map and Compass

June 17, 2013 By: Trish Corlew17 Comments

Orienteering Scavenger Hunts

Disclosure

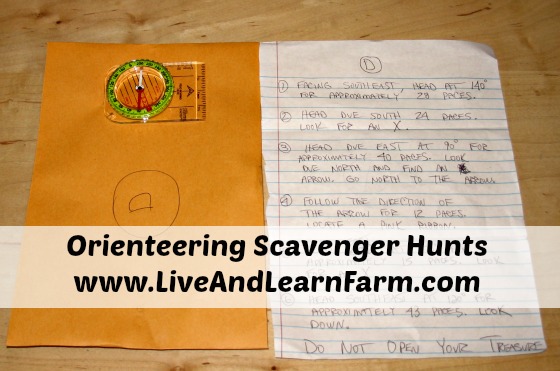
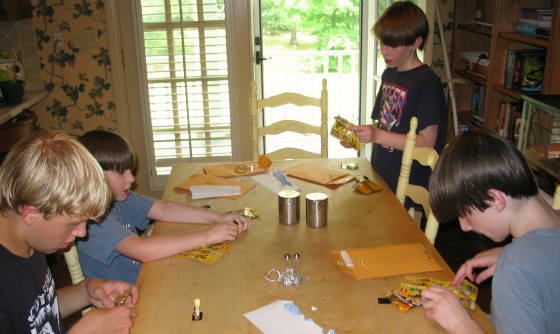
This past weekend was Father’s Day and my middle son, Gage’s birthday.  What did we do?  We all learned how to use a compass! How? By Orienteering Scavenger Hunts using a map and compass. As you probably have already read, in our Paths of Exploration Columbus Unit: Lesson 1, Part 1 study, we learned about the compass. We did all the worksheets for the compass in our POE student notebook, we printed out a great compass work from Montessori Print Shop. We even made  our own compass… but we didn’t learn how to use one, especially when using bearings and degrees.  That’s where orienteering comes into play. On Father’s Day, my hubby David was busy setting up a scavenger hunt for the boys and their best friend, Austin!  Each received their own packet, which contained, a compass and directions to find a treasure at the end of their individual courses. 

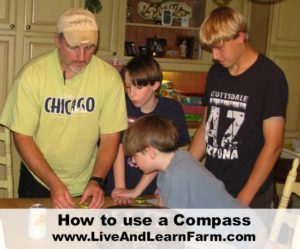
How to use a Compass LessonWe started inside with a quick lesson on how to use a compass.  I found some great instructions here and here.  But, that inside lesson was not as effective as we thought it would be.    

Once outside, they each opened their packets and read through their direction. After studying their packet a minute or two, they all decided they needed another lesson that was practical instead of theoretical … good thing that is our educational philosophy. In our homeschool and on our farm, it’s all about hands-on learning, we learn it while doing it!

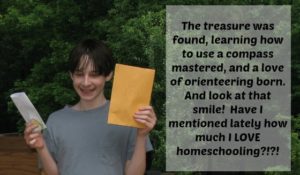
Chase was the first to finish!  They all loved this project and each found their treasure Finished Firstsuccessfully. More importantly, they loved learning how to use a compass and hunting for an object … see the smile on Chase’s face! For those curious, here is the compass we got for each of the boys.  They were not expensive and Silva is highly regarded in the orienteering world.  They all worked well and were easy to use and read.  

This was their treasure they found at the end of their scavenger hunt.  You don’t know what mini-figure you are getting and could find a Mr. Gold in their packet. (No Mr. Golds were in these though.)

Orienteering Treasures Found


Did you know Orienteering is considered a competitive sport? Here is a link to one of the Orienteering sites to teach you more about this fun sport. There are many orienteering teams around the US too, but unfortunately, none in TN or MS.  Here is a link to see if they have one in your area.  If you decide to do this with your children, please post a link to your post below!  The boys LOVED the scavenger hunt and my hubby loved setting up the course!  We will be doing this again and soon!  Here are a few more pictures of the boys in action:  

Geography – Orienteering

One final note, we learned today that one of the authors of Paths of Exploration, Debbie Strayer passed away over the weekend.  Our thoughts and prayers are with her family and the good folks at Geography Matters!!! 

Until Next Time…


If you like this post, please share it!

  • Share on Facebook (Opens in new window) Facebook
  • Share on Pinterest (Opens in new window) Pinterest
  • Share on X (Opens in new window) X
  • Print (Opens in new window) Print
  • More
  • Email a link to a friend (Opens in new window) Email
  • Share on Reddit (Opens in new window) Reddit
  • Share on LinkedIn (Opens in new window) LinkedIn
  • Share on Tumblr (Opens in new window) Tumblr

Like this:

Like Loading…

Name that Spice Game

June 17, 2013 By: Trish Corlew4 Comments

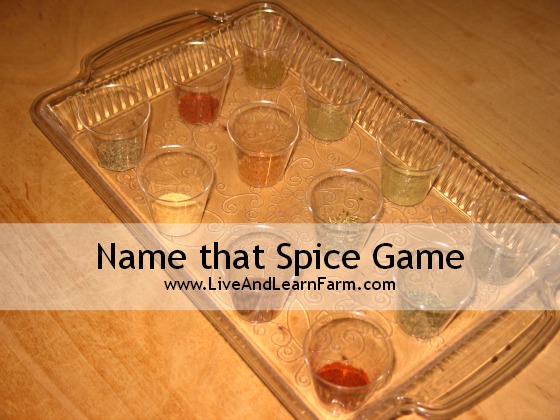
Name that Spice

Disclosure

Can you imagine how fabulous (and pungent) it would be to walk into a spice tent?  As you know, we are hands-on (Montessori-ish) Homeschoolers, so we decided to create a “Name that Spice Game” to experience that blend of spices smell on a small scale. In Lesson 1, Part 2 of our Paths of Exploration Columbus Unit, we studied about ancient open-air bazaars, such as the ones you might find in Middle Eastern countries today.  Explorers liked to bring home spices from bazaars to sell in their own countries.  

This game is a spin-off of a Montessori work, Scent Jars. If you have younger students that have not used this activity, I highly recommend using it with this lesson first.  Remember, all Montessori works are teaching a life-principle or concept that is much deeper than the obvious work itself.  For example, for the smelling jars, your child is not just being taught how to be able to identify a specific spice smell, the lesson’s goal is to help your child become aware of scents in their environment.  Another reason younger students should do the traditional work can be found in the WARNING at the bottom of this article.  

Over the last several years, we have studied why our olfactory system (our sense of smell) is important to us in our various Apologia Textbooks: Human Anatomy and Physiology, an elementary study and human anatomy is the entire second half of General Science, the first middle school science book.  The sense of smell is a way for us to gather messages about the environment around us. So, literally, with each breath we take, we are sampling our environment for smells that would indicate various dangers, food, or other individuals, etc.  

Since my boys are older and have already had the luxury of using the Montessori primary curriculum (including the smelling jars), we made an extension for our purposes.  Here is a list of spices you can use, the spices that are in bold type are the ones we used.    

  • Allspice
  • Basil
  • Bay Leaf
  • Black Pepper
  • Cayenne pepper
  • Celery Seed
  • Chili Powder
  • Chives
  • Cilantro
  • Cinnamon
  • Clove
  • Garlic
  • Ginger
  • Lavender
  • Mustard Seed
  • Nutmeg
  • Oregano
  • Paprika
  • Parsley
  • Peppermint
  • Poppy seed
  • Rosemary
  • Sage
  • Spearmint
  • Thyme


Materials:

12 Spices

Party Cups (Read the Warning at the bottom of the post)

Tray

Notebook paper

Pencil

Stickie Notes 


Directions:

1.  Choose 12 different spices.  

2.  On the bottom of each cup, prior to pouring in the spice, number the cups 1-12, with a sharpie.  

3.  Pour a small amount of spice into one cup.  Place a stickie note on the spice jar with the number that corresponds to number on the bottom of the cup that contains that spice.  

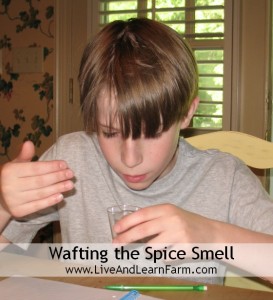
4.  Share one cup at a time and request that your children use their hand to wave the smell toward their nose.  It is called Spice Game Waftingwafting and here is a demonstration.  You will see why you should not put your nose over the cup and sniff when you read the warning at the bottom of this article.  

5.  Have your children number their paper 1-12.  As they finish exploring each spice, ask them to write the name of the spice they think each smell is.  I did not blindfold my boys, but this would narrow the senses being tested down to just their sense of smell (and, in the process, protect those eyes)!  Since I did not blindfold, my boys could see the color, texture, and features of each spice, which did make it a little easier)!

6.  Once your children have explored all 12 spice scents, reveal what each spice is, starting with #1. 

Spice Game Blake I was a little bit surprised with the results.  Blake loves to cook and is in the kitchen with me cooking most meals.  So, I expected him to do extremely well (and he did, 10 out of 12 he got right).  But Gage came in a close second and he rarely cooks. However, Gage has always seemed to have heightened senses, so maybe this was just further confirmation of that theory.  Chase was a distant third!  He needs more time in the kitchen cooking, apparently!  

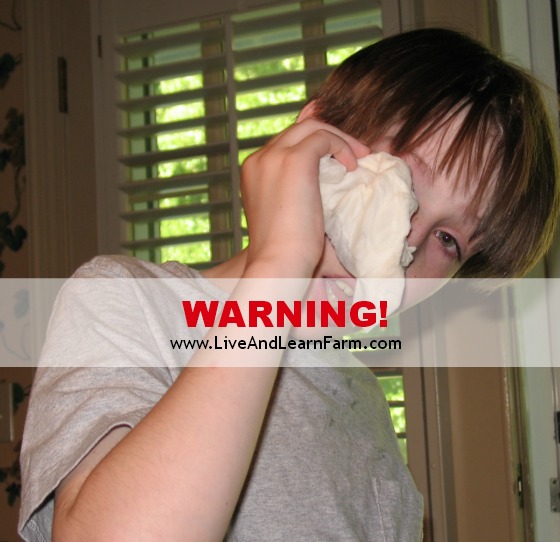
Spice Game Warning

WARNING!!  When dealing with anything you are smelling, there is always a chance of getting too strong a whiff or getting it in your eyes. Therefore, I’ve always been taught and taught my boys that to smell an unknown item, you should do so by waving their hand over the item to draw the scent to you (wafting). Well, even with this lesson firmly established and us using this practice throughout this project, Gage, my 12 year old son, on the next to the last spice, got that spice in his eyes, not once but TWICE.  Gage decided he couldn’t smell the spice with just the light scent his hand was able to direct toward his face, so he put his nose over the cup of spice.  Well, he breathed into the cup accidentally and the Ground Clove flew right into his eyes. I’m still thanking our Father in Heaven it was only Clove… it could have been MUCH worse. So, if you have young children I recommend NOT using open cups with spices.  

See why we named the blog (and our farm) “Live and Learn” Farm? We are always learning…. sometimes, the hard way!  I’m not sure who learned this lesson more, me or Gage!  

Until Next time…


If you like this post, please share it!

  • Share on Facebook (Opens in new window) Facebook
  • Share on Pinterest (Opens in new window) Pinterest
  • Share on X (Opens in new window) X
  • Print (Opens in new window) Print
  • More
  • Email a link to a friend (Opens in new window) Email
  • Share on Reddit (Opens in new window) Reddit
  • Share on LinkedIn (Opens in new window) LinkedIn
  • Share on Tumblr (Opens in new window) Tumblr

Like this:

Like Loading…

11 Must-Have Math Story Books

June 14, 2013 By: Trish Corlew6 Comments

Disclosure

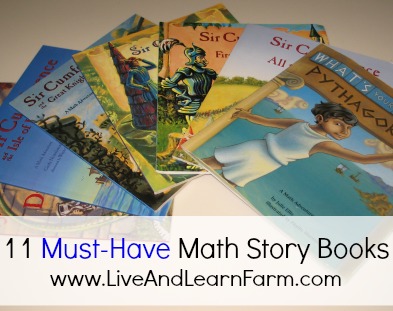
As a homeschooling mom of upper elementary and middle school children, I sometimes struggle to find reading resources that both my 11 Must Have Math Story Booksboys and I love, especially math.  The ones listed below are ones that we all agree are fabulous!  I can not tell you how many times we refer to these stories when remembering equations or concepts! Look at their ratings… we are not the only ones that love them. We read them in lower elementary, but we regularly review them now in upper elementary and middle school.  The stories are fun and silly and most importantly, MEMORABLE, which is the goal, right?  So let’s get to the list of Must-Have Elementary Math Stories!  When you click the pictures below, it will take you directly to Amazon.  


Pythagoras


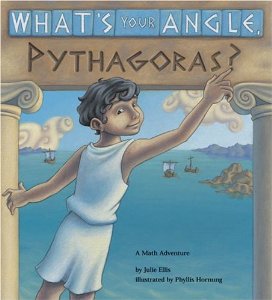
What’s Your Angle, Pythagoras.  Grades 3-5 (although I would say upper elementary 4-6).  A fictionalized look at Pythagoras as he discovers his famous theorem. He is depicted as a curious boy who travels with his father from Samos to Alexandria, where he meets a builder named Neferheperhersekeper, who introduces him to the right angle. He begins to experiment, observing and noting the fixed and unvarying mathematical nature of triangles–right triangles, to be precise. The cartoon illustrations capture the dress, homes, and sailing ships in a warm and clear palette. Ellis includes delightful puns for those who are keen on wordplay. Sticklers be warned: there is lots of dialogue, but in the context of the story, it works well and helps to explain the math. This clear and interesting explanation of the theorem is a wonderful read.


Pythagoras and the Ratios

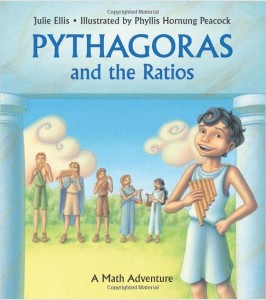
Pythagoras and the Ratios by Julie Ellis carries young mathematicians and musicians back to Ancient Greece where an ever-curious Pythagoras enjoys solving problems so much that he often forgets to finish his chores. Young Pythagoras helps his cousin Octavius tune his new pipes by comparing them to his own and realizing that because they are twice as wide, they also need to be twice as long. Using the same ratios, he ties rocks of varying weight to the lyres of Reyna and Amara so that all of the cousins can play their instruments together for the first time in history.


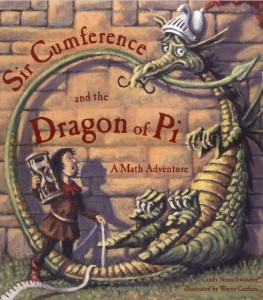
Sir Cumference and the Dragon of Pi

Sir Cumference and the Dragon of Pi.  When Sir Cumference turns into a dragon, Lady Di of Ameter helps him hide, while Radius searches for the cure–the magic number that is the same for all circles.


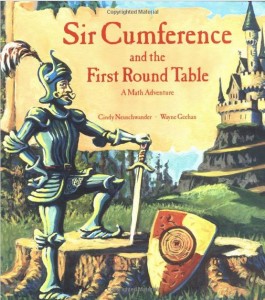
Sir Cumference and the First Round Table

Sir Cumference and the First Round Table.  King Arthur has a Problem! When his knights get together, they sit at such a long table that everyone has to shout to be heard. Can Sir Cumference and Lady Di of Ameter ”measure up” to the challenge of building a better table? Explore the castle, watch a tournament, and ride along with Sir Cumference as he searches for the shape of the future. Noisy knights, a clever carpenter, and a juggling jester all add to the fun.


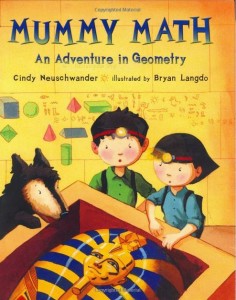
Mummy Math

Mummy Math.   The Zills family is summoned to Egypt to help find the hidden burial chamber of an ancient pharaoh. But when Matt and Bibi get trapped in the pharaoh’s pyramid, they stumble upon an even bigger mystery. With only each other, their dog Riley, and the geometric hieroglyphics on the walls to help them, the twins must use their math skills to locate the burial chamber—and the way out. Luckily, Matt and Bibi know their stuff when it comes to geometric solids, and so will the readers of this adventure in math!


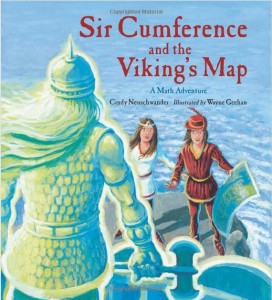
Sir Cumference and the Vikings Map

Sir Cumference and the Viking’s Map.  Xaxon Yellowbearyd was the fiercest Viking warrior of his time. Now a map to his hidden treasure lies in Radius’s and Per’s hands. Together the cousins must decode the strange numbered grid on the map-and figure out the secret of the Viking’s X and Y axes. As bungling bandits pursue them, Radius and Per use coordinate geometry in their quest for “treasure of the greatest measure”.


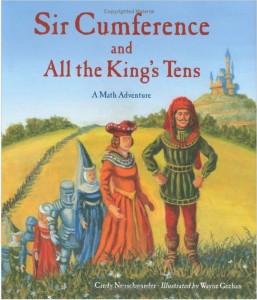
Sir Cumference and all the Kings Tens

Sir Cumference and All the King’s Tens.  Sir Cumference and Lady Di planned a surprise birthday party for King Arthur, but they didnt expect so many guests to show up. How many lunches will they need? And with more guests arriving by the minute, what about dinner? Sir Cumference and Lady Di have to figure out a quick way to count the guests to bring order to the party. Sir Cumference and his friends have been entertaining young and old alike for years as they introduce important math concepts with clarity and humor.


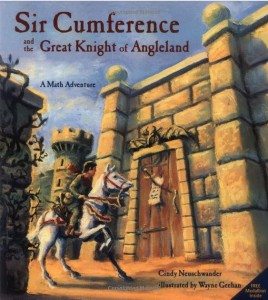
Sir Cumference and the Great Knight of Angleland

 Sir Cumference and the Great Knight of Angleland.  On a quest to earn his knighthood, Radius uses different geometry concepts to find and rescue a missing king.


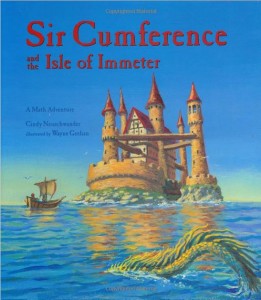
Sir Cumference and the Isle of Immeter

Sir Cumference and the Isle of Immeter. In an adventurous title that teaches math skills, such as finding the area and perimeter of a rectangle and a circle, young Per must figure out how to unlock the secrets of the mysterious island of Immeter.


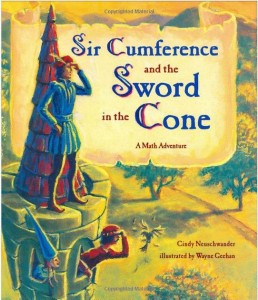
Sir Cumference and the Sword in the Cone

King Arthur and the Sword in the Cone.  King Arthur has issued a challenge. The first knight to find the sword, Edgecalibur, will be the next king. Sir Cumference, Lady Di of Ameter, and Radius help their friend, Vertex, find the sword. 


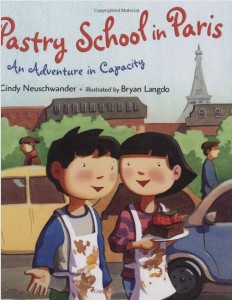
Pastry School in Paris An Adventure in Capacity

Pastry School in Paris.  The Zills family is off to Paris to see the sights and take a class at the International Pastry Academy! In class, Matt and Bibi have to measure liquids to make lollipops. It’s hard work, but knowing about different liquid measurements comes in handy when the Inspector General pays a visit while everyone else is out.  The twins want to help. Will their knack for baking the best-ever brownies and their knowledge of capacity be enough to save the day?


What are your favorites?  Please leave a comment below so we can check them out too!  Until next time… 
 

If you like this post, please share it!

  • Share on Facebook (Opens in new window) Facebook
  • Share on Pinterest (Opens in new window) Pinterest
  • Share on X (Opens in new window) X
  • Print (Opens in new window) Print
  • More
  • Email a link to a friend (Opens in new window) Email
  • Share on Reddit (Opens in new window) Reddit
  • Share on LinkedIn (Opens in new window) LinkedIn
  • Share on Tumblr (Opens in new window) Tumblr

Like this:

Like Loading…
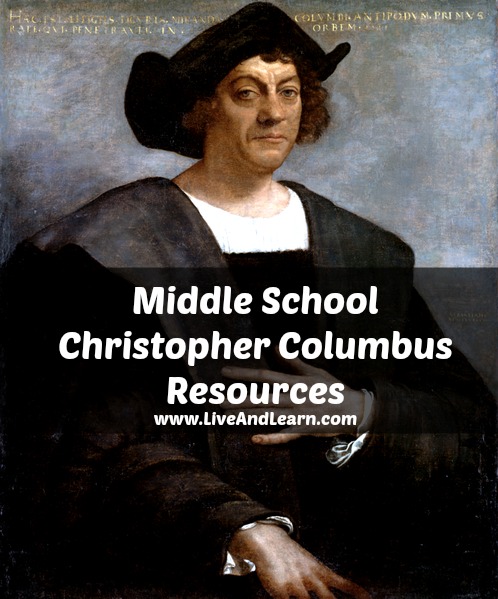
Middle School Christopher Columbus Resources

June 12, 2013 By: Trish Corlew6 Comments

Christopher_Columbus Resources


Disclosure

In my article on Paths of Exploration Columbus Unit, I mentioned our library of resources and decided to list for you what we are using for our upper elementary and middle school Christopher Columbus resources.  These are not all the great books out there, but the ones we need that we don’t have we either purchase on Kindle or we borrow from the public library.  I pray these resources will be a blessing for your homeschoolers! 

First I thought I would share the required reading books (and materials) for the Trail Guide to Learning Paths of Exploration Columbus Unit curriculum.  

Columbus Study

Required Reading / Materials

Meet Christopher Columbus by James T. de Kay 

Christopher Columbus by Bennie Rhodes

Intermediate World Atlas

Eat Your Way Around the World

A Globe

Crayons or Colored Pencils

Paste

A Thesaurus

A Dictionary

Birthday Pictures

Yellow Highlighter or Crayon

Index Cards or Paper

Graph Paper

Magazines, Newspapers, etc.

Large World Outline Map

Carry On, Mr. Bowditch (Middle School Supplement Required Reading)

Our Christopher Columbus Resources 

Christopher Columbus Coloring Book (For drawing not coloring)

Columbus Day by Vicki Liestman Lower Elementary Reading Level

Scholastic Atlas of Exploration by Dinah Starkey Upper Elementary Reading Level

The Usborne Book of Explorers From Columbus to Armstrong Upper Elementary Reading Level

The Value of Curiosity:  The Story of Christopher Columbus a ValueTale by Spencer Johnson, M.D.  Upper Elementary Reading Level

Kids Discover Columbus October 1992 Issue Lower and Upper Elementary 

The Life and Times of Columbus by Curtis International / Portraits of Greatness Series Middle School – High School

Columbus For Gold, God, and Glory by John Dyson / Peter Christopher Middle School – High School

The Conquest of Paradise:  Christopher Columbus and the Columbian Legacy High School

A New History of the United States by William Miller and George Braziller High School

The Oxford History of the American People by Samuel Eliot Morison High School

And just to be sure we study all the recent research on Christopher Columbus, there are quite a few scholars that are now hypothesizing that Christopher Columbus was Jewish.  You can find articles about this in CNN, Huffington Post, as well as Christopher Columbus’ Jewish Roots by Jane Francis Amler.

If you know of other books or resources that you would add to the list, please comment below with the title and author!  

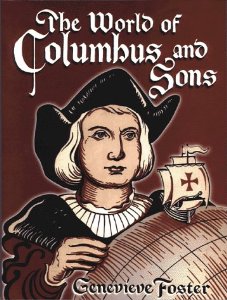
The World of ColumbusUPDATE 7/12:  I have since added a fabulous book that has not been added to our library list yet. The World of Columbus and Sons by Genevieve Foster. This author has written many books (I purchased several used in a lot on ebay). I stumbled upon these when reading somebody’s discussion of the Beautiful Feet History curriculum. These readers are a core part of BF History. We just love them. The summary of the book from Amazon reads:

This is the story of a wonderful, changing, reawakening world the world of the Renaissance and Reformation. Measured by the lifetime of Columbus and his sons, this book spans the years from 1451-1539. With Columbus as the central figure of this narrative, readers will also learn the fascinating stories of Prince Henry the Navigator, Ivan III of Russia, Gutenberg, Queen Isabella, Leonardo da Vinci, Mohammed II, the African ruler Nomi Mansa, Martin Luther, Erasmus, Albrecht Dürer, Copernicus, Michaelangelo and many others. Told in Foster’s engaging and winsome style enhanced by her helpful chronologies and timelines, readers will learn of the religious, cultural and scientific changes that ushered in a new frontier of exploration and discovery.

I have started calling books like this Historiction. Historical but within a fictional story. Think about all the great Henty Books that are exactly this same formula. My boys seem to love them so that is another book that is part of their 30 minute reading options.  

Until next time……

If you like this post, please share it!

  • Share on Facebook (Opens in new window) Facebook
  • Share on Pinterest (Opens in new window) Pinterest
  • Share on X (Opens in new window) X
  • Print (Opens in new window) Print
  • More
  • Email a link to a friend (Opens in new window) Email
  • Share on Reddit (Opens in new window) Reddit
  • Share on LinkedIn (Opens in new window) LinkedIn
  • Share on Tumblr (Opens in new window) Tumblr

Like this:

Like Loading…
« Previous Page
Next Page »
  • Pinterest
  • Facebook
  • Twitter
  • Google+
  • Sulia

Subscribe to our blog

Email

HHMTeamMember3-01

Winner-Top-Ten-BlogDesign10

Top Posts

  • But I Don't Want to be the Policeman!
    But I Don't Want to be the Policeman!
  • Hands-on Activity for Studying Globes and Maps
    Hands-on Activity for Studying Globes and Maps
  • Start a Home Economics Class in Your Homeschool
    Start a Home Economics Class in Your Homeschool
  • Brimwood Press Worldview Curriculum Review
    Brimwood Press Worldview Curriculum Review
  • nature journal post 2
    nature journal post 2

Affiliates / Sponsors

Give lynda.com

Shop Montessori Services

Newsletter Affiliate

We create and distribute our newsletter via MadMimi! It is SOOO easy to use! I highly recommend it!
Mad Mimi Email Marketing

Grab A Button

LiveAndLearnFarm.com Just select and copy the code below.
<a href="http://www.LiveAndLearnFarm.com" target="_blank"><img src="http://www.LiveAndLearnFarm.com/blog/wp-content/LiveLearnFarmButton.jpg" alt="LiveAndLearnFarm.com" width="125" height="125" /></a>

Copyright © 2026 · Modern Blogger Pro Theme By, Pretty Darn Cute Design

Loading Comments...

    %d