Live and Learn Farm

  • Home
    • About Us
    • Contact Us!
  • HomeSchool
    • All Inclusive
    • Apologia
    • Arts
    • Bible
    • Civics
    • Current Events
    • Curriculum
    • Elementary
    • Geography
    • History
    • Language Arts
    • Math
    • Middle School
    • Montessori
    • Other
    • Practical Life Skills
    • Science
    • Writing
  • Link Ups
    • Monday Middle & High School Link Up
  • Montessori
  • Teen Blogs
    • Gage – 13 Years Old
    • Chase – 14 Years Old
    • Blake – 10 Years Old
  • Shop
    • Cart
    • Checkout
    • My Account
  • Free!!!
  • Other Topics
    • Blogging
      • Facebook Series
    • Farmstead
      • Chickens
      • Cows
      • Permaculture Garden
    • Mom
You are here: Home / Archives for Zoology

Teenage Chicks’ Playpen

April 21, 2013 By: Gage6 Comments


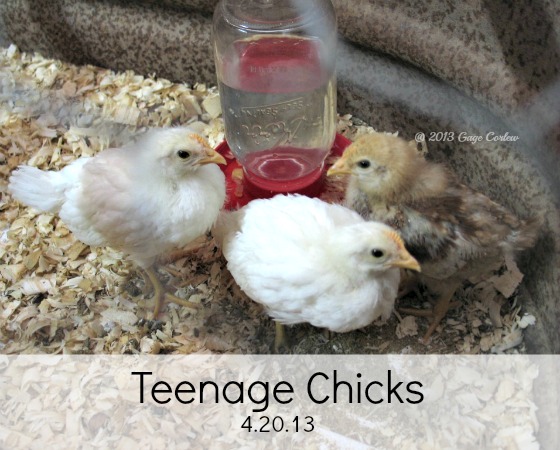
Teenage Leghorns and Red Sexlink

Good afternoon. As our surprise baby chicks grow from young balls of fluff to teenage chicks, they are getting more and more rambunctious.  One of the leghorns started wanting to roost so he/she would fly on top of the waterer.  They all love to try to fly, run, and play.  I decided they needed a perch, so my dad and I created them a small perch and they loved it!  

But that is not enough. They need to start getting ready for the outside world, the grass and hunting for bugs.  I saw a big one on Backyard Chickens, but we didn’t really want one that big.   So my Dad made them a small outdoor play pen.  It does not have a bottom so they can be in the grass and scratch around.  Their waterer and a bucket are in there (the bucket is for them to hide in if they want),  they are loving this too!  I scattered some of their chick starter on the ground in the play pen so they could start learning where to look for some of their food. I had to put them back in their brooder though because it started to rain. They all seemed shocked by the rain, this was their first rain they ever really experienced.  
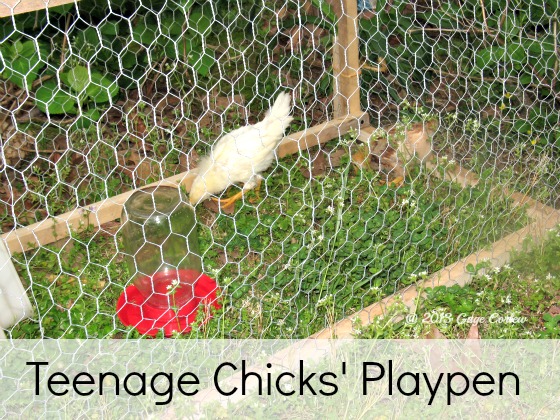
Chicks' Playpen


In a month, I will move the teenage chicks out with the Rhode Island Red chickens.  We will keep them in a separate pen and the coop is separated too.  I believe they will be shocked by them too.  We think one of the surprise chicks is a rooster because… early one morning dad was checking on all the chicks when he thought he heard a strange rooster call emanating from the teenage chick’s side of the garage. I can not tell which is a rooster yet but i will be able to soon. They don’t need a heat lamp any more unless it is a cold night. If one of them finds something interesting he/she picks it up and the other two will chase it until they either lose it or if it is food, eat it. They love to cuddle with each other when they are tired

They are very tricky sometimes.  For instance… As I got their waterer out to clean and refill, one of the leghorns hopped up on a support beam in the top of the brooder.  This is not the first time this has happened.  The last time I handled it wrong and the two leghorns got out!  Thankfully me and mom caught them before they ran off. After learning my lesson last time, this time I just slowly put the top to the brooder back on and he/she just hopped back down in the brooder. 

I’ll give you an update on the baby chicks this week too.  See ya’ soon!

———————————————————————————————————————————————–

If you like this post, please share it!

  • Share on Facebook (Opens in new window) Facebook
  • Share on Pinterest (Opens in new window) Pinterest
  • Share on X (Opens in new window) X
  • Print (Opens in new window) Print
  • More
  • Email a link to a friend (Opens in new window) Email
  • Share on Reddit (Opens in new window) Reddit
  • Share on LinkedIn (Opens in new window) LinkedIn
  • Share on Tumblr (Opens in new window) Tumblr

Like this:

Like Loading…

Parts of a Feather

April 17, 2013 By: Trish Corlew3 Comments

As most of you are aware, we are in chicken mode right now with Gage’s business (Deluxe Clucks) starting and the brooder webcam up and running (see right sidebar and click play to watch).  We have been contacted by some local homeschoolers to come out for field trips, so we are in the process of getting ready for them to start.  As part of the homeschool field trips, I’m creating various works to help teach them more about chickens.  This lesson is about parts of a feather and it is one of a series of posts on basic Chicken Anatomy. Be sure to visit the other posts too!  You can find them here:  Hands On Chicken Anatomy Lessons and Bird’s Nest study.  

Parts of a Feather Free 3 part cardsFeathers are pretty amazing!  They are extremely strong, yet lightweight.  There are actually five basic types of feathers:  

  • Contour
  • Down
  • Semiplumes
  • Filoplumes
  • Bristles

This would be a great time to go on a nature scavenger hunt to find some feathers.  Grab a magnifying glass or a microscope to study your feathers more closely!  If you do not have access to feathers or a microscope, here are some pictures and another set is here for you to be able to see them up close.  For the Parts of a Feather study, I drew a contour feather.  I will be creating a work about the various types of feathers. Here is a set of nomenclature cards I drew and made for parts of a feather.

Most feathers have a couple of feathers in common:  

  • Most feathers have a thick hard pole down the center of the feather.  This is called the Shaft.  It is made of Keratin (the same material our fingernails are made of).  Birds cannot feel the shaft, therefore it does not hurt the bird to clip their wings.  
  • The Quill is where the feather attaches to the Bird.  Quills were used to write with long ago.  It was dipped into ink and the ink would go up the shaft a little way.  
  • The soft part of the feather is called the vane.  If you can look at this part through a microscope or magnifying glass, you will see that it has tiny hairs called barbs.  Those hairs also have tiny hairs called barbules.  They function like a hook and latch… making the wing vanes act like a zipper.  
  • Some feathers are fuzzy, these are called Down Feathers.  This  is where the barbs do not have barbules so they cannot hook (or zip) together.  Down feathers do not have a shaft.  Every bird has down feathers under it’s contour feathers.  

All birds molt.  It is where the bird loses its old feathers and grows new ones.  Why do birds molt?  Simply, because their feathers get old and beat up.  Most birds molt gradually losing a few feathers at a time.  There are a few birds that lose their feathers all at once.  Doesn’t that sounds like a great research project to figure out which ones do this?!?  

If you don’t know where to begin to teach zoology to your students, we used Apologia’s Exploring Creation with Zoology, Flying Creatures Book. For more information about how I take traditional curriculum and make them more hands-on and Montessori-ish, look here under the Zoology and Botany tags.   

I’ll be covering more basic anatomy information about chickens (and birds in general, like this lesson), so stay tuned!  

Until next time… 

If you like this post, please share it!

  • Share on Facebook (Opens in new window) Facebook
  • Share on Pinterest (Opens in new window) Pinterest
  • Share on X (Opens in new window) X
  • Print (Opens in new window) Print
  • More
  • Email a link to a friend (Opens in new window) Email
  • Share on Reddit (Opens in new window) Reddit
  • Share on LinkedIn (Opens in new window) LinkedIn
  • Share on Tumblr (Opens in new window) Tumblr

Like this:

Like Loading…

Hands-on Chicken Anatomy Lessons

April 14, 2013 By: Trish Corlew17 Comments

As most of you know, we are in full out chicken mode right now with Gage’s business assets arriving (chicks) and with the webcam up and running (see link in the right hand column, click play), I thought this would be a perfect time to start an in-depth, hands-on study about chickens!  I will even attempt to answer the proverbial question, “which came first, the chicken or the egg?”.  Read to the bottom for that one 🙂  In the meantime, let’s get to some hands-on chicken anatomy lessons!

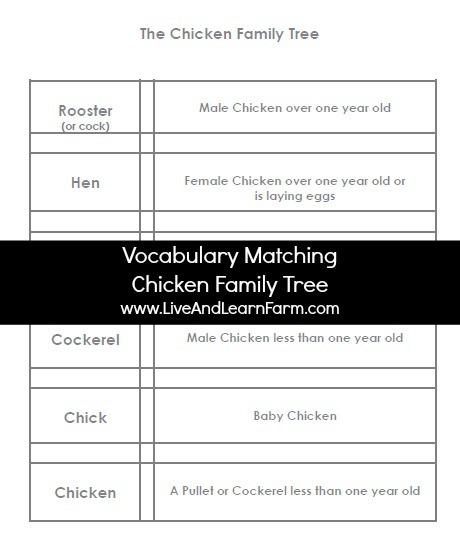
Vocabulary Matching Chicken Family Tree


The first thing that I teach about chickens is the vocabulary.  Most areas of study or professions have a certain vocabulary that is associated with that particular topic.  Chickens are no exception.  Some of the vocabulary will be very familiar, but some won’t be.  I try to use the correct vocabulary for all the works in a particular area, so this is the first document to present to your students.  I call it the Chicken Family Tree because so much of it surrounds the names of the chickens at different stages of their life.


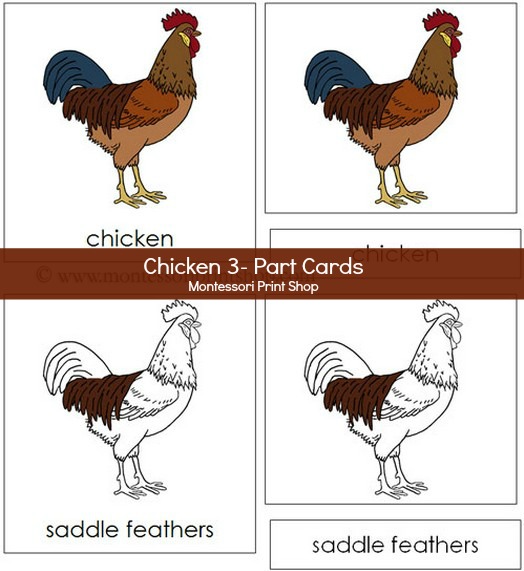
Chicken 3 Part Cards Montessori Print ShopThe next area I typically teach is the anatomy of a chicken.  Montessori Print Shop has a beautiful set you can purchase.  If you are not in a position to purchase them, here is another set of chicken anatomy that I found this is free.  Unfortunately, I don’t remember where I got these, if you know who to give credit to, please let me know!  

I know some people consider nomenclature (3 Part) cards to be just for young students, but I use them with my older boys all the time.  If you are a visual learner (I am and two of my boys are), we like to see it… so we continue to use nomenclature cards even though they are 9, 11, and 13  (and I’m 47) now.  It’s all about following the child to teach them the way they learn the best!  Anatomy is the same across breeds but not across gender.  So any set of chicken anatomy cards needs to distinguish if they are defining anatomy of a hen or a rooster.  Here is a great chart of the differences between hens and roosters.  


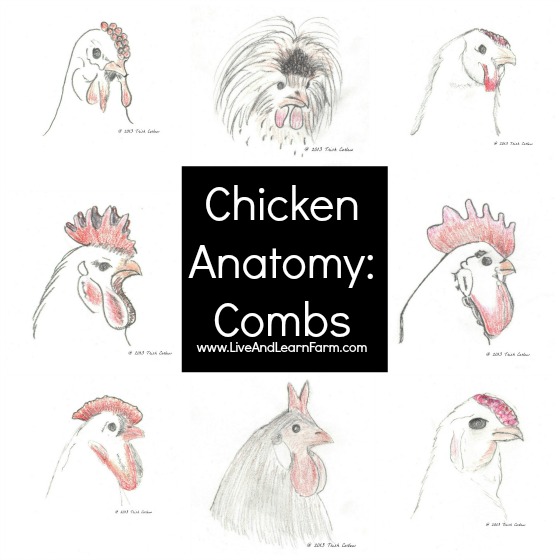
Chicken Anatomy Cones Free 3 part CardsDid you know chickens can’t sweat? Since they do not sweat, they lose a primary way to cool their body down.  Instead, chickens have combs and wattles to help them regulate their body temperature. But not all combs and wattles are created the same. I have created a Chicken Anatomy Combs work to show the reason for the differences and variations.  The comb variations are usually based on breed and gender.  The comb is not just a means to cool off, it is also used to attract a mate.  In addition, when a young female chicken (called a pullet) is ready to start laying eggs, her comb will turn from pink to red.  


Since we are now discussing various chicken breeds, there is a great chart here to help your children see all the variations in each breed.

Now, back to the question about the chicken and the egg and which came first… if you believe in the Bible, it answers this question for us.  

Gen 1:20 And God said, Let the waters bring forth abundantly the moving creature that hath life, and fowl that may fly above the earth in the open firmament of heaven.
Gen 1:21 And God created great whales, and every living creature that moveth, which the waters brought forth abundantly, after their kind, and every winged fowl after his kind: and God saw that it was good.
Gen 1:22 And God blessed them, saying, Be fruitful, and multiply, and fill the waters in the seas, and let fowl multiply in the earth.
Gen 1:23 And the evening and the morning were the fifth day.

Since I’m pretty sure there were not any eggs walking around, it would mean the chicken came first 🙂

I have so much more to cover regarding chickens, but this is a good place to stop for this study.  I’ll be posting much more on chickens since it appears we will be spending much of our time with our new chicks.  We recently received a request to host some homeschool field trip days, so we will be creating lots of works to teach our guests when these field trips start.  

Until next time….

If you like this post, please share it!

  • Share on Facebook (Opens in new window) Facebook
  • Share on Pinterest (Opens in new window) Pinterest
  • Share on X (Opens in new window) X
  • Print (Opens in new window) Print
  • More
  • Email a link to a friend (Opens in new window) Email
  • Share on Reddit (Opens in new window) Reddit
  • Share on LinkedIn (Opens in new window) LinkedIn
  • Share on Tumblr (Opens in new window) Tumblr

Like this:

Like Loading…

Spring has Sprung and the Snakes are Awake!

April 7, 2013 By: Trish Corlew2 Comments

Disclosure

If you know me, you know I HATE snakes!  I don’t mean I just don’t like snakes… I mean I hate snakes with a passion!  So spring to me means the snakes are awake!  They scare me to death!  When God said He was putting enmity between woman and the serpent, He was NOT kidding!  (Genesis 3:15)  

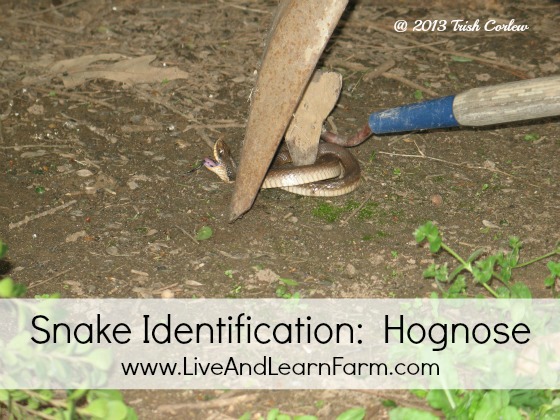
Today we spent the day helping Gage get his brooder box ready for the 30 chicks that are arriving this week.  When Gage and I were about to walk out of the garage, he calmly announced “SNAKE”.  There slithering off of our front walkway into the shrubs is THE snake.  I immediately froze.  My hubby, David, was there with us so he grabbed a shovel and a hoe.  When Hubby approached the snake, he could not immediately tell if it was poisonous or not because the snake was acting so aggressively.  Well, it turns out it was a two foot Hognose snake!  And, to make matters worse, David does not believe in killing the wretched things unless they are poisonous… but he will take it off, at least.  Even though I completely abhor snakes, there are some good lessons here to learn.  And yes, I took these pictures!  

Snake Identification HognoseHognose snakes are hard to tell apart from a Water Moccasin (Cotton Mouth) snake when they are little.  If you are like me, kill the darn thing and worry about if it is poisonous after the threat is gone … but that is not hubby’s mode of operation so we have to learn this stuff when he is around.  

The color of a Hognose snake varies widely, so using color as an identifier is not viable.  As always, we look at the face and eyes.  But this guy was so small, we couldn’t see his eyes.  We did, however, notice its snout was upturned. But that actually made it hard to determine if it had a triangular or round nose.


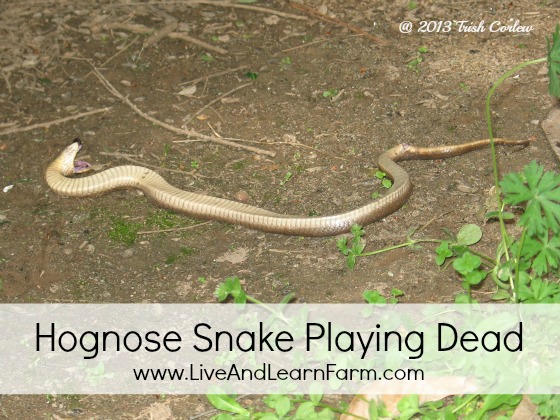
Hognose Snake Playing Dead When threatened, a hognose snake will flatten their neck and raise their head off the ground and hiss like a cobra … behaving quite aggressively.  This also makes it hard to determine if they have a triangular or round head.  Our little snake was doing a fabulous job at acting all aggressive, hissing, flaring, etc.  He almost lost his head cause he is such a good actor!  So, needless to say, putting our face down there to see its eyes was completely out of the question!  

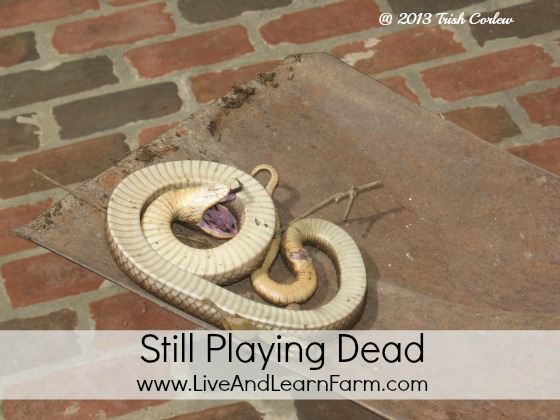
If flattening and flaring their neck and hissing  fails to thwart their attacker, the Hognose snake will literally roll over and play dead, with their tongue hanging out of their gaping open mouth. (Ugh!!!  Have I mentioned I hate snakes… ).  


Hognose Snake playing deadThe Hognose Snake will continue to play dead until the threat has disappeared.  I can assure you, no snake was harmed during this event (although this one is an excellent actor at faking it).  This snake WAS personally escorted off the property, by my hubby.  

Something every family that lives in an area where there are snakes needs is a great snake identification book!  Just in case the internet is down when you stumble upon one of these!  (Note we are a participant in the Amazon Services LLC Associates Program, an affiliate advertising program.  Any money received via this relationship is used for our homeschool!  PS. I’ve made a grand total of $0.00 from affiliate marketing… but the FTC says I have to tell you that IF you buy it, I will make 4% of the sale as commission.) 

Side note:  There is some controversy over if the Hognose snake is venomous or not.  Here is a Quote from Wikipedia:

The venomous nature of Hognose snakes is controversial, however it is generally agreed upon that they are not venomous. A bite from a hognose can result in swelling and numbness at the site of the bite, though this is likely the result of a simple allergic reaction. Similar symptoms can result from dog and cat bites, and even from human saliva. There does not seem to have been any scientific studies to determine the existence or characterize the nature of hognose “venom.”

The most reliable identifier of the Hognose Snake is the upturned nose.  It uses it to dig out toads, their primary diet.   These snakes are stout bodied and do not grow very long, adults are from 14 to 40 inches long.  They are diurnal (means they are active during the daytime), and burrow into loose soil.  Hognose snakes are not constrictors, they are rear-fanged.  Their venom enables them to overcome toads to allow the snake to swallow the toad.  Hognose snakes have mild dispositions and rarely bite.  Apparently this makes them attractive for those that like to keep snakes.  

I can assure you, this is one pet this household will NOT have (at least not while they are living here)!  

Until next time….. 

Note we are a participant in the Amazon Services LLC Associates Program, an affiliate advertising program designed to provide a means for sites to earn advertising fees by advertising and linking to amazon.com. 

If you like this post, please share it!

  • Share on Facebook (Opens in new window) Facebook
  • Share on Pinterest (Opens in new window) Pinterest
  • Share on X (Opens in new window) X
  • Print (Opens in new window) Print
  • More
  • Email a link to a friend (Opens in new window) Email
  • Share on Reddit (Opens in new window) Reddit
  • Share on LinkedIn (Opens in new window) LinkedIn
  • Share on Tumblr (Opens in new window) Tumblr

Like this:

Like Loading…

Pasty Butt WARNING!

April 5, 2013 By: Gage5 Comments

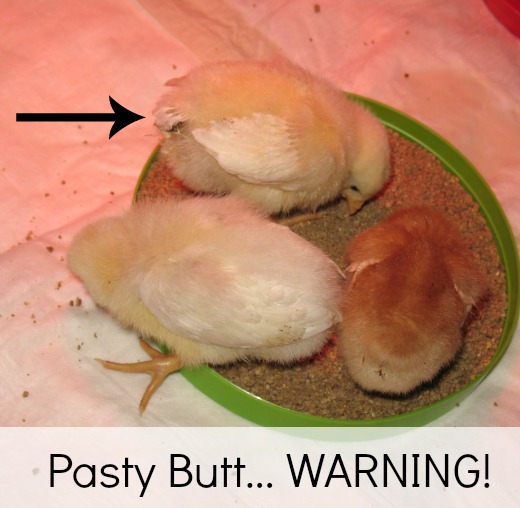
Pasty ButtGood afternoon!  I know, strange title… but this is important and could save your chick’s life one day.  So… what is pasty butt, you ask?

Pasty butt is a common thing that can happen to your chicks. When chicks are stressed, chilled or dehydrated, they can get this.  It can be fatal, if not treated.  Its just poop that has hardened on a chick’s bottom but it can block their vent.  This is critical that the vent area gets cleaned thoroughly because the vent is the place where they poop, urinate and lay eggs.  If it is blocked, the chick can’t poop or pee leading to death.  

This is what happened and how we dealt with it.  As we were looking at our chicks the other day we discovered that one of our leghorn chicks had pasty butt.  The first thing I tried to do was just wipe the poop off, but it was really dried and stuck. So I went and got a small plastic tub and filled it with warm water. Then I picked up the little leghorn chick and she got a bottom soak, which she seemed to enjoy for a little while.  After her soak I tried to wipe her bottom again, but it was still stuck. So I soaked her bottom some more and finally I got it off.  Today I checked her bottom, but which bottom is her’s? Her bottom was so clean I could not tell the two leghorns apart!! I have decided to name her Tweety because of her sweet little tweets while I soaked her.  I did finally determine which chick was which…. because Tweety has a bigger head than April.  So I figured out which leghorn was which!  

This morning my mom was talking with a Google+ friend who has a business helping people start farms and raise healthy animals.  Ms. Vicky Hinschlager owns Small Farm Solutions and she confirmed that we did the right thing to help Tweety.  I’m thankful Ms. Vicky is there to help us!  

I will continue to check on Tweety’s situation and to be sure her sickness is gone.  In the meantime, we read on BackYard Chickens about some natural remedies and found that yogurt is helpful. Yogurt has probiotics that give the chicks more friendly bacteria in their intestines to help fight off sicknesses better.  We also have dairy cows on our farm, so mom and I made yogurt this morning.  We pulled out our new Yogotherm and used it for the first time!  We are waiting for it to be ready to mix with their chick starter for dinner tonight!  I’m sure I’ll post about what the chicks thought of the yogurt later (with pictures)!  

Making Yogurt

See ya’ soon! 


If you like this post, please share it!

  • Share on Facebook (Opens in new window) Facebook
  • Share on Pinterest (Opens in new window) Pinterest
  • Share on X (Opens in new window) X
  • Print (Opens in new window) Print
  • More
  • Email a link to a friend (Opens in new window) Email
  • Share on Reddit (Opens in new window) Reddit
  • Share on LinkedIn (Opens in new window) LinkedIn
  • Share on Tumblr (Opens in new window) Tumblr

Like this:

Like Loading…

Homeschooling on the Beach Part 1

March 27, 2013 By: Live & Learn Farm6 Comments

Homeschooling on the Beach Part 1

Disclosure

Are you in the process of planning your beach vacation?  If you are, be sure to not leave your homeschool at home.  Studying with the ocean as your backdrop can bring in almost any subject you can imagine.  And, if you don’t live in an area where saltwater creatures are geographically close, you don’t want to miss this opportunity to teach it while you are on location!  Since we homeschool, we are not limited to vacations when our children are “out of school”.  We get to be creative about the “out of school” and vacation timing which allows us to make the most of the discounts available for the off seasons.  So you might consider a longer stay to get even more homeschooling in!  We spent a month on the coast of North Carolina in August and we learned so much about zoology and saltwater life that we could only learn there at the beach!  We did get run off the beach due to two hurricanes, but the absolute best homeschooling occurred right after the storms.  The storms brought in fabulous sealife, amazing shells and treasures from the depths!  So don’t be afraid to go in the late summer months!  Because there are just so many great opportunities and activities to teach at the beach, I have decided to break this topic into several posts .  So, part one will be about some lessons you might want to teach leading up to your beach vacation.  

If you have been following our blog, you already know that we take traditional curriculum and make them more hands-on and tactile learning materials.  With Apologia Swimming Creatures it is already a hands-on learning text, but we have added even more experiments and activities to help make your beach vacation a great experience homeschooling on the beach!  (Note we are a participant in the Amazon Services LLC Associates Program, an affiliate advertising program.  Any money received via this relationship is used for our homeschool!  PS. I’ve made a grand total of $0.00 from affiliate marketing… but the FTC says I have to tell you that IF you buy it, I will make 4% of the sale as commission.)

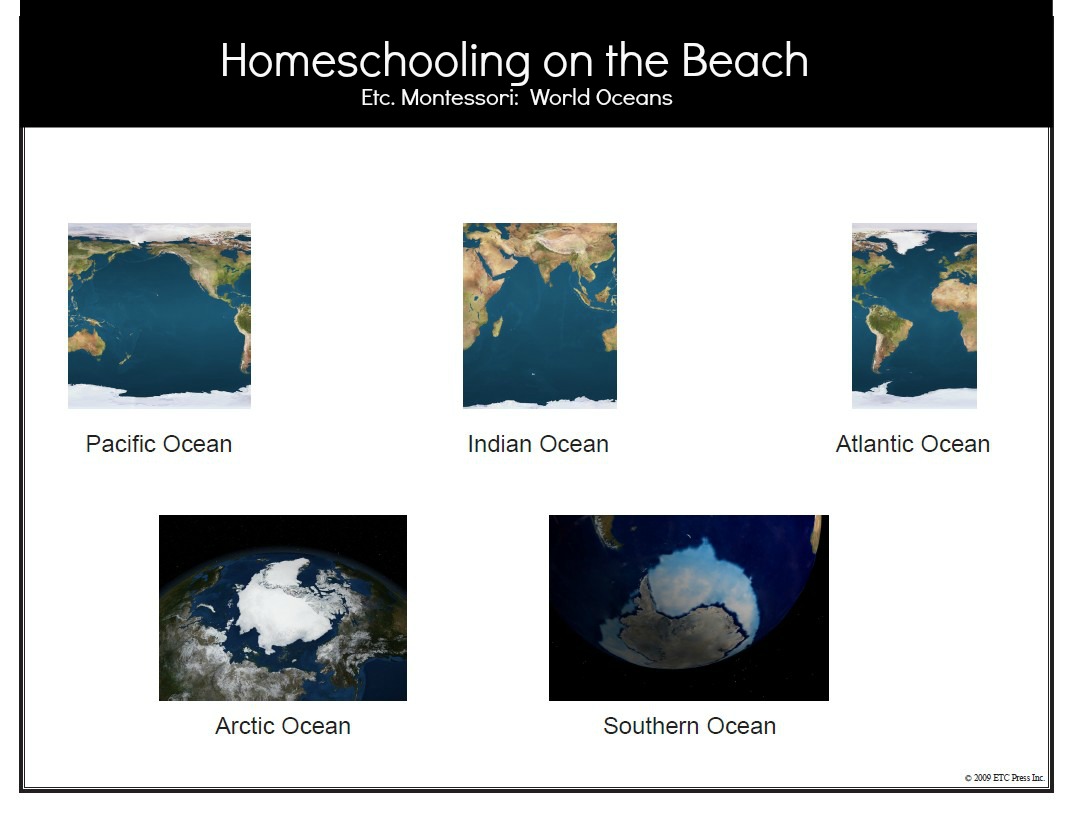
Geography is one of those subjects that I like to teach before we leave.  I will assume you are heading to an ocean, if you are reading this article, so the first thing we want to cover is the oceans of the world!  


World Oceans Etc. Montessori


Etc. Montessori has a beautiful free set of hands-on materials to cover World Oceans.  Click here to download them from their site.  


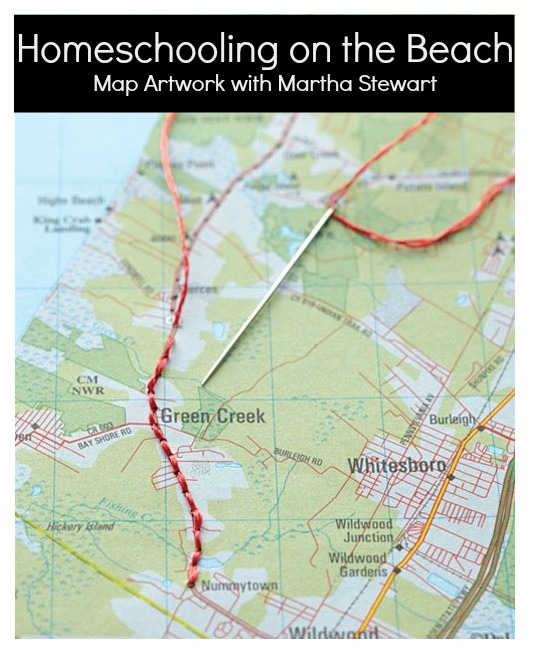
Mapping Vacation with Martha Stewart


Another great way to teach geography is to map out the trip.  This is another project you can do before you leave.  I love building up the anticipation of going on vacation.  Believe it or not, Martha Stewart really adds a bit of an artistic flair to this one.  I LOVE this idea and will be doing this myself!  


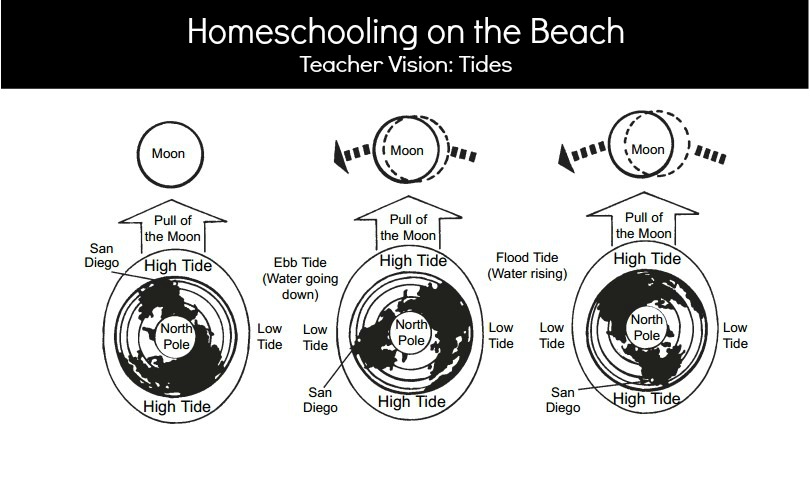
Tides Teacher Vision

Another subject to teach before you go to the beach is about tides.  What causes the tides?  Here is a great print out from TeacherVision (if you are not using the Apologia Swimming Creatures textbook).  There is a great experiment on ehow to demonstrate how the gravitational pull creates the tides by using a magnet and metal shavings.  However, I can’t find a single picture of the experiment online.  So, I guess we’ll do it and post the pictures 🙂  When I do, I’ll add the link here.  


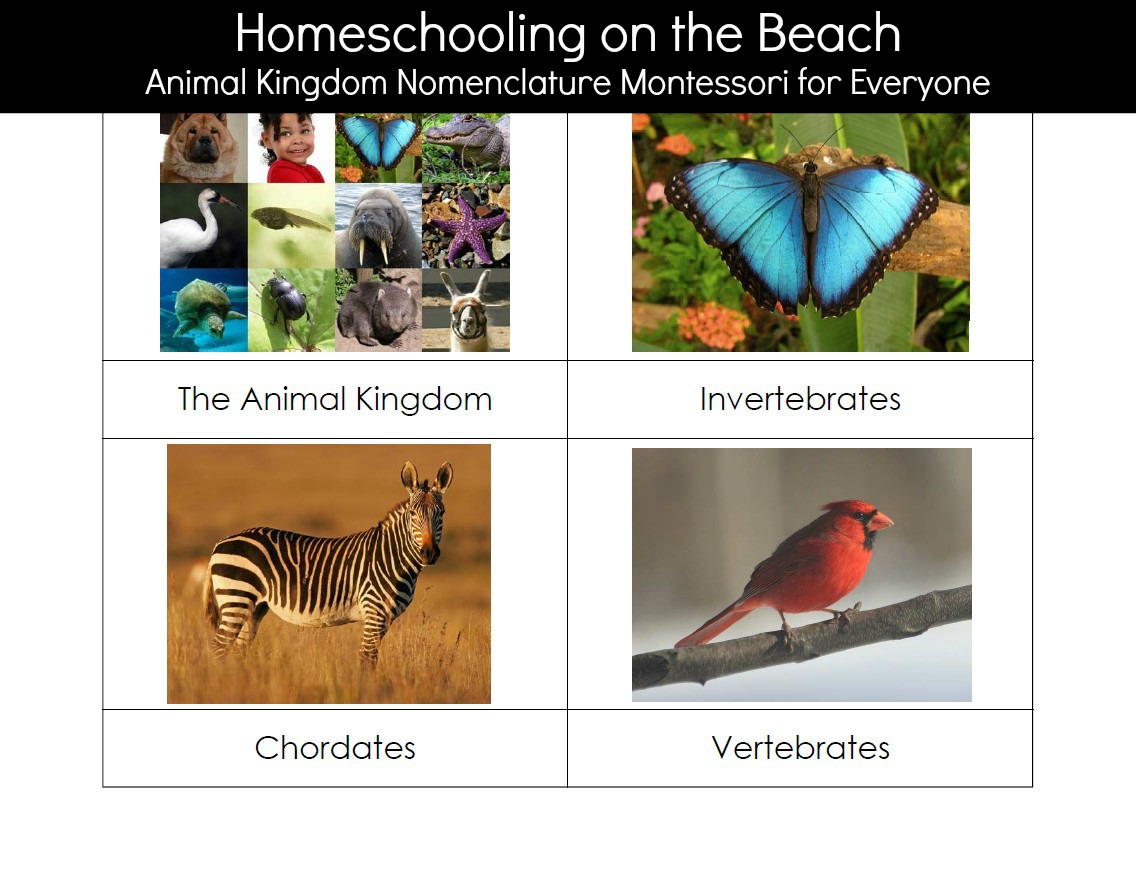
Animal Kingdom Nomenclature Montessori for Everyone

If you have not started studying Zoology yet, this would be a great time to introduce  animal classification, since so many ocean creatures are invertebrates (do not have backbones).  Montessori Materials has some free classification works here.  Matri Learning has a chart here.  The Helpful Garden has over 20 free sets of Zoology Materials to download including classification and sorting cards.  The Homeschool Den created some invertebrate cards and lots of other ocean activities! If you are in a position to purchase a beautiful set, Montessori for Everyone has wonderful nomenclature cards that are quite affordable.  


Here is a short “homeschooling on the beach” packing list.  If I have left anything off, please leave me a comment so I can add it! 

  • Nature Notebook to sketch / draw and journal in
  • Sketch Pencils
  • Magnifying Lens  
  • Binoculars
  • Camera (like we would go on vacation without one … )
  • Plastic Bags, Totes, Buckets, Bottles to take home some beach samples (sand, saltwater, shells, etc.)
  • Ocean Field Guide (can be borrowed from the library) 
  • Plain paper or a notebook and pencil
  • Ruler

Part two will be the various studies to do once you are at the beach!  I will add a link here once it is posted.    


Until next time… 


If you like this post, please share it!

  • Share on Facebook (Opens in new window) Facebook
  • Share on Pinterest (Opens in new window) Pinterest
  • Share on X (Opens in new window) X
  • Print (Opens in new window) Print
  • More
  • Email a link to a friend (Opens in new window) Email
  • Share on Reddit (Opens in new window) Reddit
  • Share on LinkedIn (Opens in new window) LinkedIn
  • Share on Tumblr (Opens in new window) Tumblr

Like this:

Like Loading…

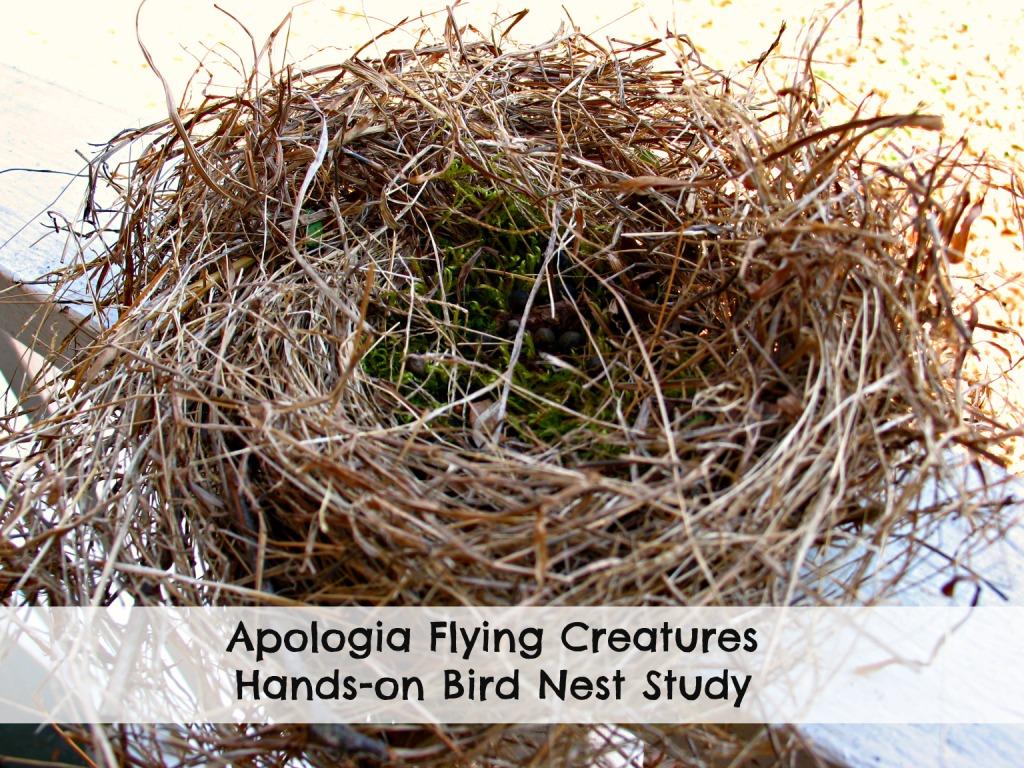
Apologia Flying Creatures Bird Nest Study

March 22, 2013 By: Trish Corlew2 Comments

Bird Nest Study

Apologia Flying Creatures – Bird Nest Study

This is another example of taking a traditional homeschool curriculum and supplementing with hands-on tactile materials to make it feel more Montessori. In Lesson 5 of Apologia’s Flying Creatures we studied Bird Nests.  Did you know birds only sleep in nests when they are incubating eggs and when their babies are young.  So, their nests are not their homes.  For most birds in North America, the nesting season starts in March and ends by the end of August.  Birds instinctively know, when the days are getting warmer and longer, that it is time to construct nests.   (Note we are a participant in the Amazon Services LLC Associates Program, an affiliate advertising program.  Any money received via this relationship is used for our homeschool!  PS. I’ve made a grand total of $0.00 from affiliate marketing… but the FTC says I have to tell you that IF you buy it, I will make 4% of the sale as commission.)

Nests are made with a variety of materials from the typical straw, hay, and leaves to yarn, string, and dryer lint.  Most birds like to fill the nest where the eggs and babies will be with soft materials.  Hummingbirds will even pull lichen off trees to soften their nests.  Nests are built by the female bird typically, with some assistance from the male.  

For our homeschool, I made Zoology Lesson 5 Nesting 3 part nomenclature cards that include all the different types of nests covered:

  • Bower Nests
  • Weaver Nests
  • No Nests
  • Ground Nests
  • Mound Nests
  • Earth-Hole Nests
  • Cavity Nests
  • Platform Nests
  • Cup Nests
  • Adherent Nests

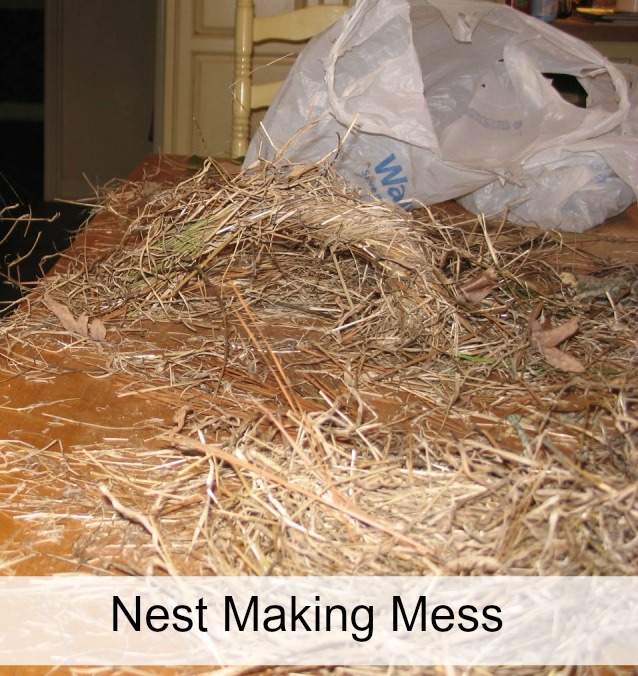
The “Try This” for Lesson 5 is making nests.  I can tell you from experience, they are MUCH harder to make than you might think and certainly can make a huge mess!  

Materials You Might Use to Try to Build Various Nests:

  • Grass
  • Twigs
  • Leaves
  • Straw
  • Mud
  • String
  • Cotton
  • Dryer Lint
  • Fishing Line

Directions:  

Now take the materials and try to build the various nests in the nomenclature cards.  Some are easier than others.  Here are some of our finished nests:


A Bower Nest:

Bower Nest edited


A Cup Nest (and a platform in the background):  


Cup and Platform Nests edited


And the mess we made 🙂


Nesting Pictures


Let me know if you do make any nests and use the nomenclature cards. Leave a comment below with a link to your blog so we can see!  

Until Next Time…..

If you like this post, please share it!

  • Share on Facebook (Opens in new window) Facebook
  • Share on Pinterest (Opens in new window) Pinterest
  • Share on X (Opens in new window) X
  • Print (Opens in new window) Print
  • More
  • Email a link to a friend (Opens in new window) Email
  • Share on Reddit (Opens in new window) Reddit
  • Share on LinkedIn (Opens in new window) LinkedIn
  • Share on Tumblr (Opens in new window) Tumblr

Like this:

Like Loading…

We’ve Got Good News and Bad News

March 18, 2013 By: Trish Corlew3 Comments

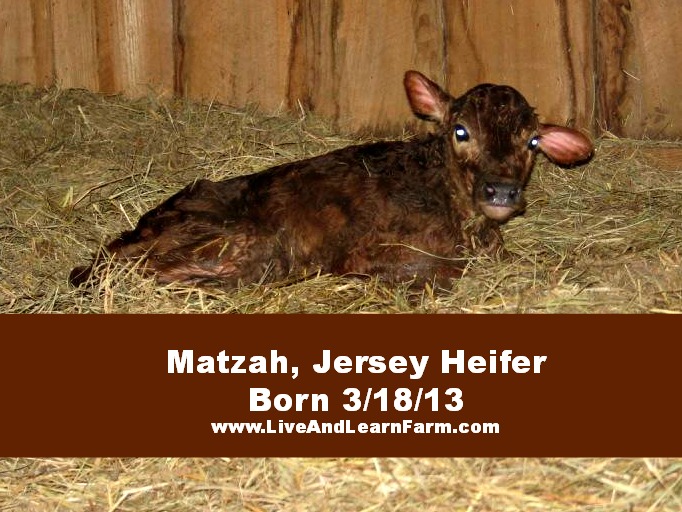
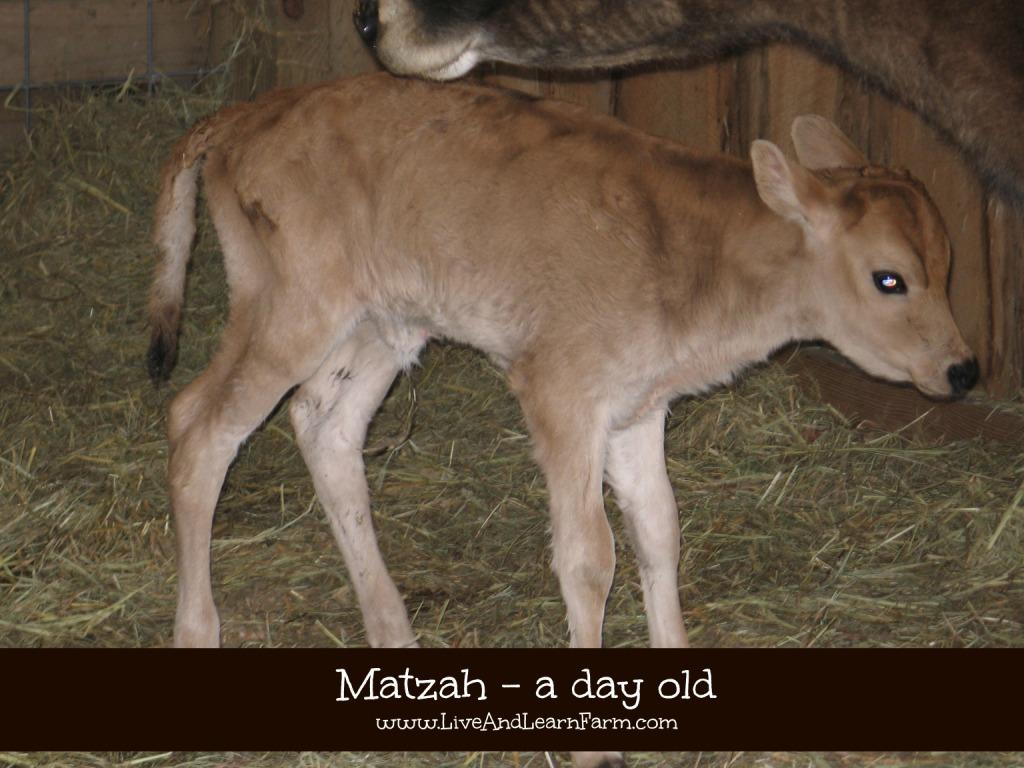
We’ve got good news and bad news.  First, the good news!  We have a small farm where we raise registered Jersey cows.  We had another first today… One of our Jersey cows, Buttercup, had her first calf.  This calf is also the first “second generation” calf born on our farm.  Girls are prized in the Jersey Dairy world… so we are very excited that Buttercup’s calf is a heifer (girl), we think.  My boys named her Matzah because the Feasts of Pesach and First Fruits are coming up and we eat Matzah bread for the feasts.  When we discussed the irony of her being two first born’s (Buttercup’s and the farm’s first second generation calf) they decided the name should focus on something that pertained to First Fruits.  I love the fact that our boys know about, understand and get excited about keeping the Biblical feasts!  What a blessing!  So, without further adieu, meet Matzah:

new calf, we named her Matzah

Jersey Calf: Matzah

Isn’t she just adorable?  And she looks like she might be a red heifer 🙂  Look that one up in scripture!    ‘Course it could be that she is still wet … tomorrow, I’ll head down there to see if she is still this red!  


On a more somber note, we lost Cooter Brown yesterday. The first day we saw the rooster, we could not catch him or lure him into the pen.  The second day we managed to catch him and put him in the pen with Rocky and the ladies (hens).  That didn’t go well, so we moved him to the other pen.  We put fresh water and lots of crumble and scratch in there to keep him happy and full.  The next morning, we discovered that Cooter Brown had “flown the coop”.  We decided to just open up the pen and let him come and go as he pleased with food and water in the pen for him.  It was that or just not try to keep him!  We saw him first thing yesterday morning, in the pen. Unfortunately, he chose to wander… and something got him in our field yesterday afternoon.

Ironically, another biblical principal was taught with this unfortunate incident. When we willfully choose to walk outside of Abba’s protection, we are vulnerable.  Our boys saw a vivid reminder of this.  They knew full well the extent of the actions we took to try to keep and protect Cooter Brown. But ultimately, it was his choice that led to his demise and it is the same for us.

We have witnessed the full life-cycle occur in the span of 24 hours here on our farm.  All teachable moments…  Teaching children about death is never easy!  But, in nature and on a farm, children experience both death and life, decay and renewal.  And not only do they learn these are a part of the life-cycle, they see the examples.  I know many parents are uncomfortable talking about death, but I think we do children a huge disservice if we do not help them work through death and loss.  Isn’t that our job, to help them learn these difficult concepts in a loving and supportive environment.  Our job is not to shield them from reality!  Here, on the farm, ignoring the topic is not an option…  

So… Today was going to be catch up day.  My middle son is trying to get caught up on some of his recent science experiments that he is behind on … instead of working on experiments, today, he got to experience science (biology) live and in-person.  Live and Learn Farm… yep, the name fits!


UPDATE:  

Matzah is no longer red!!!

Updated... Matzah 1 day old

Updated… Matzah 1 day old


If you like this post, please share it!

  • Share on Facebook (Opens in new window) Facebook
  • Share on Pinterest (Opens in new window) Pinterest
  • Share on X (Opens in new window) X
  • Print (Opens in new window) Print
  • More
  • Email a link to a friend (Opens in new window) Email
  • Share on Reddit (Opens in new window) Reddit
  • Share on LinkedIn (Opens in new window) LinkedIn
  • Share on Tumblr (Opens in new window) Tumblr

Like this:

Like Loading…

Pickin’ Chickens!!!

February 28, 2013 By: Trish Corlew6 Comments

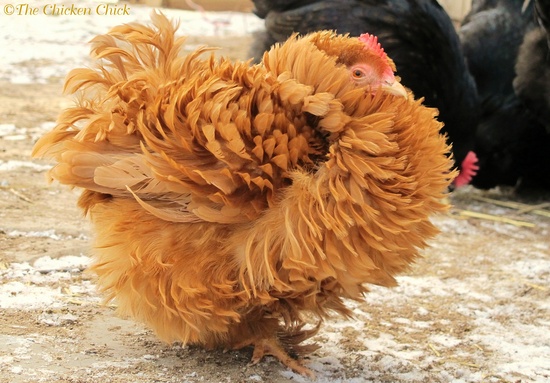
Today we decided to get our “chickens in a row” and pick the chickens we want to add to our flock of Rhode Island Reds. We fell in love with Rachel, the red frizzled cochin from Kathy, The Chicken Chick!  So we knew one of the breeds we were adding would be frizzled bantam cochin!  (Note this is a long article, so I have chosen to use the “read more” tab below in order to shorten the articles on the home page… so if you are interested, please be sure to click the “read more” button right below the share buttons for the various social media sites).  See what a lovely lady little Rachel is:  


Rachel

Our current coop / pen combinations severely restrict our options for adding chickens.  The way the coop and pens are laid out now, we can only prevent two breeds from mingling.  Therefore, we decided to go with all bantam / cochins.  We ordered them from a new hatchery we found Welp, Inc.  They have been in business since 1929, so they are certainly not a “new business” just new to us!  We will provide a review of this hatchery once we receive the chicks (they will not ship out until 4/9).  Below are pictures of the chickens we ended up pickin’ today:

[Read more…]

If you like this post, please share it!

  • Share on Facebook (Opens in new window) Facebook
  • Share on Pinterest (Opens in new window) Pinterest
  • Share on X (Opens in new window) X
  • Print (Opens in new window) Print
  • More
  • Email a link to a friend (Opens in new window) Email
  • Share on Reddit (Opens in new window) Reddit
  • Share on LinkedIn (Opens in new window) LinkedIn
  • Share on Tumblr (Opens in new window) Tumblr

Like this:

Like Loading…

It’s For The Birds!

February 14, 2013 By: Trish Corlewcomment

It’s time to count birds in our backyards again!! We had so much fun doing this count while studying Apologia Exploring Creation Zoology 1 Flying Creatures, I figure we will make this an annual event. The birdcount starts Friday, February 15th! So you only have a little while left to get organized and everything printed! This year we are adding a few things to help with our bird identification.

2013gbbc

http://www.birdsource.org/gbbc

If you live in TN here is a link to the most common birds you will probably see in your backyard. She has created cards to print and study. So Montessori!  http://jimmiescollage.com/2011/02/more-bird-resources-for-backyard-bird-count/

We will also be using the Bird Observation sheet from The Notebooking Fairy. I LOVE these notebooking pages and have used various ones from this site. Check out all the free ones!  http://notebookingfairy.com/2011/11/bird-observation-notebooking-page/

We have been meaning to do this and just have not gotten around to creating nature journals yet. I am hoping we will make these this summer! But for those that have progressed to that point, here is a great bird feeder journal page:  http://www.arps.org/users/ms/pricen/Science7/biology/Ecology/nfj/birdfder.pdf

We are going to make some homemade bird seed ornaments and suet to hang out. You can find recipes for both here:   http://handsonaswegrow.com/homemade-heart-bird-feeder/# and http://www.artistic-garden.com/easy-homemade-bird-suet-recipe/

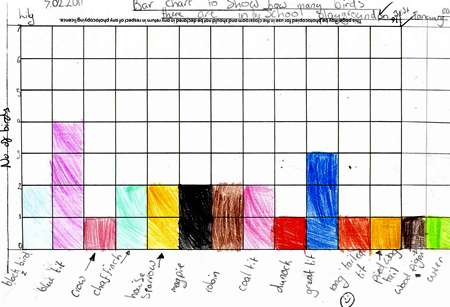
After you complete the bird count, create a graph or a pie chart with your children to show visually which birds are the most common and which are least common. Here is one I found online that is very simple, but easy to understand.

Bird Bar Chart


I hope you will get involved in the great backyard bird count! It is a fun and easy way to encourage our children to slow down, look around and for us to demonstrate making the time to study nature and our Father’s creation! Remember, our children do what we do, not what we say!!

Until Next Time….

If you like this post, please share it!

  • Share on Facebook (Opens in new window) Facebook
  • Share on Pinterest (Opens in new window) Pinterest
  • Share on X (Opens in new window) X
  • Print (Opens in new window) Print
  • More
  • Email a link to a friend (Opens in new window) Email
  • Share on Reddit (Opens in new window) Reddit
  • Share on LinkedIn (Opens in new window) LinkedIn
  • Share on Tumblr (Opens in new window) Tumblr

Like this:

Like Loading…
« Previous Page
Next Page »
  • Pinterest
  • Facebook
  • Twitter
  • Google+
  • Sulia

Subscribe to our blog

Email

HHMTeamMember3-01

Winner-Top-Ten-BlogDesign10

Top Posts

  • But I Don't Want to be the Policeman!
    But I Don't Want to be the Policeman!
  • Hands-on Activity for Studying Globes and Maps
    Hands-on Activity for Studying Globes and Maps
  • Start a Home Economics Class in Your Homeschool
    Start a Home Economics Class in Your Homeschool
  • Brimwood Press Worldview Curriculum Review
    Brimwood Press Worldview Curriculum Review
  • nature journal post 2
    nature journal post 2

Affiliates / Sponsors

Give lynda.com

Shop Montessori Services

Newsletter Affiliate

We create and distribute our newsletter via MadMimi! It is SOOO easy to use! I highly recommend it!
Mad Mimi Email Marketing

Grab A Button

LiveAndLearnFarm.com Just select and copy the code below.
<a href="http://www.LiveAndLearnFarm.com" target="_blank"><img src="http://www.LiveAndLearnFarm.com/blog/wp-content/LiveLearnFarmButton.jpg" alt="LiveAndLearnFarm.com" width="125" height="125" /></a>

Copyright © 2026 · Modern Blogger Pro Theme By, Pretty Darn Cute Design

Loading Comments...

    %d