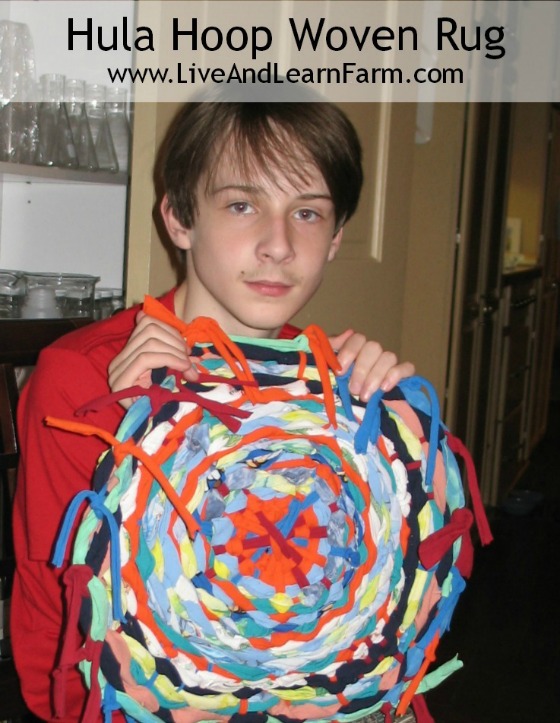

As we discussed in our Paths of Exploration Columbus Unit Lesson 1, Part 2 post, we are discussing Bazaars and the items that you can find for sale in these open-air markets. We have already mentioned spices being one of the items the explorers liked to bring back. Another item the POE curriculum discusses is woven goods. They suggest the students design rugs on graph paper, which is fun and the boys are doing … but you know how we like to homeschool…. hands-on as much as possible! Therefore, we decided to create some of our own woven products! For this project, we got our inspiration from Disney Family Fun, where they created Hula Hoop Woven Rugs.
My boys have always enjoyed weaving and knitting (I guess from their Montessori school days), so we decided to try this one! I hope you enjoy reading about our project, but I hope you try it too! Put a link to your post in our comments if you do one!! I went back and looked at the Disney link after finishing our rugs. I just realized they only showed pictures of the rug being woven and before it was cut off the hula hoop. None of the finished product? I think I know why! I’ll explain later.
I guess it is a good thing that I had not gotten around to selling or donating the pile of old T-shirts and pajama tops, because that is exactly what we used to create these fabulous woven pieces of art! We actually even had the hula hoops too, so this project didn’t cost much to do!
The oversized (hula hoop) looms and loops of T-shirt material make these rugs very easy to do for beginning weavers. It is a great way for them to learn the basic hoop weaving technique by creating a colorful rug to either hang or use as a rug. There are a few terms you need to know for this project: the warp is the material you string on the hula hoops, the weft is the material you weave.
The Materials List:
- Sharp Scissors
- A Ruler
- About a dozen colorful T-shirts (we used mens xl large for the warp material and old t-shirts the boys had outgrown for the weft material)
- 30-inch hula hoop
The Directions:
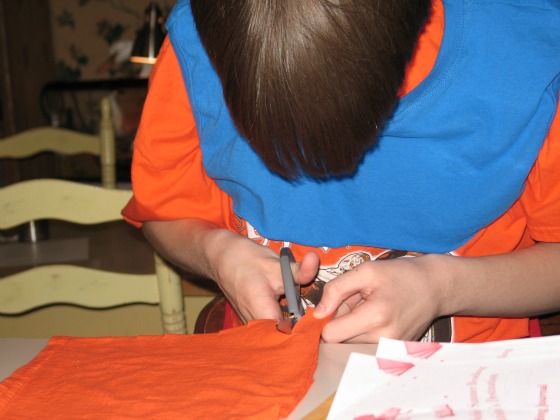
1. For the warp, cut 1-inch-wide loops from the bodies of several tees (we found a men’s xl worked best on our 30-inch hoop), we did not use the hem and stopped right under the arms. You’ll need 11 loops per hula hoop rug. For the weft, cut at least 50 loops from the remaining shirts (we used more on some rugs and less on others).
2. Stretch one warp loop over the hula hoop. You don’t want it loose, nor do you want it tight. It should fit snugly but not be too taunt.
3. Add a second loop, perpendicular to the first (Think of a + sign)
4. Repeat, filling in the spaces in between, until all 11 loops are in place. (And if you are like me, you want to know if it needs to be 11, Yes it needs to be 11 loops, or another odd number)
5. Push together two warp loops at the top of the hula hoop (just the two at one end, not both ends). This creates an odd number of warp spokes in your wheel, which allows the over/under pattern of the weft to alternate with each new row.
6. Secure the first weft loop to the center of one of the warp spokes (we used the doubled spoke from step 5) by wrapping it around the warp and then looping it back through itself.
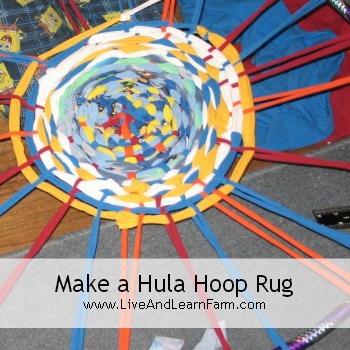
7. Begin weaving the weft over and under the warp spokes, forming a tight spiral. Not too tight though.You are treating both parts of each warp spoke as a single unit, weaving over or under the two together. As you work, push the weft material toward the center of the hoop and keep it just snug. If you pull the weft too tight, the rug will develop lumps or bends. When you reach the end of the piece of weft, add a new loop by threading it through the end of the first and back through itself.
8. When your rug is about 8 inches across, begin treating each warp spoke as two individual strips instead of a single unit, weaving over or under each strand instead of going over or under the doubled spoke. This increases the number of warp spokes, improving the structure of the project. When you get to the two warp spokes that you pushed together at the top of the loom, separate them. Treat one of the spokes as two individual strips, but continue to treat the other as a single spoke. This maintains the odd number of warp spokes. We did this step, but I think we will try another rug without this step and just see how it turns out.
9. When the rug is the size you want, but no closer than 5 inches from the edge of the hula hoop, snip open your weft loop.
Tie the ends around a warp spoke, and tuck the ends into the rug.
10. Cut the warp spokes off the hoop one at a time.
11. Tie the ends in pairs, then trim them to make a fringe or tuck them back into the rug.
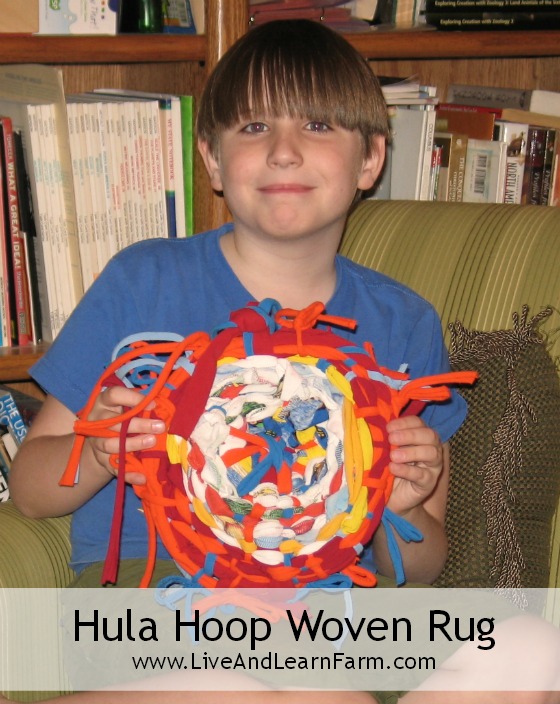
Blake lost interest in making his rug about half-way through, so his rug is the smallest. But he did a great job and he enjoyed it! We had a smaller hula hoop that we should have used for him. Next time! He is hanging his on his wall.
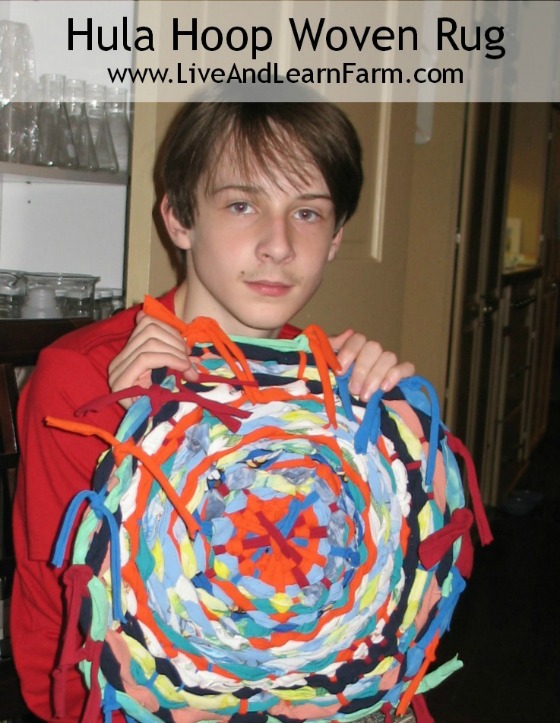
Chase ended up with the biggest rug. He was the one that was sure the whole way through weaving that he was doing something (or everything) wrong. He loves his and his turned out just great! He wants to make another one now that we half-way know what we are doing! I agree!

That’s my Gage. He can have a good time no matter what is happening around him. His rug was very tight in the center (maybe too tight), but once we started dividing the warps and weaving the two pieces individually, it seemed to change the way the rug would lay. So, this is why we will skip step 8 next time to just see what happens. Gage is so creative, while weaving his, he would make the hula hoop go back and forth and said the rug was a speaker vibrating. He decided his was a better rag hat than a rug… But Gage loved his too, had a great time weaving and always has such a great attitude! He wants to weave another one too!
Like I said earlier in the post, when I looked at all the other posts online where people were doing these rugs, I could not find one that showed the rug after it was cut off the hula hoop. I think that is ridiculous. Even if it didn’t turn out like you hoped, still show the end result! Why do so many people want us to believe their lives are perfect and everything they touch turns out exactly as planned? I think way too many people focus on perfection and completely miss the sheer enjoyment of the process and just doing it! Mistakes are windows to discovery! Journeys are where we find life! When we leave for vacation, it starts when we leave our driveway, NOT when we arrive at the beach (or wherever we are going for vacation)… We purposefully choose to live our lives enjoying the journey… and it is a choice!
So there you have it! We had fun and will make another rug soon (maybe even this weekend)! If you make one, please share a link to your post in the comment section.
This post is linked at Think Pink Sunday at Flamingo.
Until next time….




Trish Corlew
Latest posts by Trish Corlew (see all)
- 10 Fun and Educational Preschool Board Games - April 25, 2015
- March Menu Plan for Busy Homeschool Moms - March 10, 2015
- Middle and High School August LinkUp #24 - August 5, 2014
- Modeling Life-Long Learning - June 23, 2014
- The New Chapter – Day 1 with Free Printable - June 20, 2014
Thank you for linking up to the History and Geography Meme so that I could find this wonderful blog. I am so enjoying reading all the posts.
Hey Phyllis! I am excited to find your blog http://homeschooljournal-bergblog.blogspot.com/. Ticia over at Momydom suggested I post it on your bloghop. I enjoyed reading what you have posted! You are absolutely going to be an inspiration for many of our hands-on activities!! Thanks for visiting us!!
what fun! Looks so bright and beautifully colored!
Thanks Sara! The boys had so much fun making them!
Hi, I love your boys’ rugs!!! I’ve been looking for a post with the end product as well and yours came up. My 5 year old will enjoy this!!